
WARGAMES DESIGNS BLOG
|
|
THE BLOG FOR ALL THE OTHER WARGAMES STUFF THAT I DO
|
|
|
|
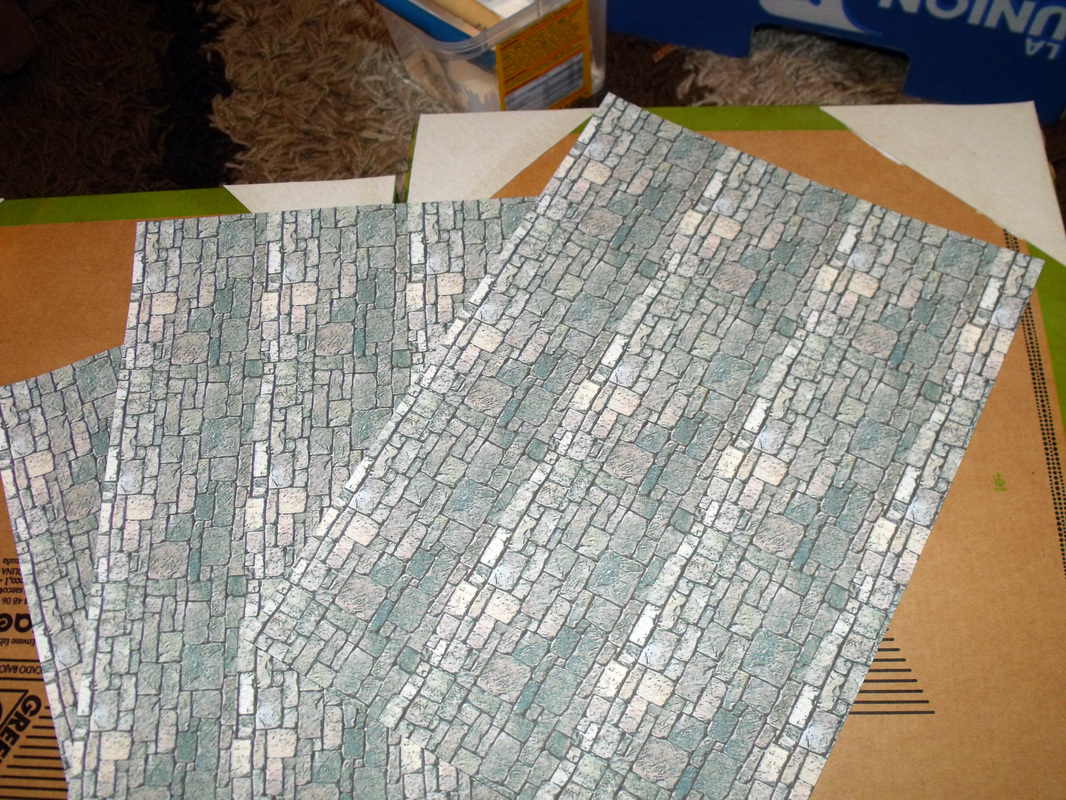
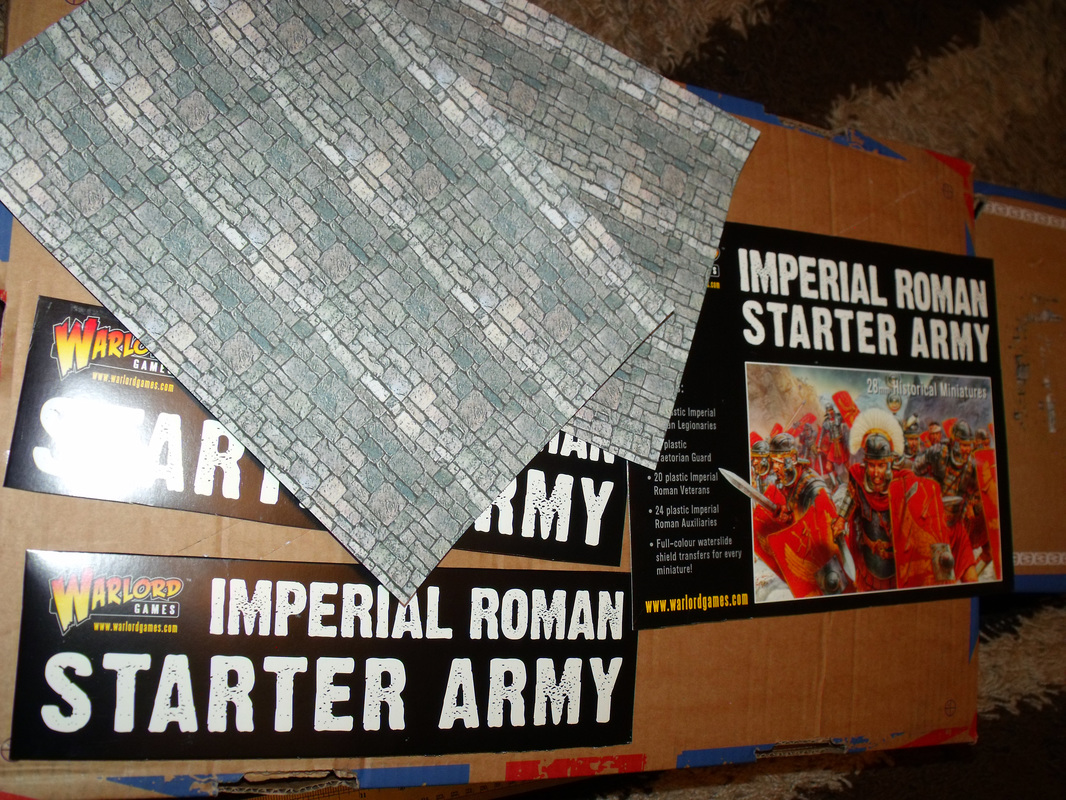
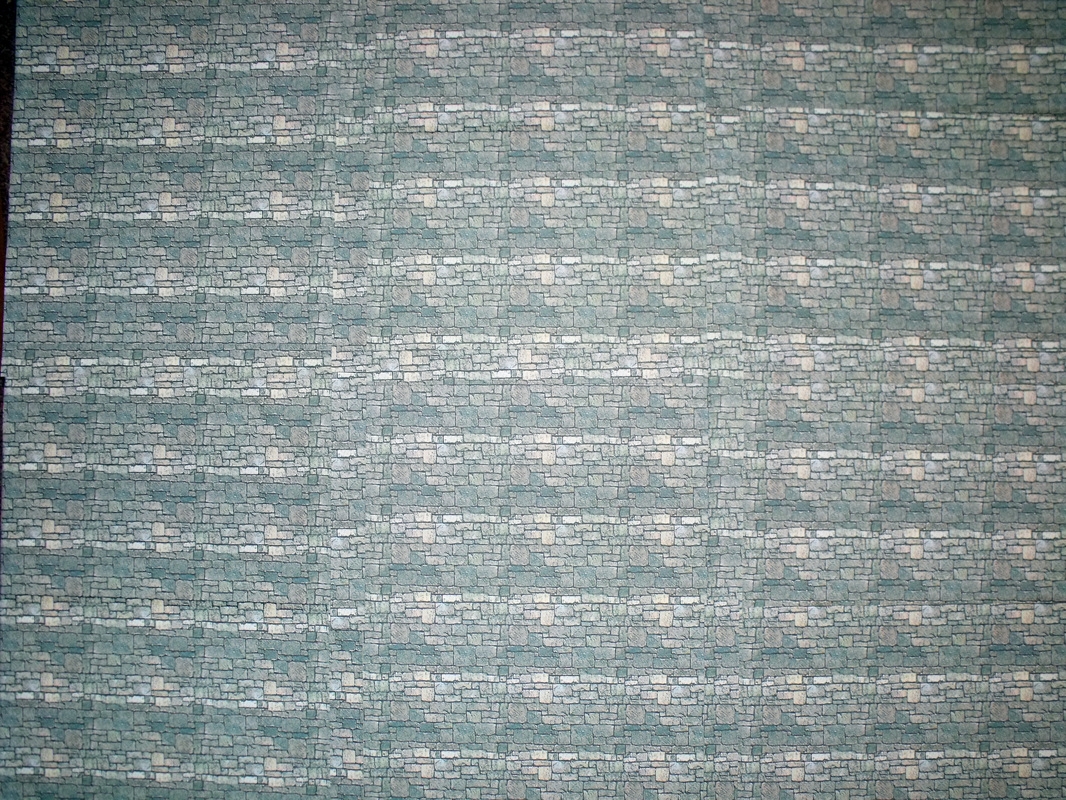
For a few weeks I have been mulling over what to do with regards to making a playing surface that is specific to Frostgrave. What I wanted was something that looked good, quick & easy to construct, light & portable, inexpensive, quick to set up and easy to store away. I experimented with tiles but was less than happy as the weight was an issue, they were either too light or too heavy and they were too flat with little scope for diferent height levels in the game. I thought about a roll up mat, but the idea of making a stone effect matt was daunting and choice of material was a tough as I couldn't find anything that seemed appropriate for my needs. Anyway both options were looking expensive the more I thought about it and neither were quick & easy to construct especially for the effect I wanted. I decided to have a total rethink and searched the internet for ideas, I found loads of nice looking terrain but most looked like it took an age to build, so was not what I wanted. I eventually found soem ideas on You Tube and especially liked the ideas related to dungeon crawling tiles from TheDMGinfo, his tiles ticked a lot of my boxes for what I wanted being cheap, easy to make, visually good and easy to store away. However I had already bought some stone effect paper PDF's from Wargames Vault and decided that it would be much quicker to use that as a surface than to paint them. As I needed lots of free corrugated card I decide to visit my local Aldi & Lidl as you can get loads from both of these places in the form of fruit & vegetable boxes, and they are also very useful for transporting your shopping from the store to your home. So, one shopping trip later I arrived home with a boot full of boxes and laid them out in front of me and that is where an idea came to me which would fulfill all of my wishes for a Frostgrave table. Why not use the underside of the boxes as they were for the table surface. They were strong, not too heavy or too light, not far from the ideal size being 16 inches by 12 inches, easy to make into a playing surface, easy to make different height levels and would also serve the purpose of storing & transporting the terrain from place to place. With the problem solved, in my head at least, I decided to throw the idea at my best buddy Nick to see what he made of it and he loved the idea. So, we planned to make a day of it and build the basic layout with six boxes, and here is how it went.  The finished terrain. Materials Needed. 7 fruit or vegetable boxes, each 16 inch by 12 inch. Cereal packet card or similar. White glue (PVA). 30 A4 sheets of borderless printed stone effect paper. Glue sticks. Tools needed. Box cutter. Scissors. Clippers. Bowl for the glue. Brushes fo the glue. Glue gun. Ruler. Scalpel.
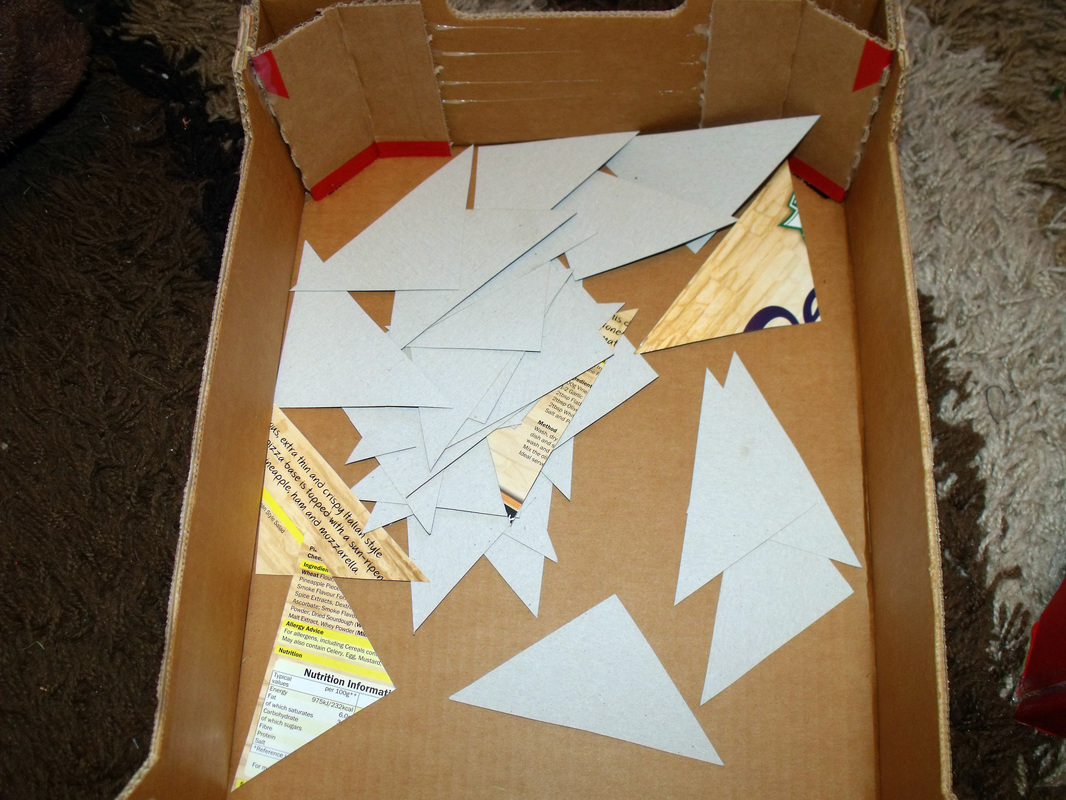
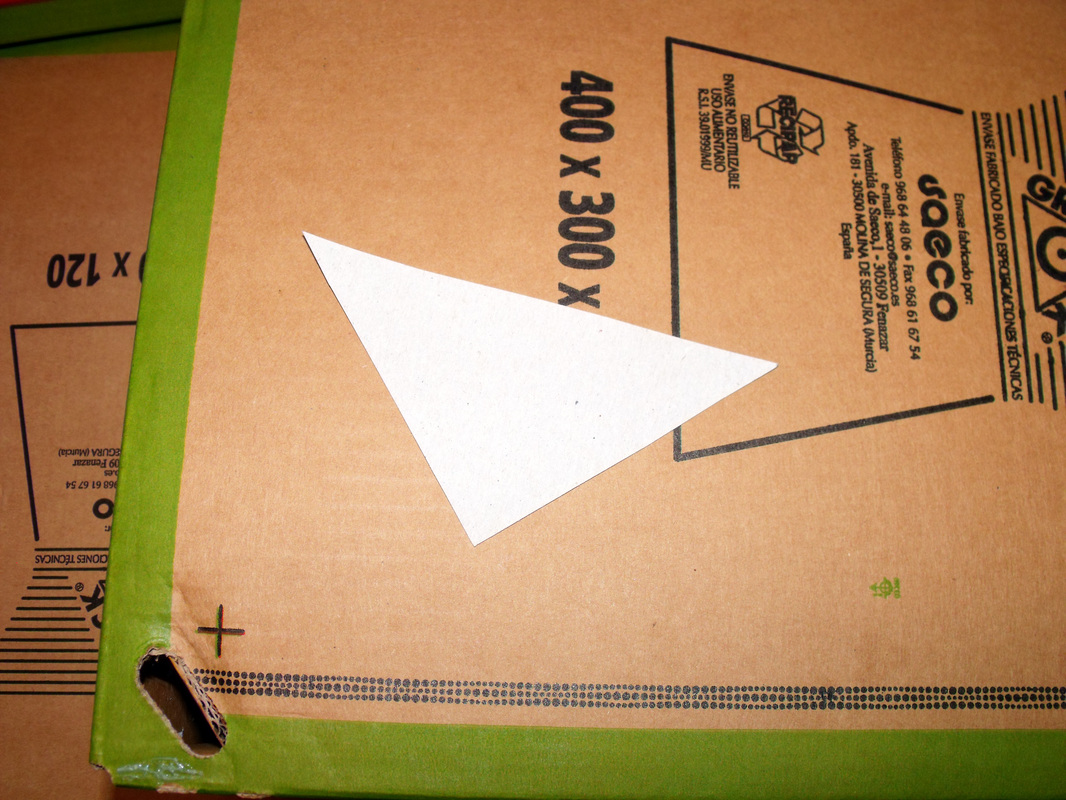
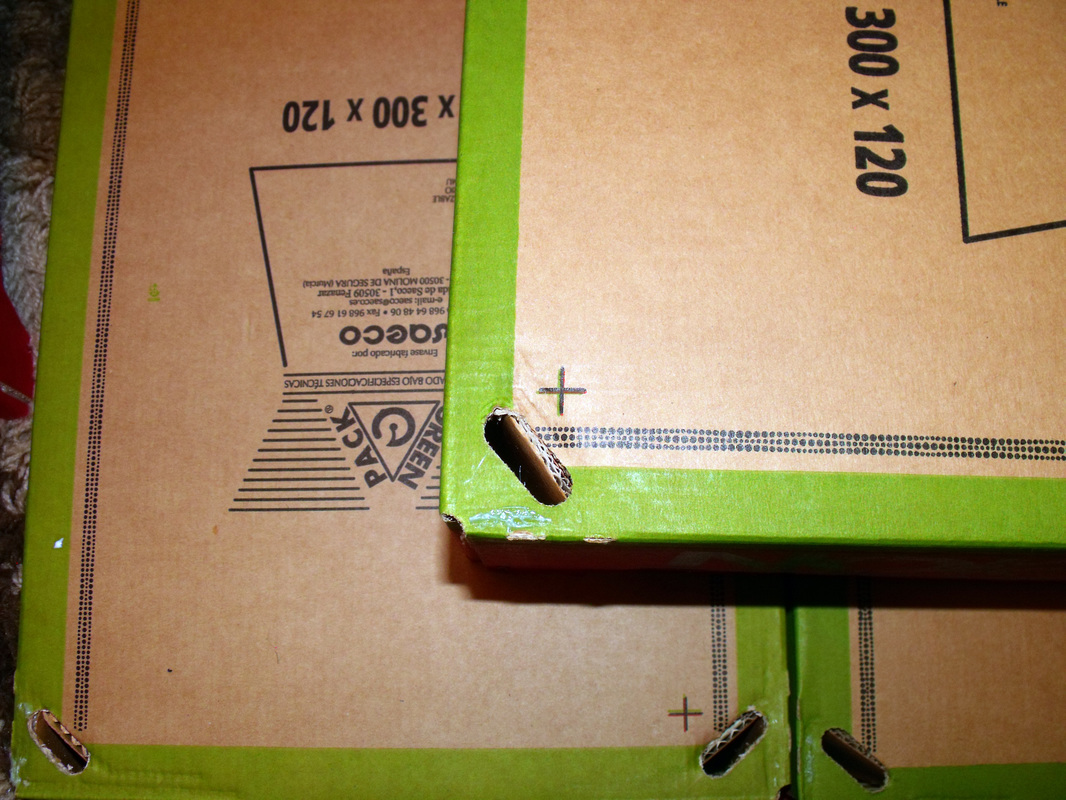
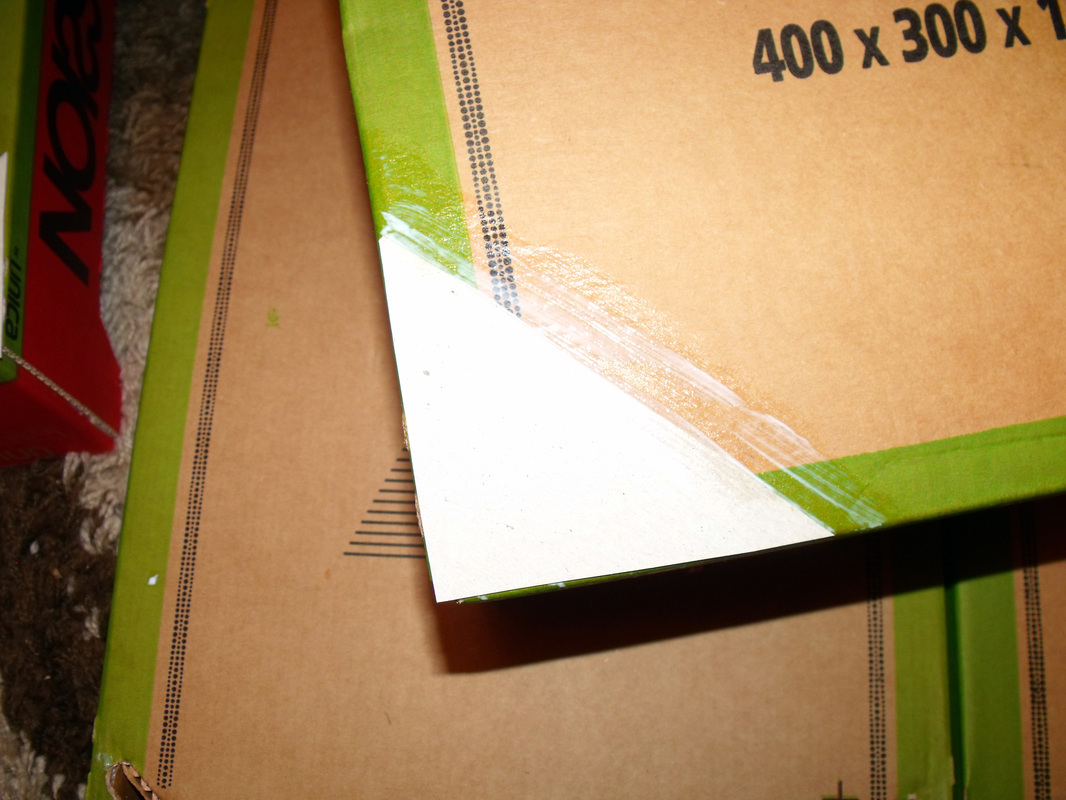
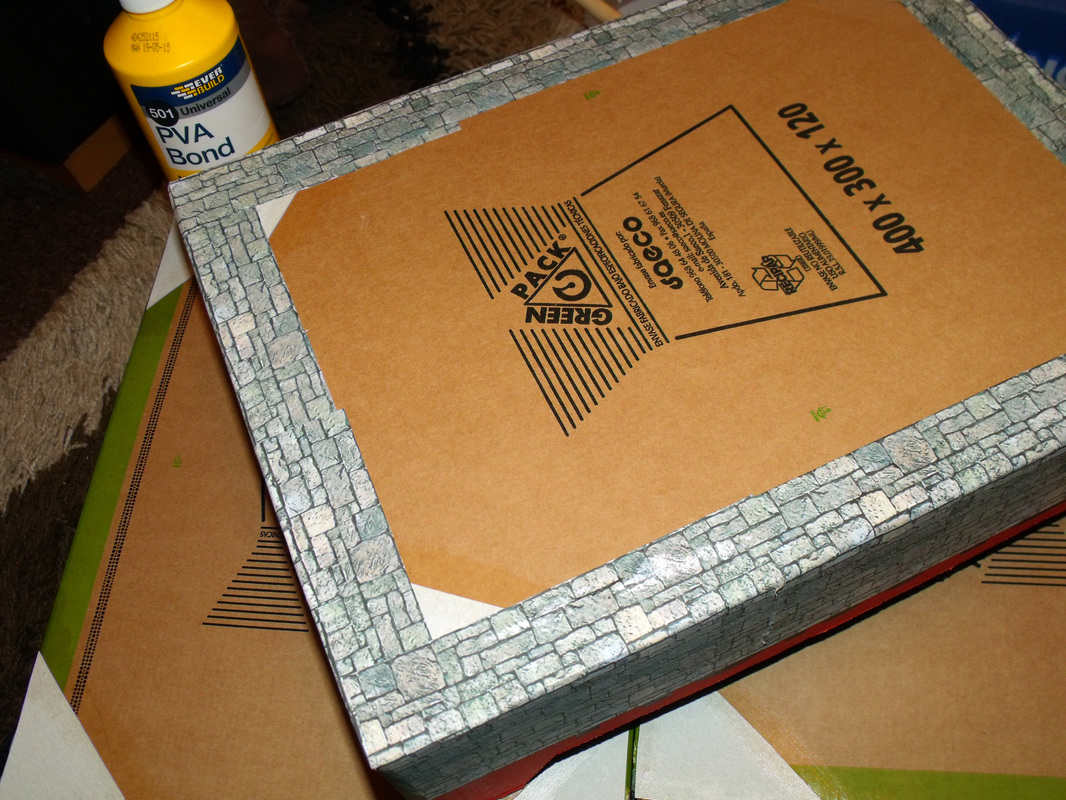
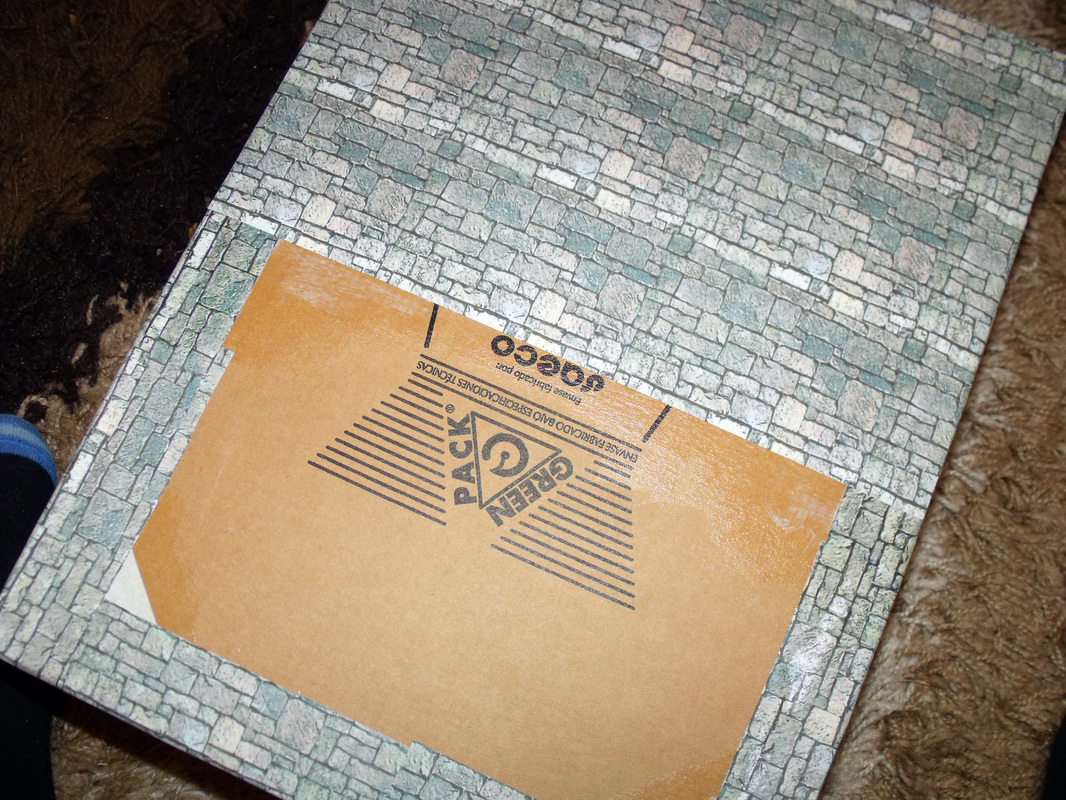
Construction Method Steps 1 - 3 1. Assemble together the 6 boxes for the table top and cut off the locator tabs as per photo's 1 & 2. 2. Cut out 24 approximately 3 inch right angled triangles for covering the locator holes in the bottom of the boxes as per photo's 3 & 4 3. Glue the triangles over the holes with white glue as per photo's 5 & 6
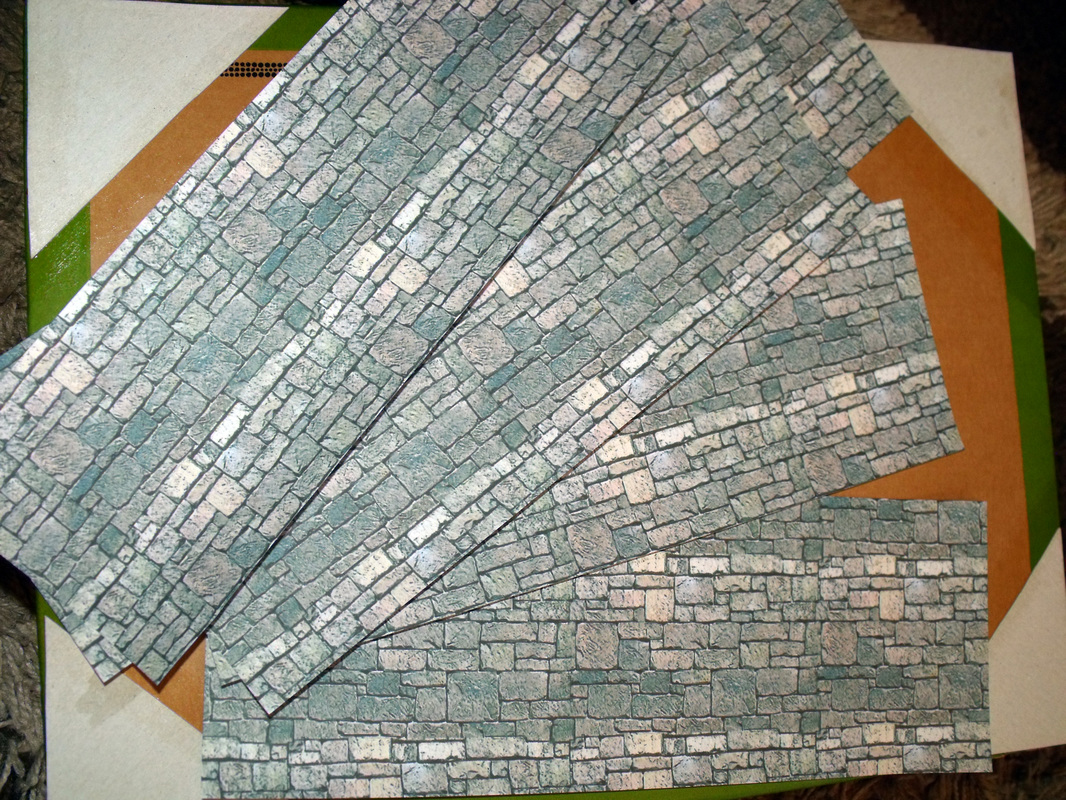
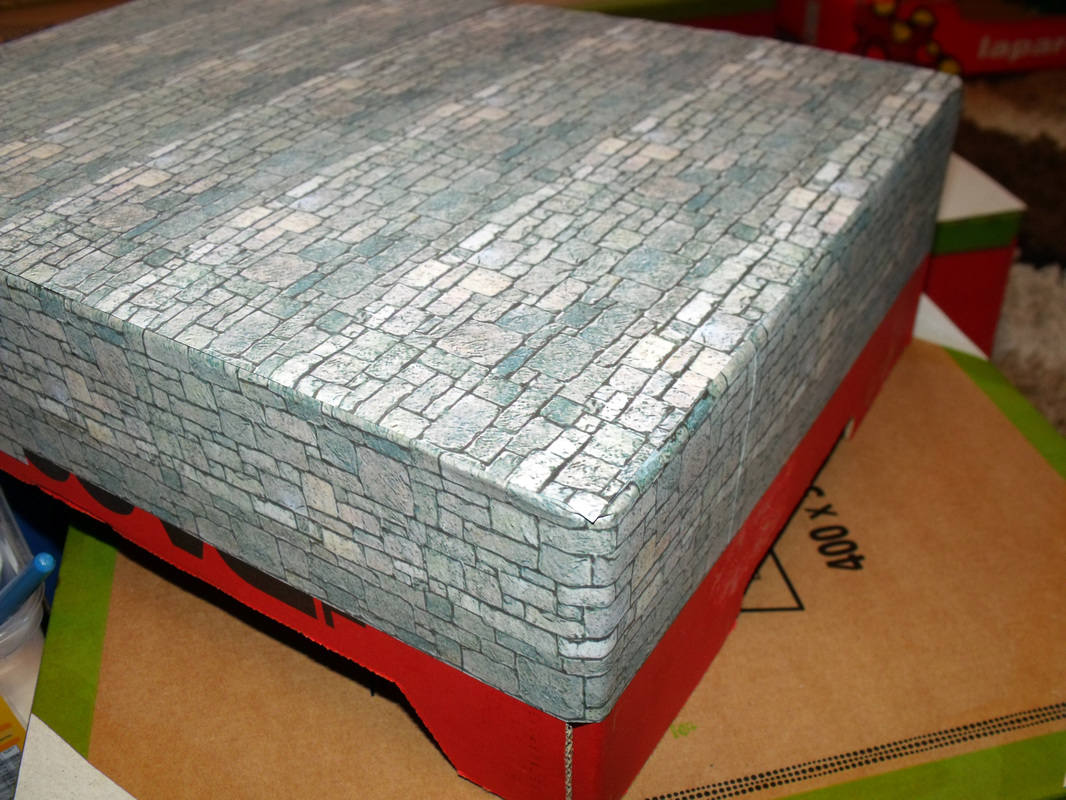
Construction Method Steps 4 - 6 4. Gather together 15 of your printed stone effect paper sheets and cut each sheet lengthways in half as per photo's 7 & 8 so that you have 30 lengths of paper. 5. Paste a length of paper with white glue and start to wrap around the box allowing approximately 1 inch overlap for the top of the box as per photo 9. 6. Continue this procedure all around until the box is totally wrapped as per photo 10. A total of 5 lengths are needed to completely wrap each box. Continue this until all the boxes are wrapped.
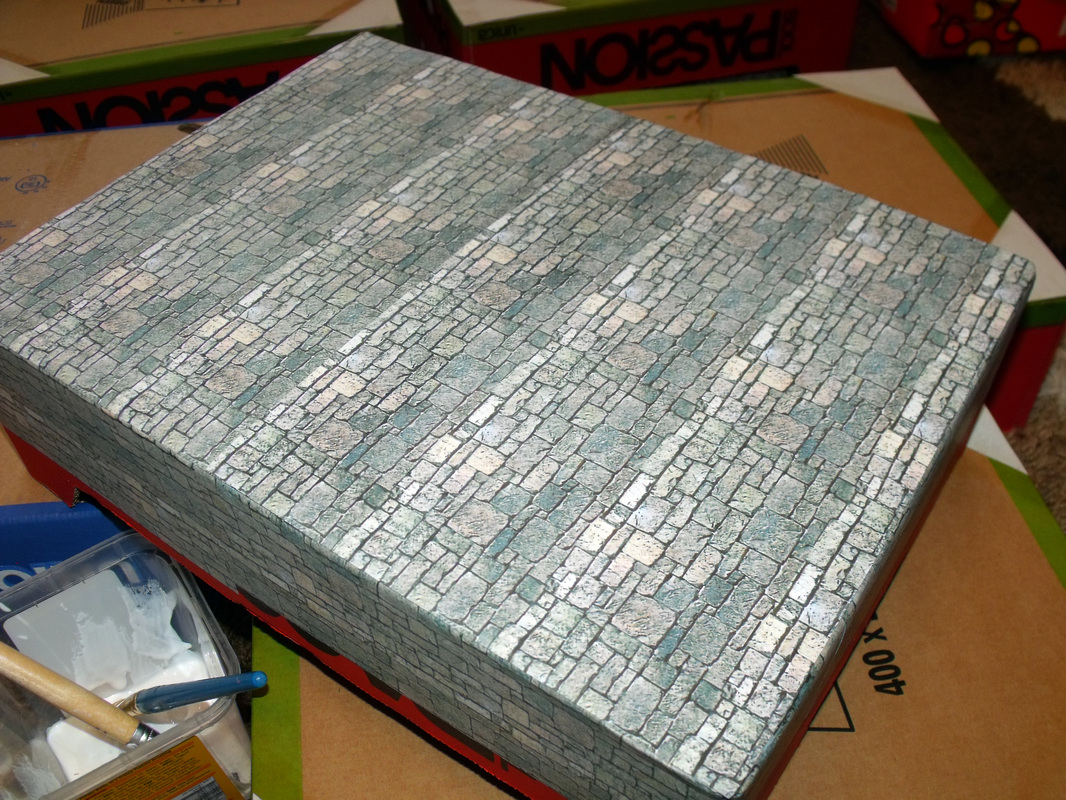
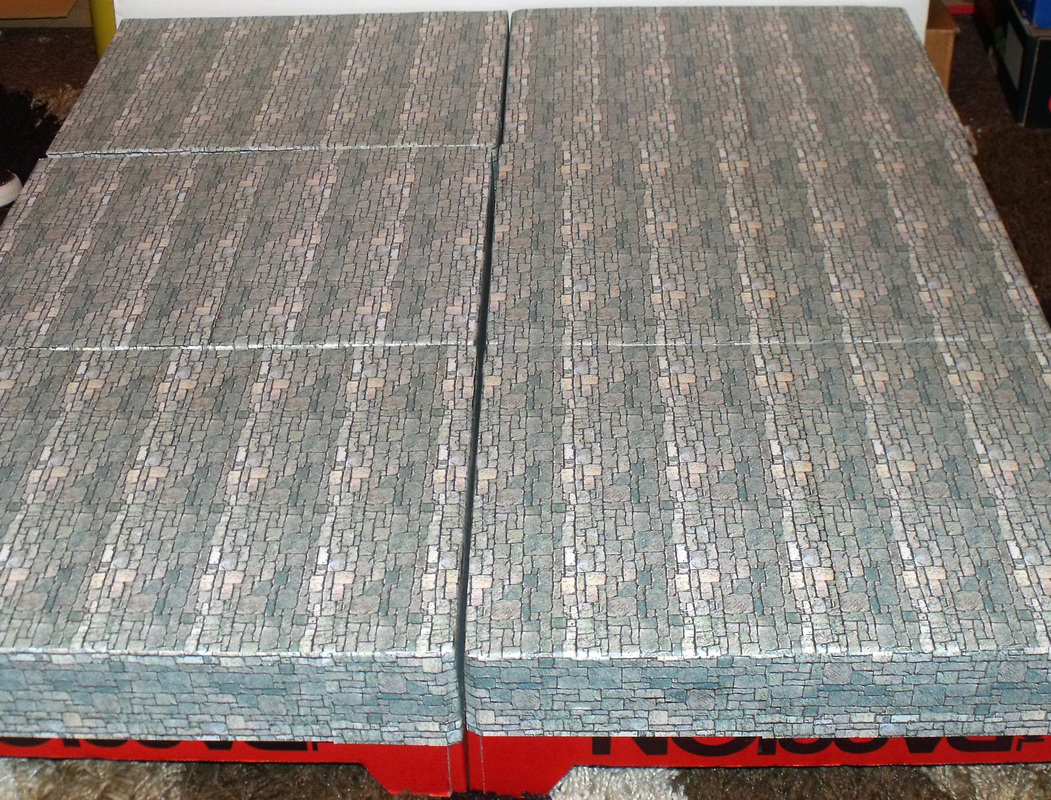
Constructions Method 7 - 9 7. Take 12 of the sheets of stone effect paer and start by pasting the half of the top of the box with white glue and then paste down one sheet of paper as per photo 11. 8. Take another sheet of paper and paste this down to the box top ensuring the paper matches up to the previous sheet as per phot 12. 9. Continue until all the box tops are complete and then lay out the boxes as they would be to make a table top as per photo's 13 & 14.
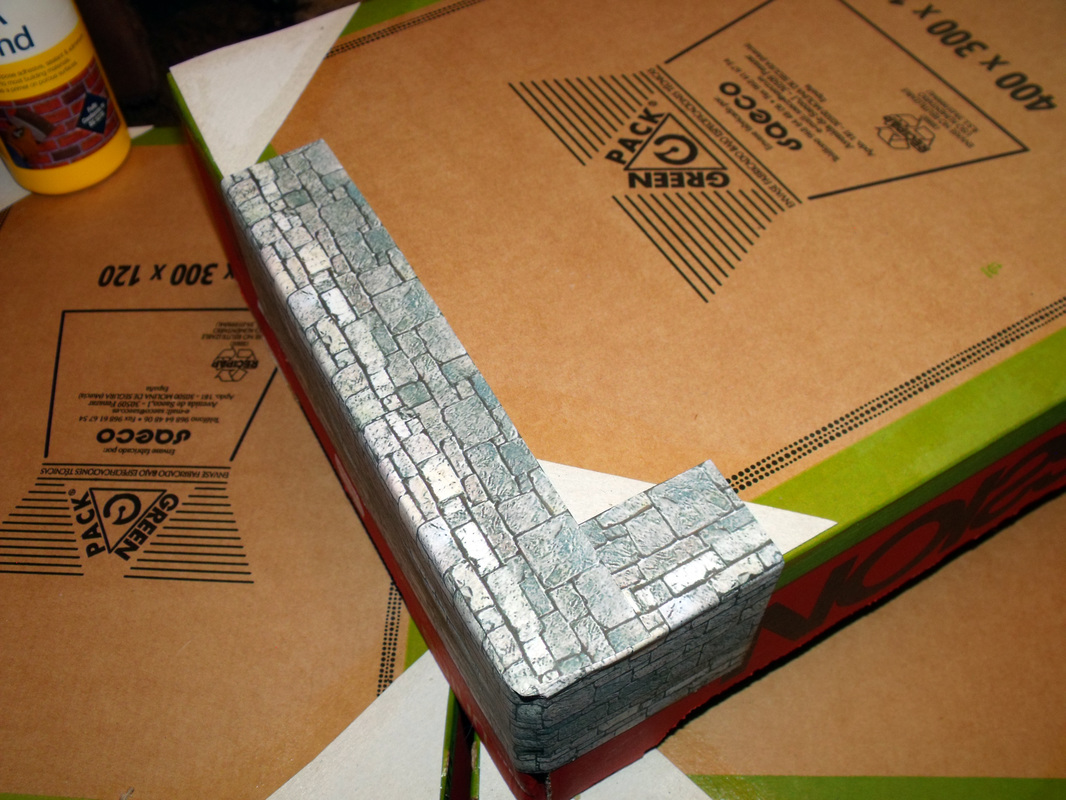
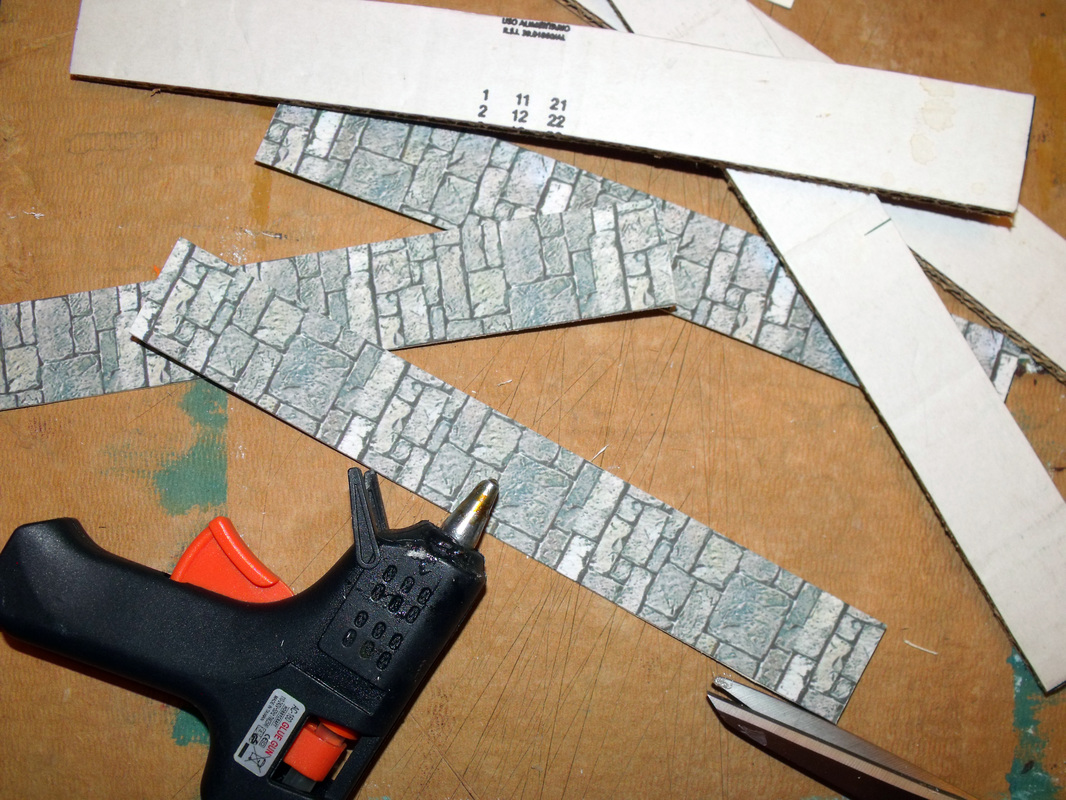
Construction Method 10 - 13 10. Take 2 sheets of the stone effect paper and paste down to thin card with white glue as per photo 15. 11. Cut 1 sheet lengthways into strips each about 1 inch or so wide and the other sheet cut sideways into the same 1 inch or so strips as in photo 16. You will need at least 3 long strips and 8 short strips. 12. Take your 7th box and cut out strips each approximately 10 inches long by 1 inch deep from the bottom of the box. You will need at least 7 of these strips as per photo 17. 13. Cut 4 of the corrugated strips in half to make 8 small strips and using a glue gun attach the corrugated strip onto the underside of the 8 short card strips along the centre line and continue with the 3 longer strips as per photo18.
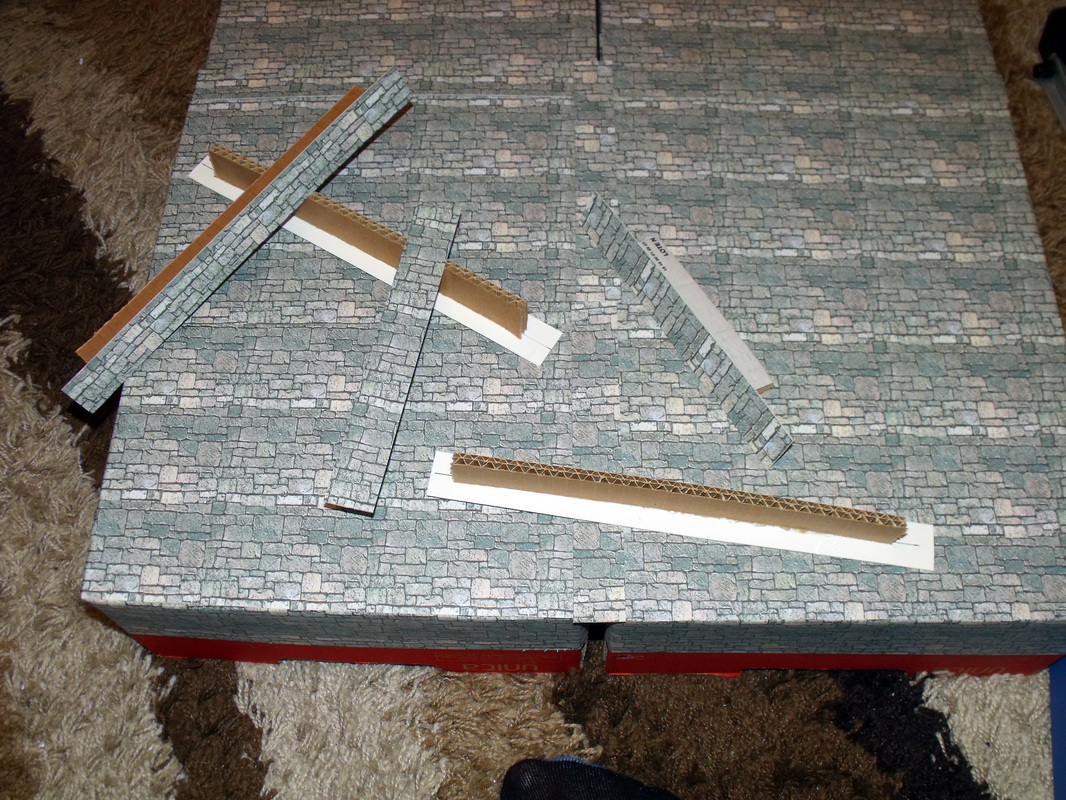
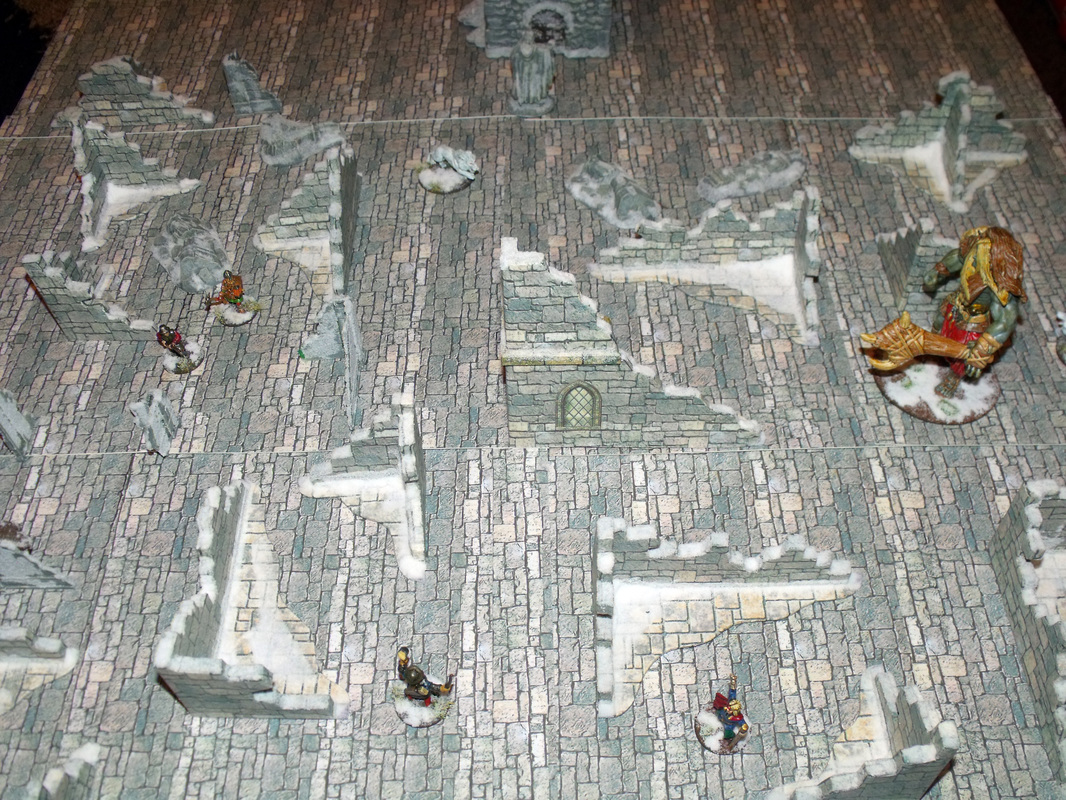
Construction Method 14 - 15 14. Place all the jointing strip into the table top as per photo 19. 15. Randomly place Terrain and admire your handywork as per photo 20. So there you have it, all finished and ready to use for a game. We were both extremely impressed with the end result especially as it was so quick to put together and inexpensive to make. All in all it took around 3 to 4 hours for us both to make from start to finish, but having said that we do tend to waffle on at times so some time could be saved there if only one person did the project. So, 6 - 8 man hours were used in making this, which is pretty good really and it was extremely easy to make. As for cost this breaks down as follows: Boxes and card all free = 0 pence, White glue, one third of a £1.00 bottle = 33 pence, Glue sticks, 2 at 10 pence each = 20 pence, 30 sheets of stone effect paper, printed on good quality 100 gsm paper with good quality ink = 45 pence, so a total price of 98 pence in total. I am going to varnish my boxes and jointing strips with matt acrlic varnish which will effectively double the price, and although not really necessary it will add extra strength, durability and water resistance to the playing surface. In the coming weeks we intend to make some steps & jointing strips for use with higher levels, which is why the boxes have stone work around their sides. Some more building & ruins covering all the scenarios in the book and someextra pieces that we feel compelled to make. We also want to make an open sewer or river that runs across the centre long edge of the table at a lower level to the rest of the table top, which will add depth to the terrain and make the table top at least 36 inch square. More of all this in later posts though, for now I want to play test the table top so that I can draw conclusions from it and perhaps even think of ways to improve it. 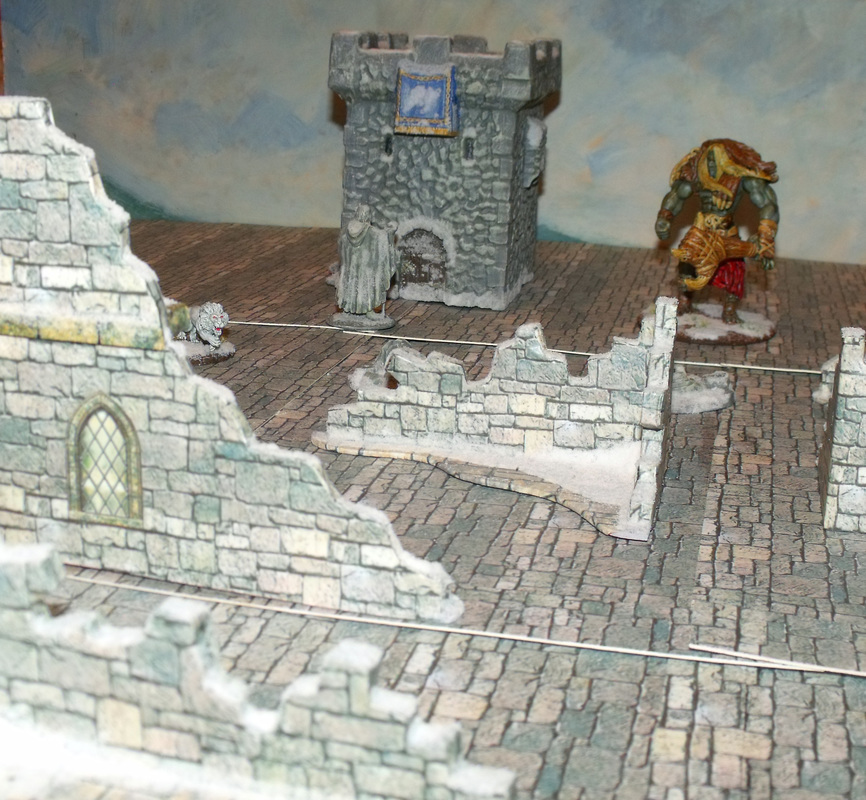 The Frost Giant lurking.
25 Comments
Nick
14/11/2015 06:29:48 pm
Nice job mate look forward to playing on it tomorrow
Steve Wylde
14/11/2015 10:53:59 pm
You should know you helped me make this. 14/2/2020 08:32:53 am
They are also available in a wide array of colors such as black and gray, teak, gray, maple, charcoal, cherry red, oak, cinnamon, etc. 31/3/2024 02:08:09 pm
I love this blog. I don’t know what I’d do without you and your great info! Thank you so much! 31/3/2024 02:50:22 pm
Thank you so much for sharing all this wonderful information. 31/3/2024 04:07:42 pm
I think this plot really works because of how well you’ve paced the story. 31/3/2024 04:17:07 pm
Your writing is so beautiful because you always know the right word for the right moment. 31/3/2024 05:40:05 pm
It was an interesting choice to describe the setting the way you did. Leave a Reply. |
AuthorStephen Wylde BA (hons) Archives
April 2020
Categories
All
|


 RSS Feed