
WARGAMES DESIGNS BLOG
|
|
THE BLOG FOR ALL THE OTHER WARGAMES STUFF THAT I DO
|
|
|
|
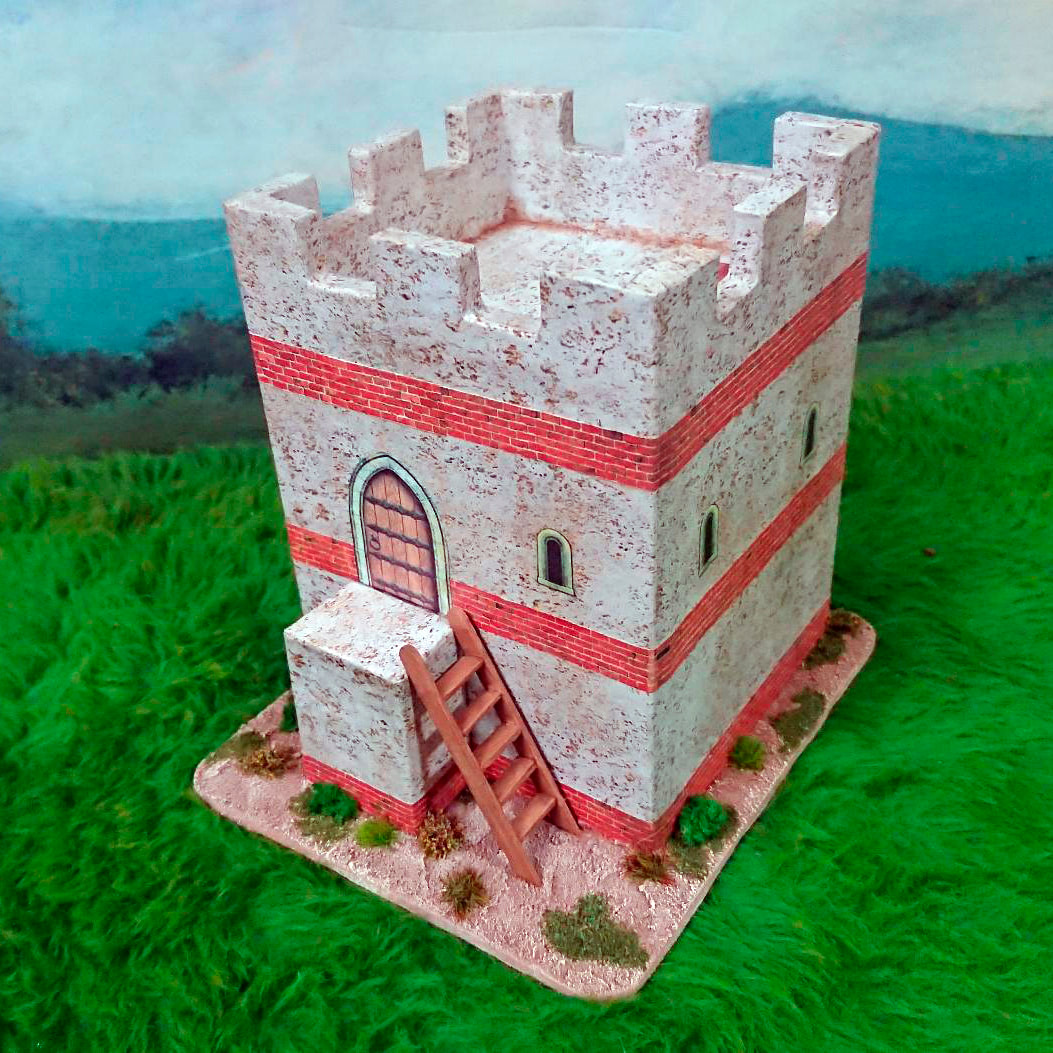
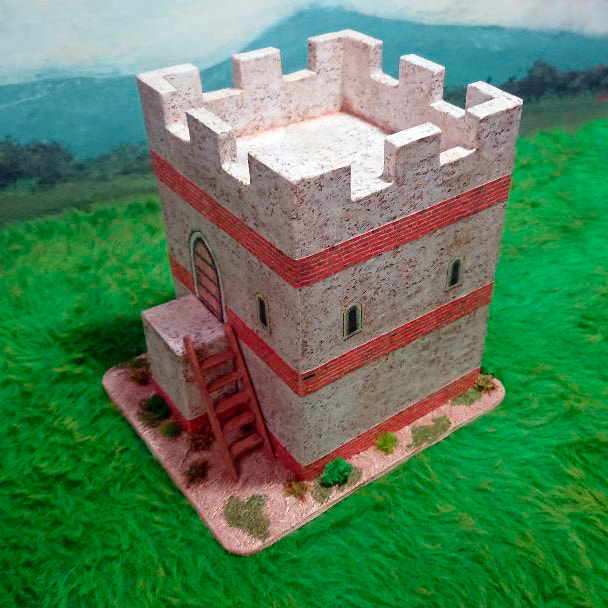
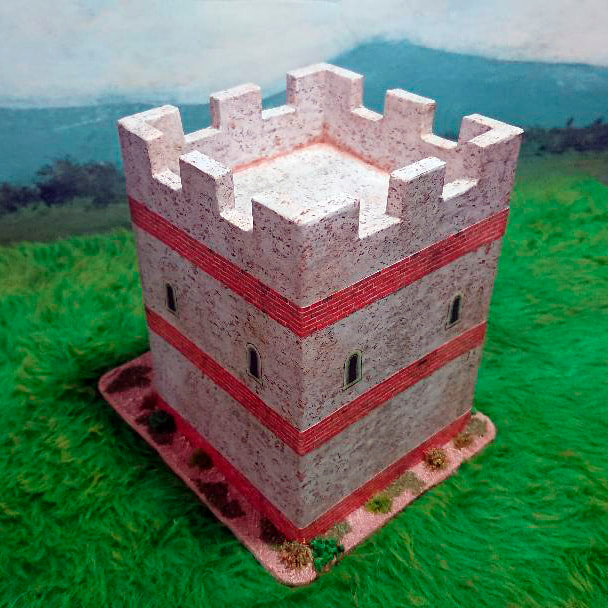
The second of the Roman watchtowers that I made can be seen here and and by simply altering the wallpaper effect and a few subtle differences it looked quite different. It was meant for a more Eastern Roman detachment and as such I felt that the stucco and brick effect was more appropriate to give the right feel to the piece. It was made in the same size and way as the first watchtower but the inclusion of a wooden ladder was the main difference. This was made by cutting and gluing together some wooden coffee stirrers and painting them to get the right effect.
2 Comments
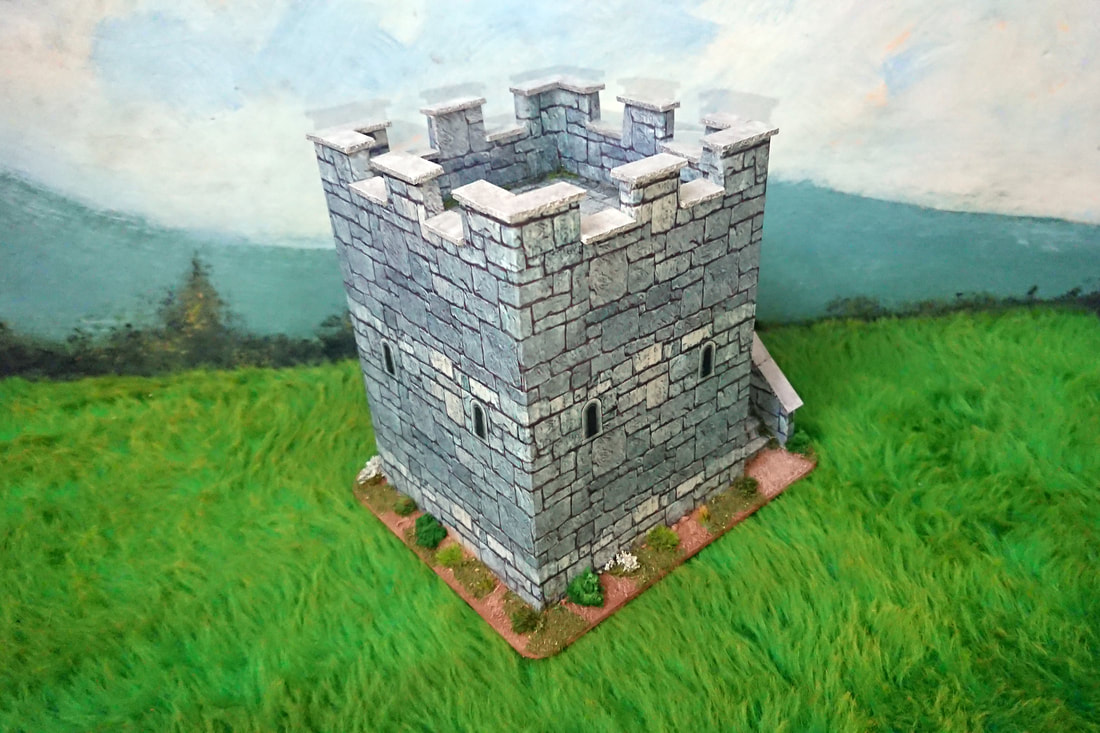
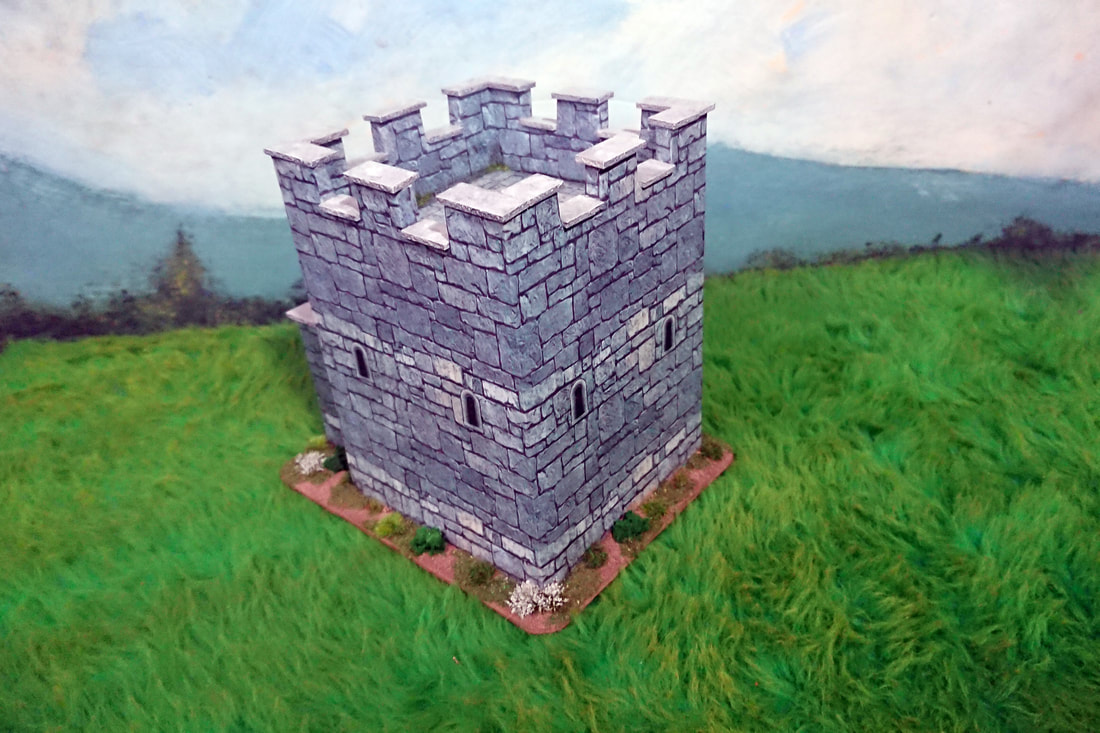
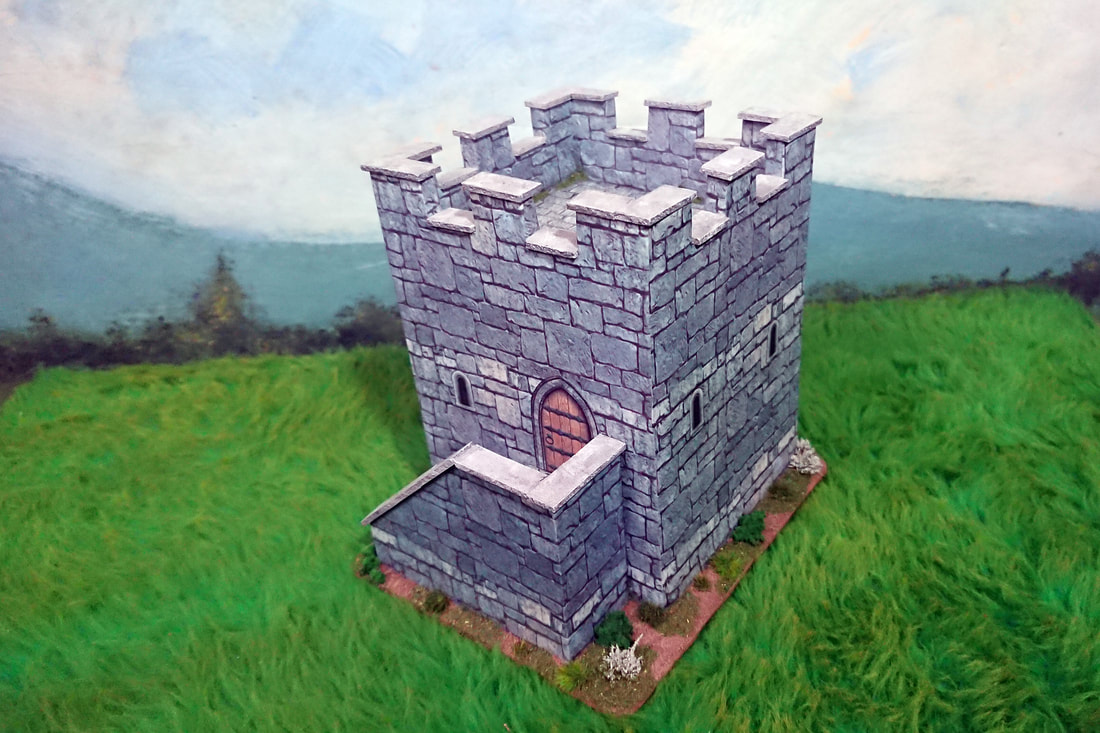
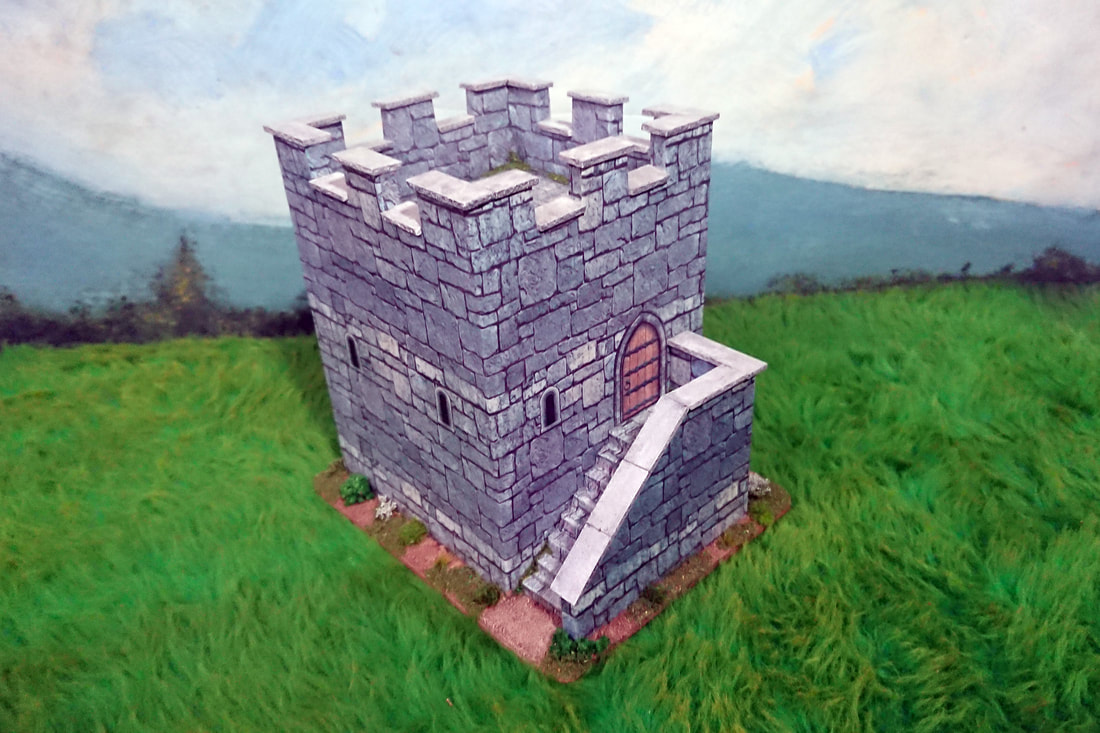
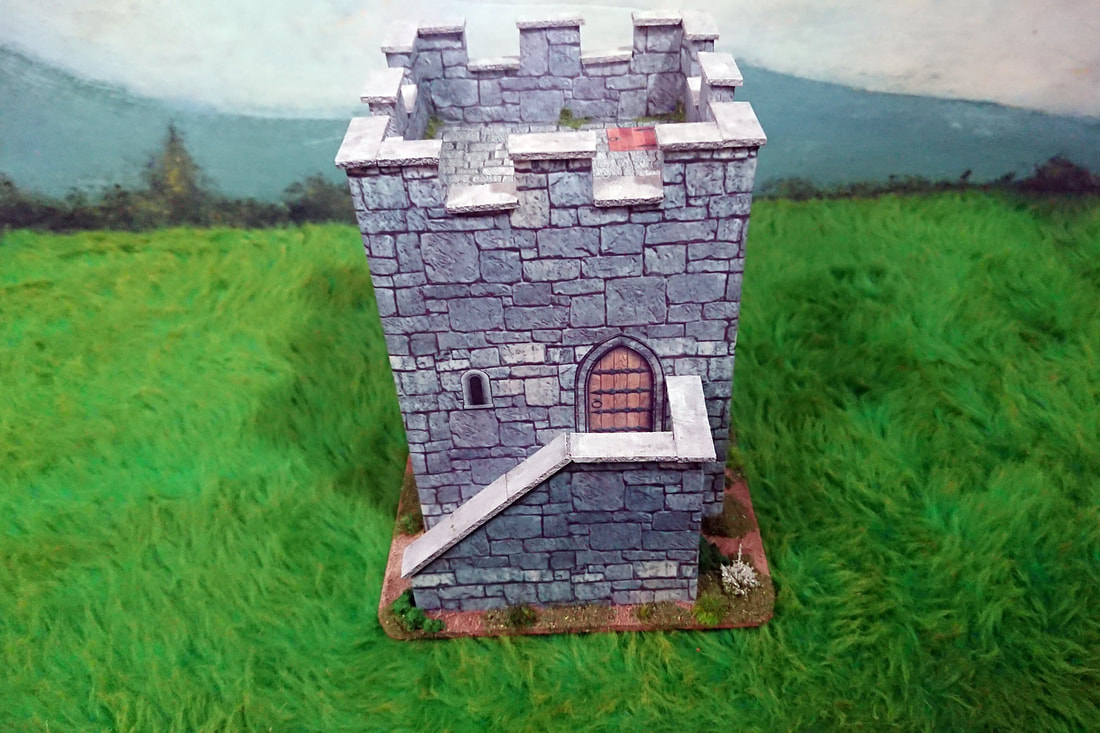
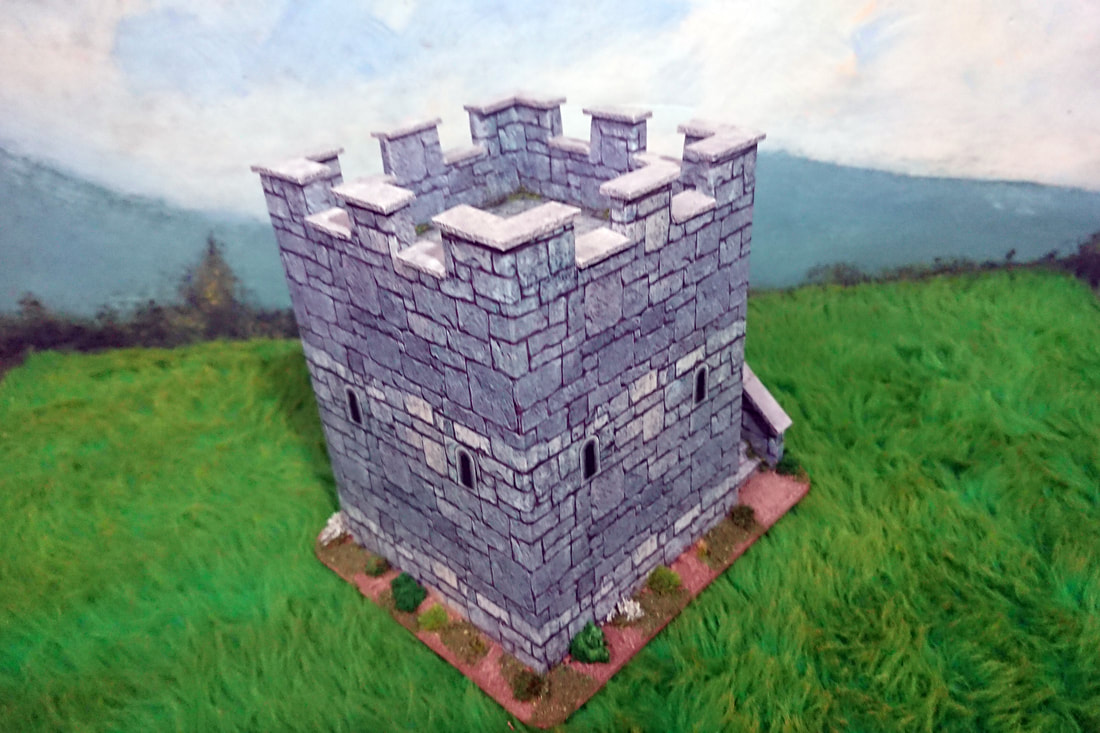
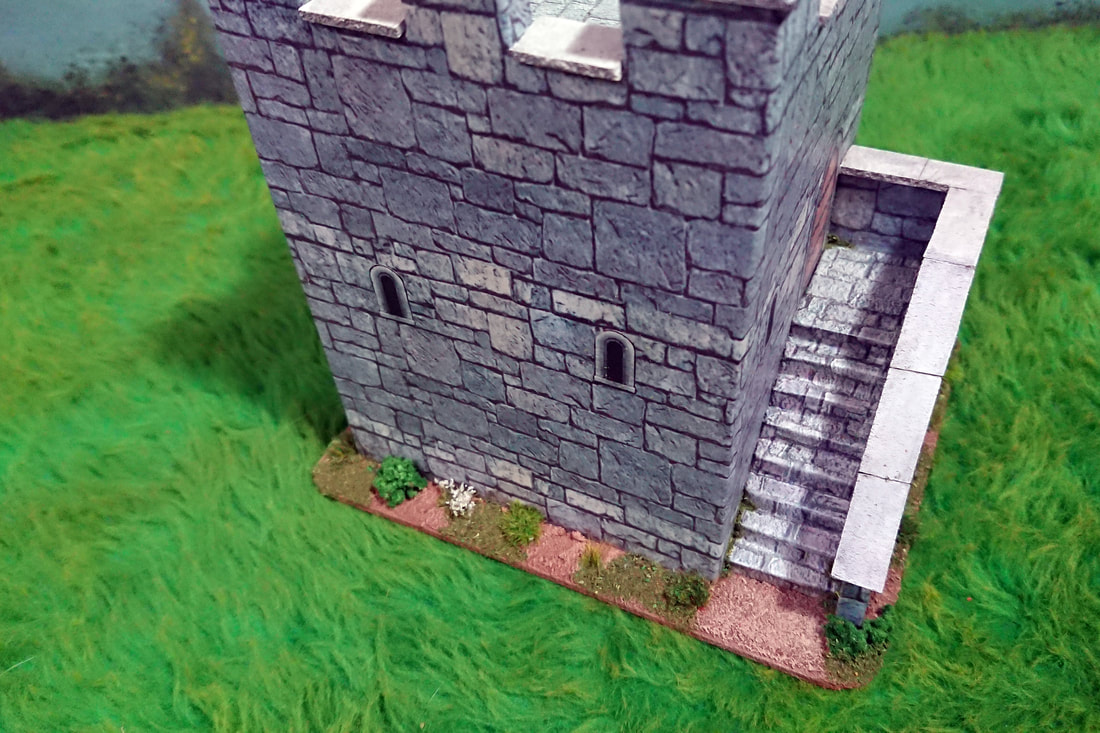
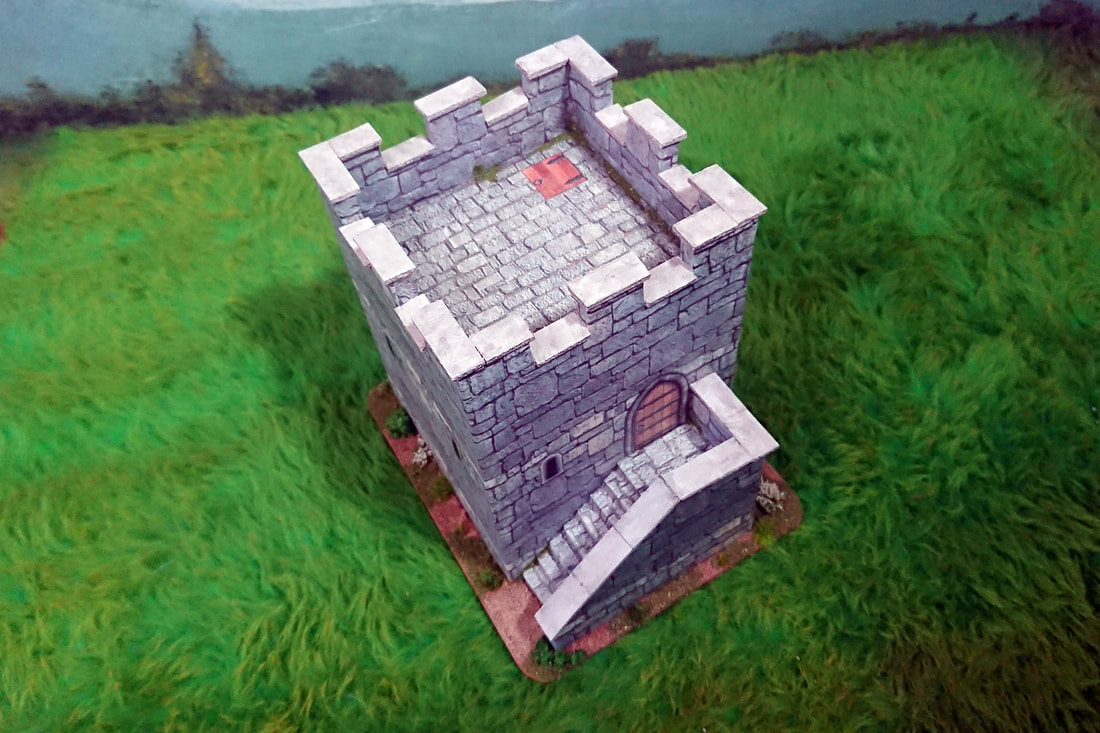
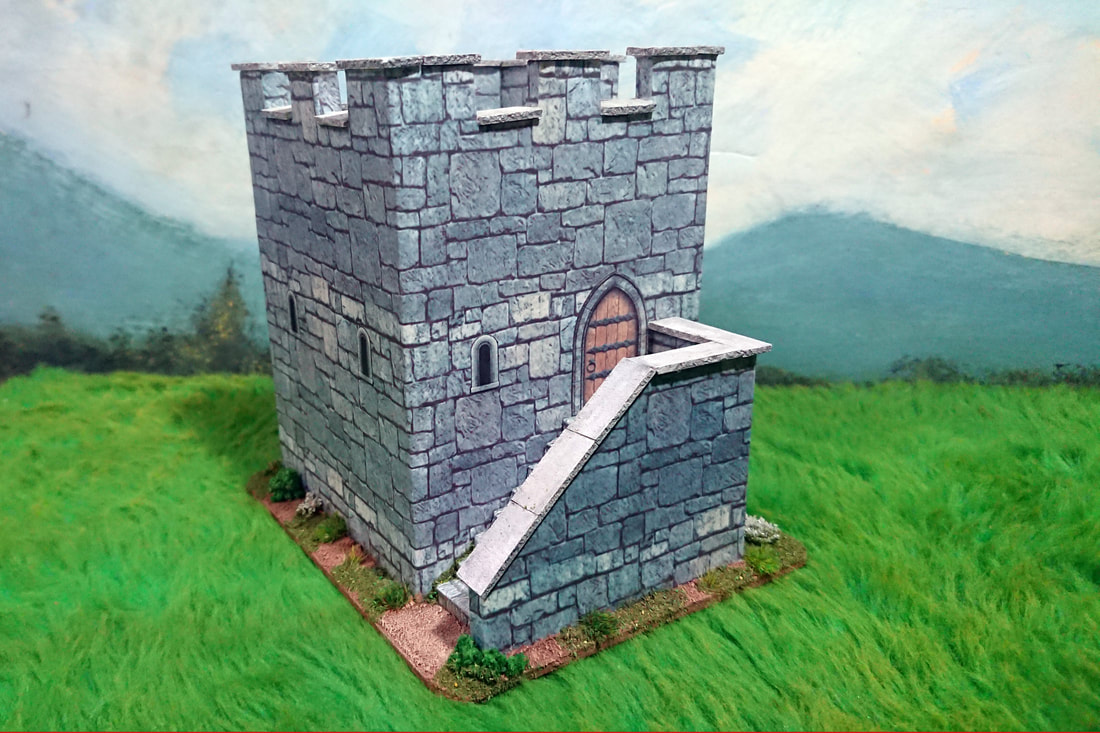
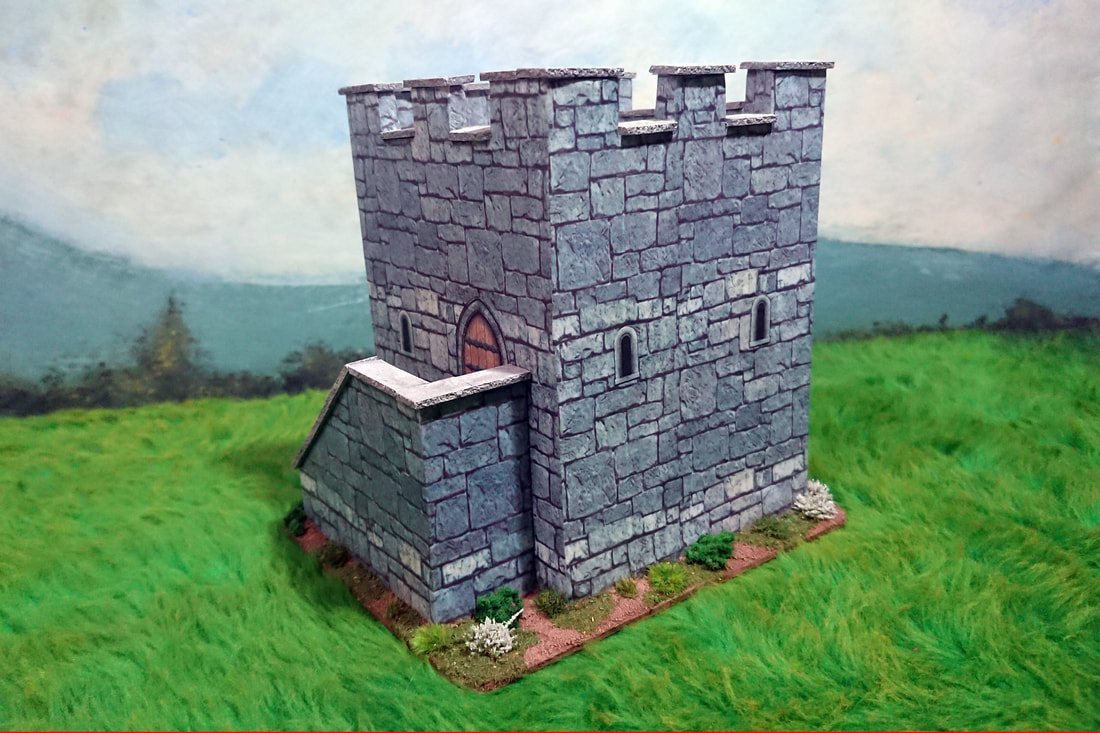
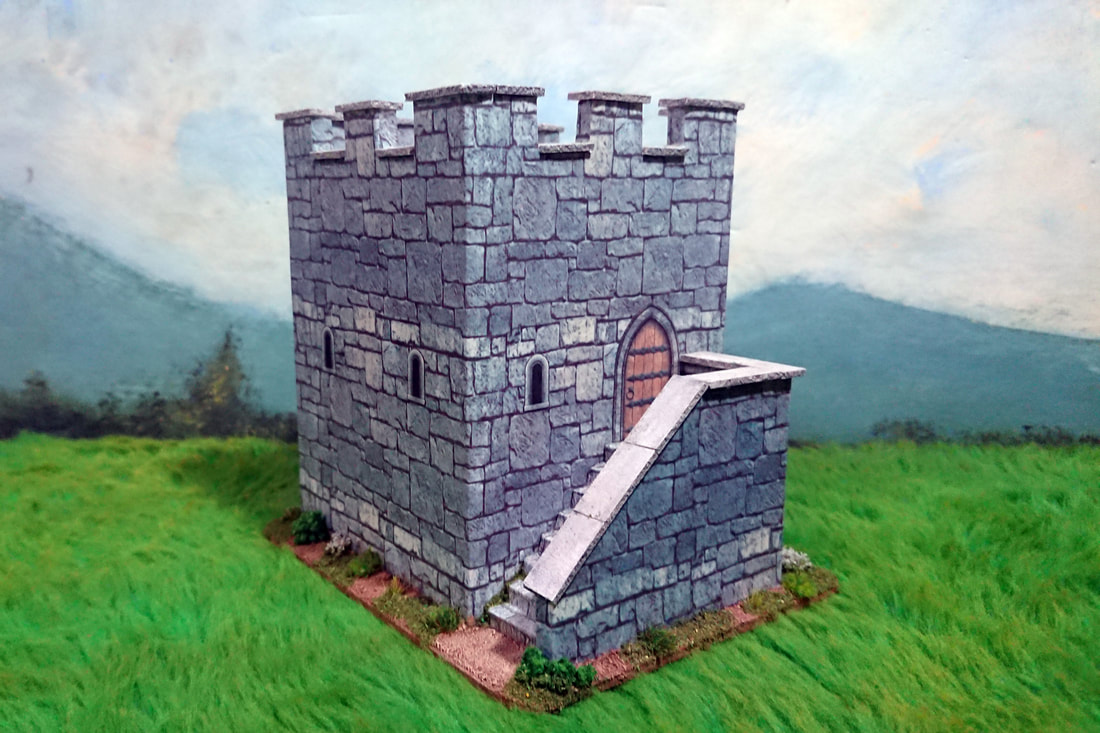
Over the last couple of months our little wargames group has discovered Warlord Games SPQR ruleset and seemingly from nowhere we have all put together warbands for the Ceasarian Roman period. As Xmas was approaching I decided to make a few watchtowers as presents for each of us, all being uniquely different as they would be from different parts of the Roman Empire. The first of them that I made was probably the most recognisable and this is how I made it.
To begin with I cut the basic parts being four walls, a floor and a couple of internal support pieces from foamboard. These were assembled and left to dry thoroughly and later the crenellations were cut out. The corner edges of the tower were filled and smoothed down as well as any areas of the crenellations that needed filling, again the model was left to dry thoroughly. The next job was to select and paste down a stone effect wallpaper over the model and also put in a floor effect and while this was drying I made the stairs and the surrounding walls. When the stairs had dried I covered them with the same stone effect wallpaper as the main tower and then glued them in place. The capping pieces along the top of the crenellations were all cut and glued in place ready for painting later and once painted the basic model was almost complete.
So, with the building work all done it was a simple case of adding a door, hatch and windows to the model and using thinned down paint to add a few weathering effects. Finally with all the work complete on the tower I decided to varnish it with acrylic wood varnish which protects and strengthens the model. The base was next and I cut out a hardboard base and glued the model to it, later this was textured and painted with loads of bushes, flowers and scatter grass added. Finally I was left to sit back and admire my work until the reality of knowing that I had another four to make hit home.
Finally some useful dimensions: Height of Tower = 14 cm Width of each side of Tower = 10 cm Width of Stairway including wall = 3.5 cm Height of Stairway including Wall = 6.5 cm Height to top of Stairs = 4 cm
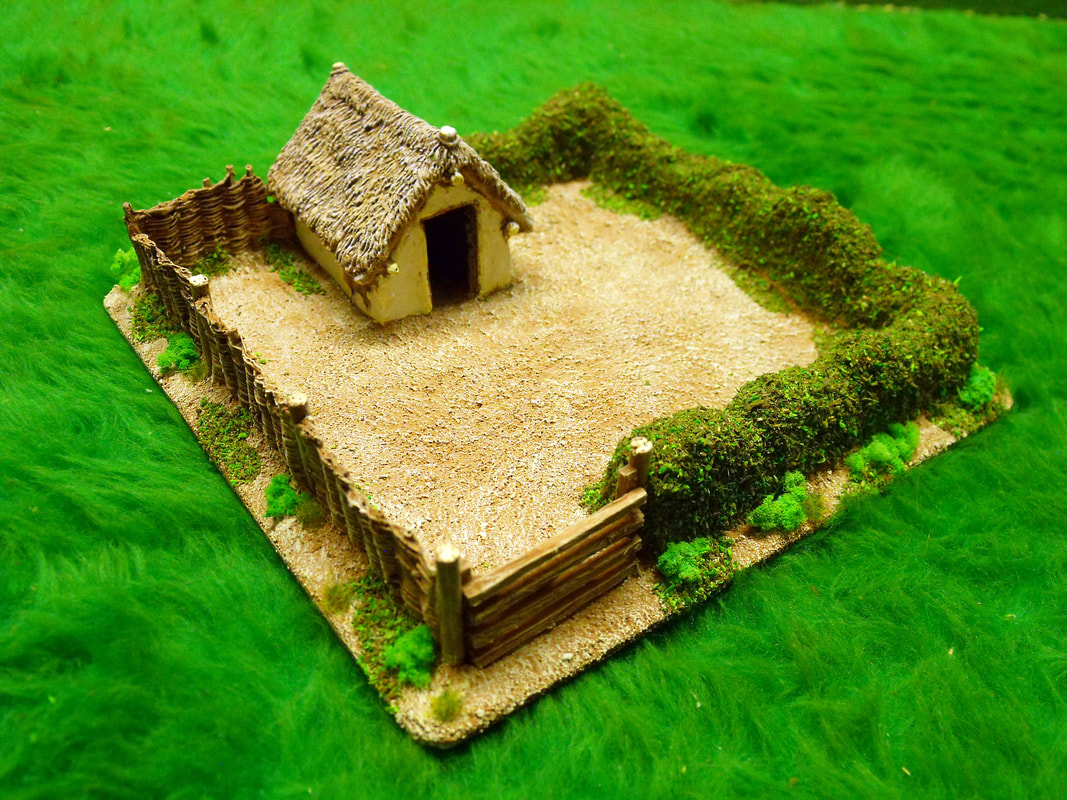
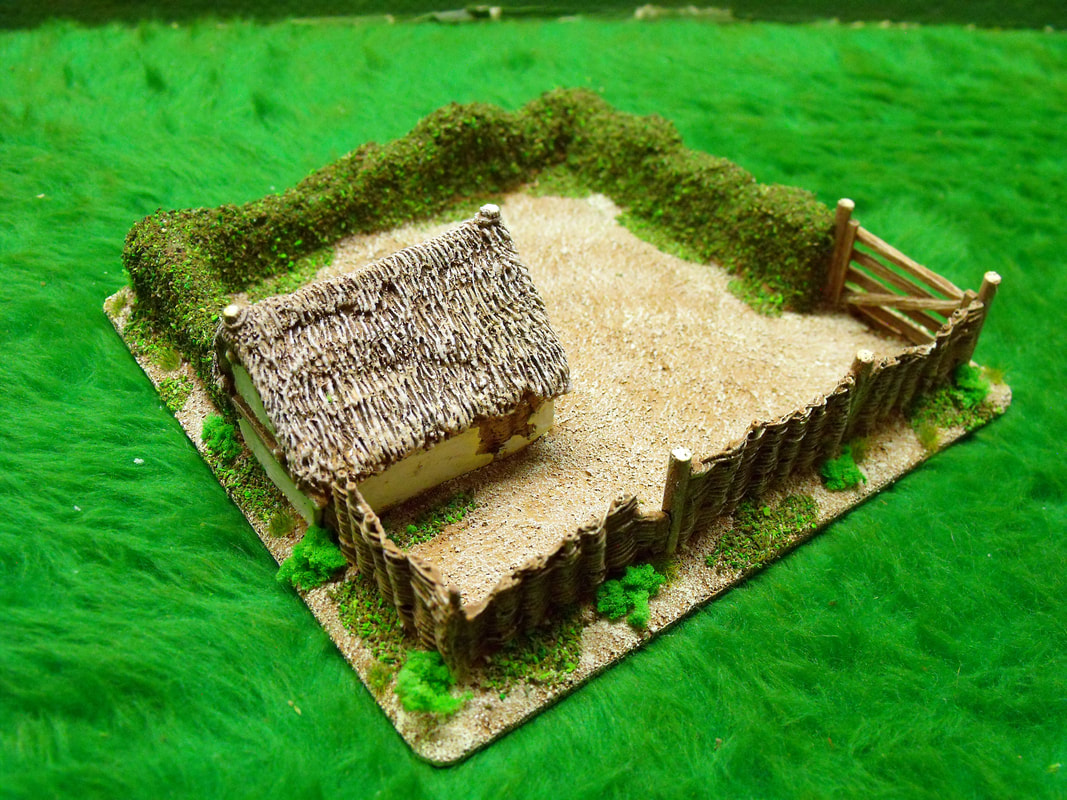
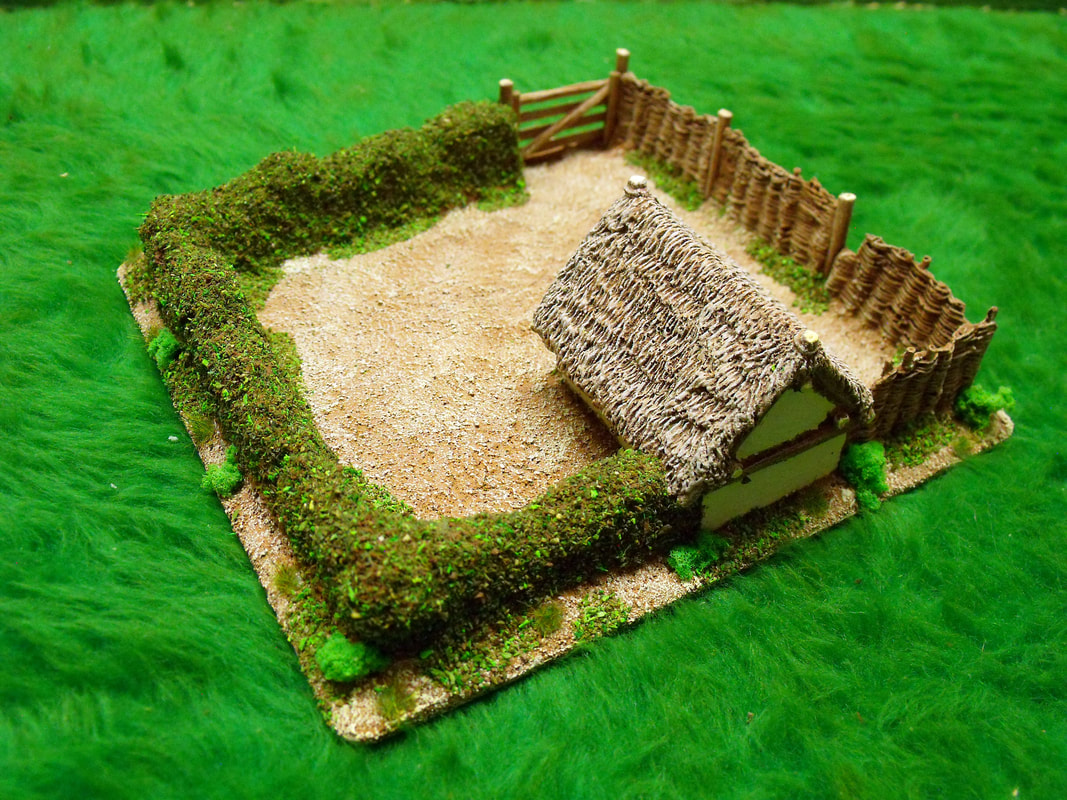
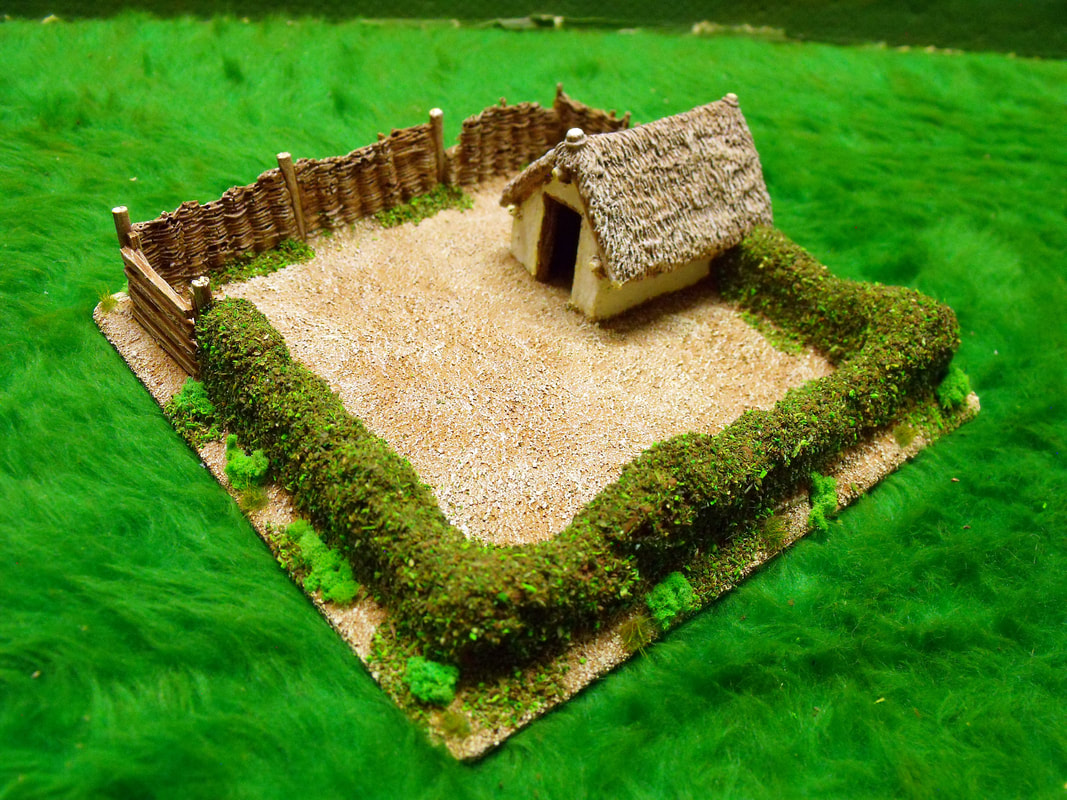
I finished this piece recently for a customer as part of an ongoing project. Basically it was a resin Pigsty with a few broken bits of wattle fencing that he wanted making into an enclosure to hold many bases of pigs and piglets. There wasn't enough wattle fencing to make a useful enclosure so I decided to add a hedge made from some sample resin pieces that I had lying around. This just left me needing a gate which was made from matchsticks and a few dowel fence posts and I had all that I needed. With all the pieces glued in place on a piece of vinyl tile I painted everything and then applied the basing, which is a mixture of sharp sand and brown paint (like Basetex, but far cheaper). Once dry I applied bushes and long grass then I covered the hedge with scatter flock and a lighter flock applied in patches around the base to finish it off. That was it, all done and ready to be used on the wargames table, a really useful building that could be used for many periods or settings.
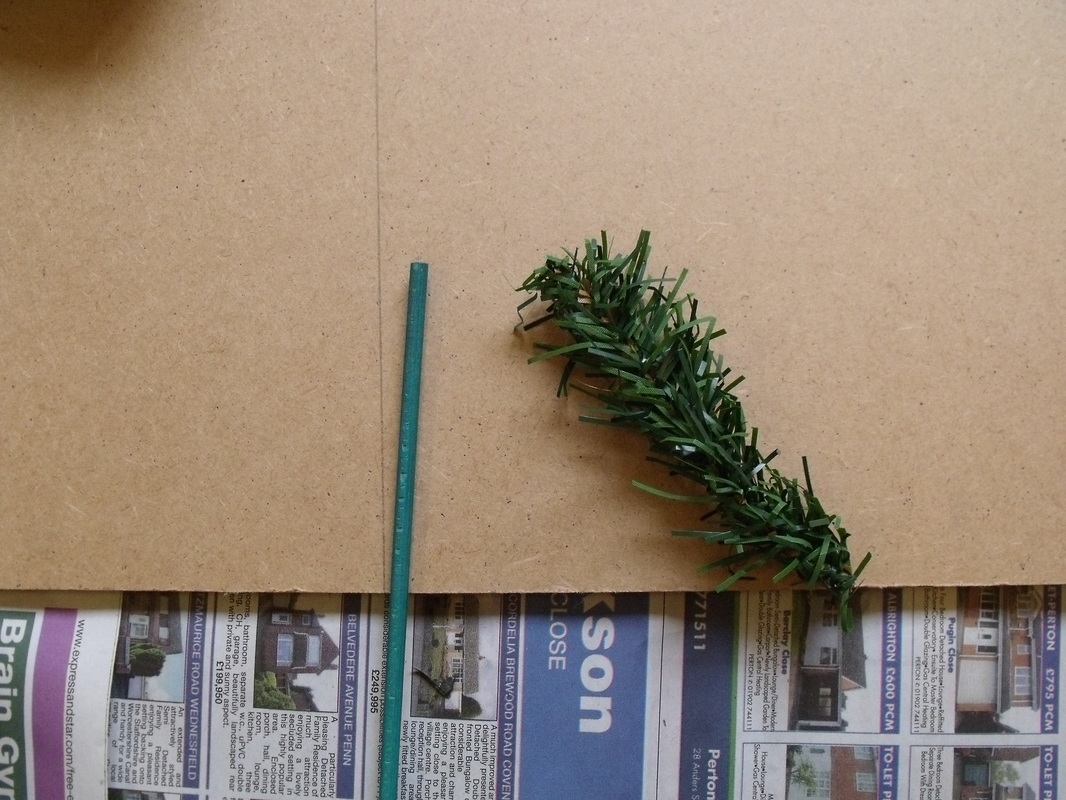
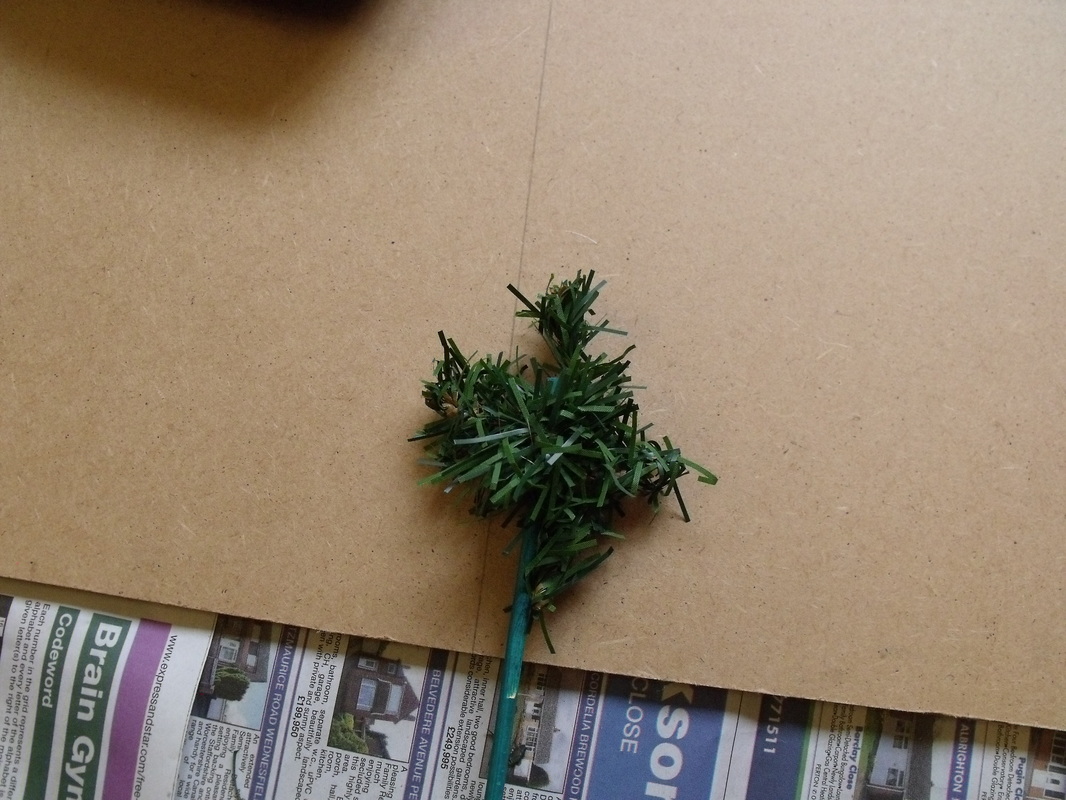
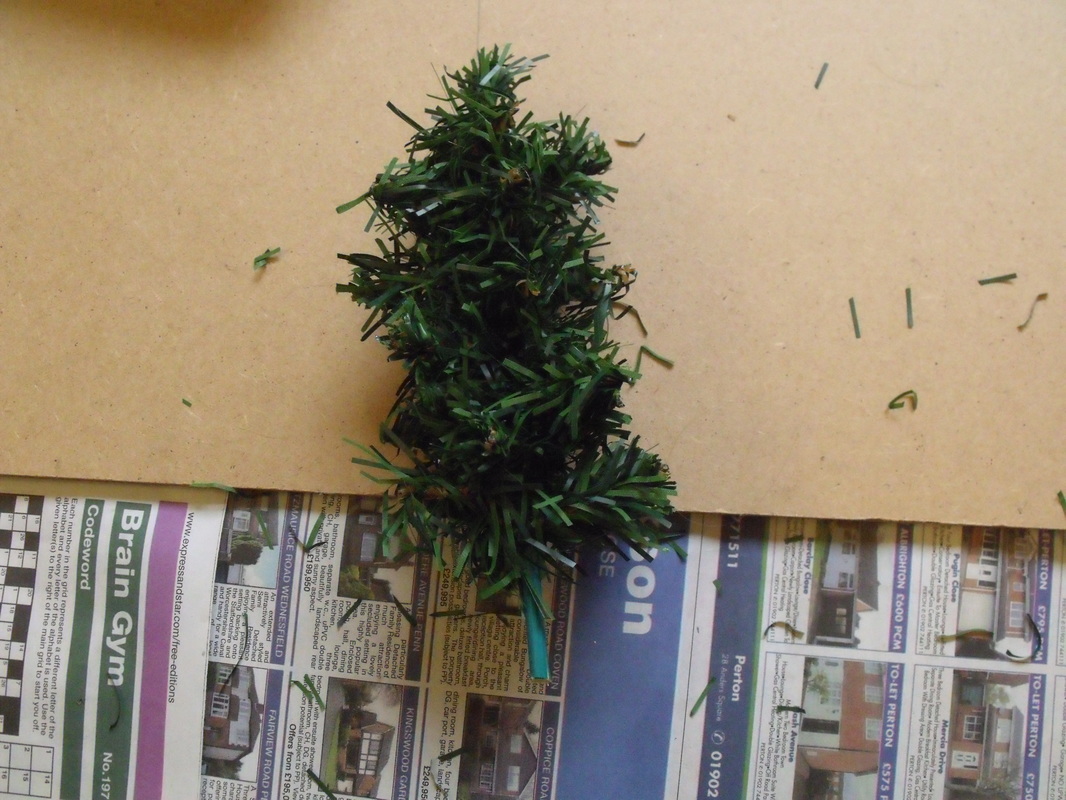
A bit of a weird title, but nonetheless quite apt when you discover the details of this posting, and without beating around the bush it's all about trees and the use of old (or even new) Christmas trees. Basically, just over three years ago I was sorting through the Xmas decorations in readiness for them being put up when I discovered one of the trees had an issue with its legs, a missing one to be exact, and as it was old I decided to throw it out and buy a new one. As is the usual way with wargamers all over the world I started looking at it wondering how to use it productively in my hobby and obviously came to the conclusion that trees could be made from this tree. Not much of a leap to be fair, but it was a leap in the right direction, so I duly set about cutting all the little branches up with my heavy duty clippers. What I ended up with was lengths of branch between 4 and 6 inches approximately and lots of them as it was a six foot high tree. The next thing was to assemble the tools and materials needed to transform these into useable model trees being: a jigsaw, drill, hot glue gun, metal ruler, paint brushes, pencil, heavy duty clippers, sharp knife, PVA glue, sandpaper, lengths of 4mm garden canes, 6mm MDF board, scatter flock and an old newspaper. 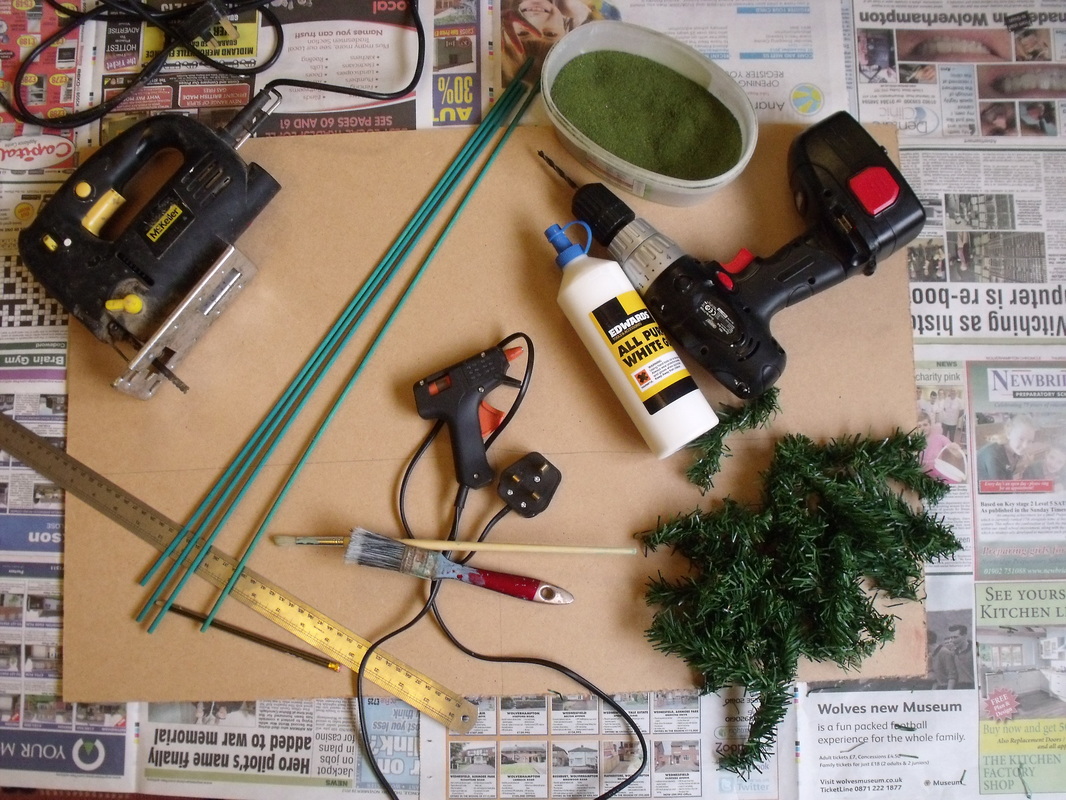 With all the tools and materials assembled I cut lengths of cane between 4 and 6 inches long, trying to vary the lengths but not have any waste from the 2 foot long lengths of cane. Once done I sorted out the lengths of branch so that I had a pile of short lengths and a pile of long lengths, this makes things much easier as you make the trees. Next I took a small length of branch and a length of cane and wrapped the branch around the cane about 1 inch from the top and then I bent one end up and one end down as per the photo's below.
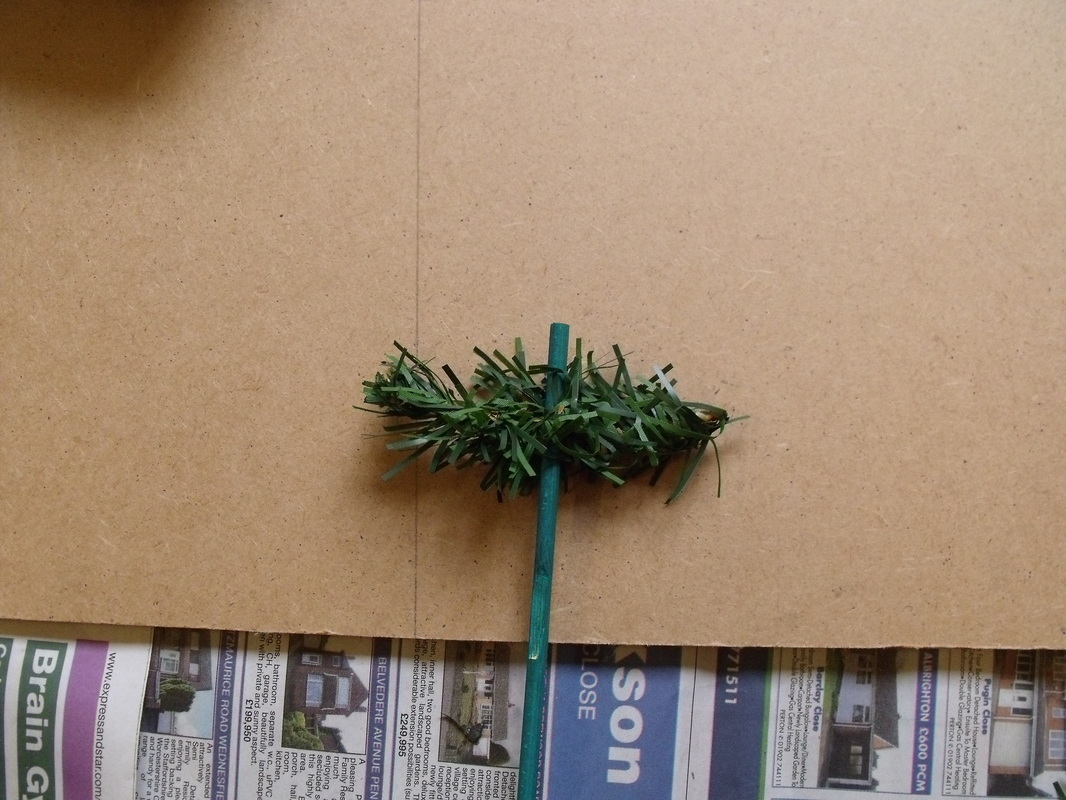
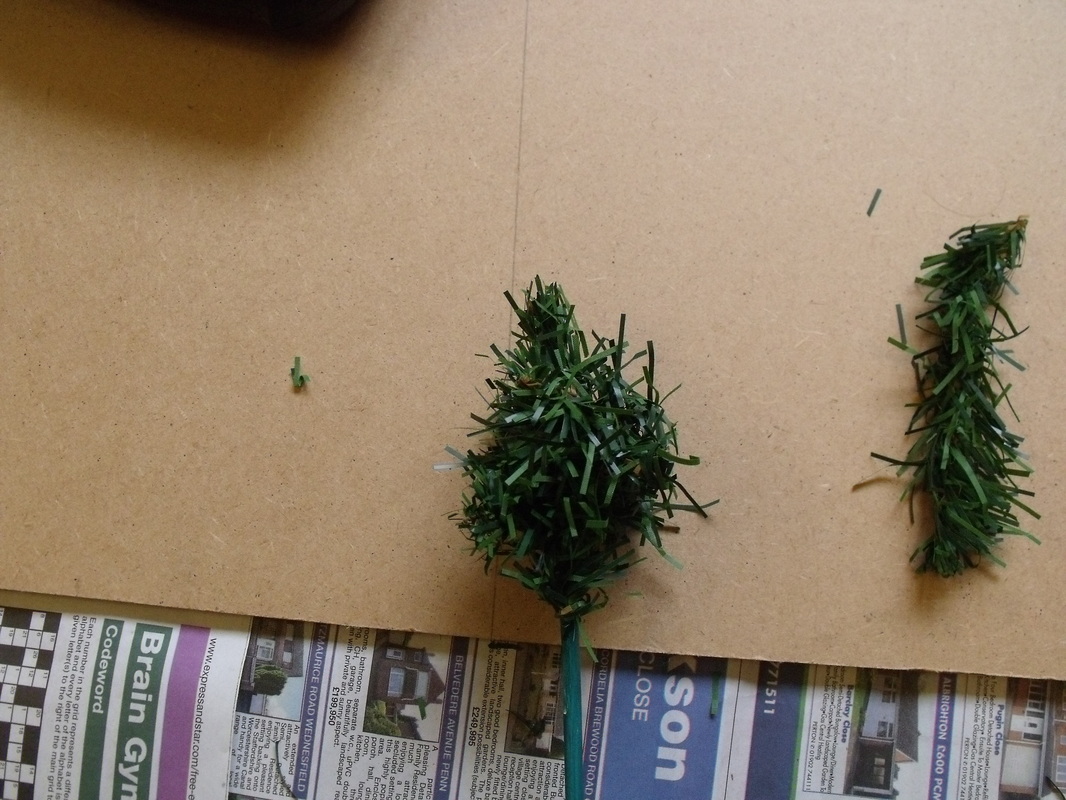
Then I took another short length and again wrapped it around the cane about half inch from the top and bent both ends of the branch slightly upwards. This was followed by another short length wrapped just below and this time its branch ends were left facing at right angles to the first ones and bent slightly up. At this stage I had the top of the tree done so I took another short length and placed it parallel to the trunk overlapping what was left of the first piece of branch going down the trunk. I took another piece of branch and wrapped it around the trunk securing the trunk piece again bending the branch ends slightly upwards. At this stage there was no glue involved as the branches held each other in place, again the photo's below help explain the procedure.
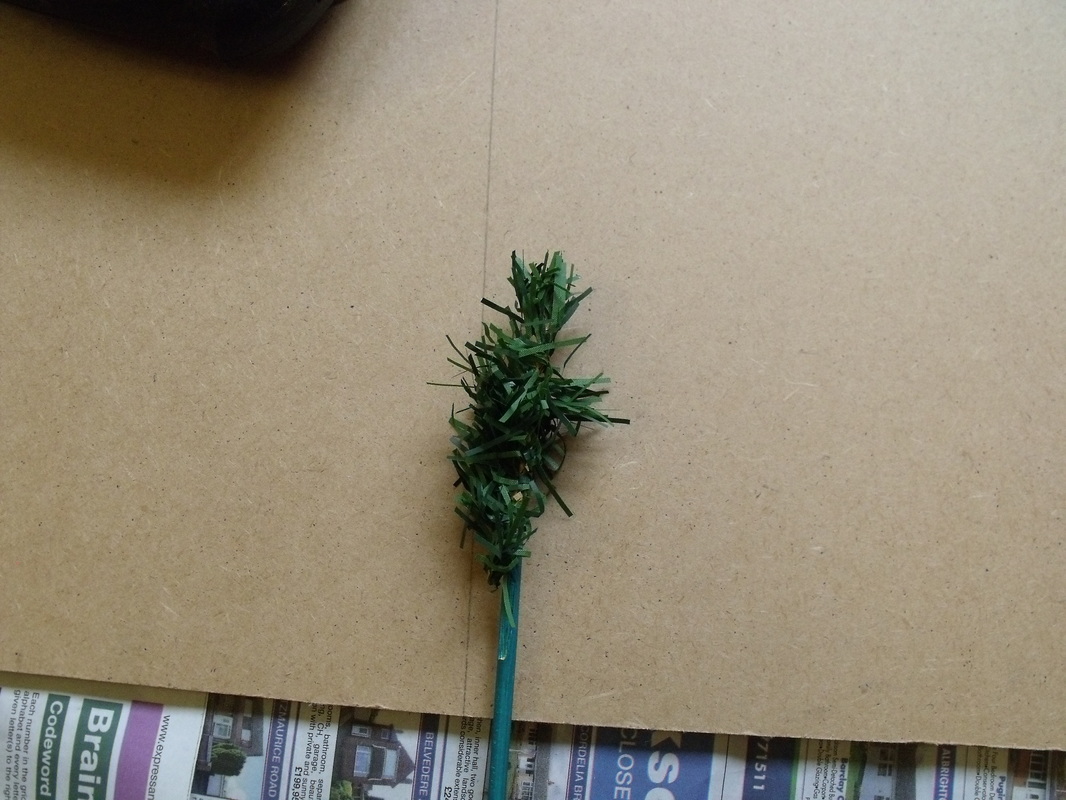
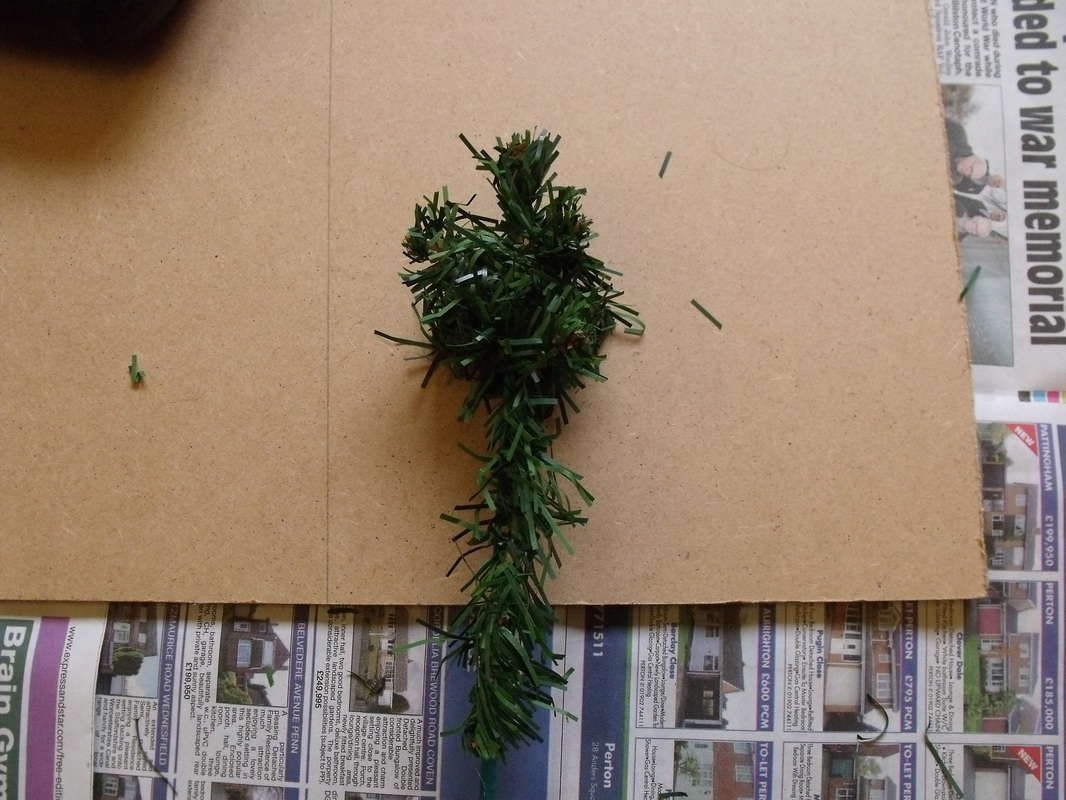
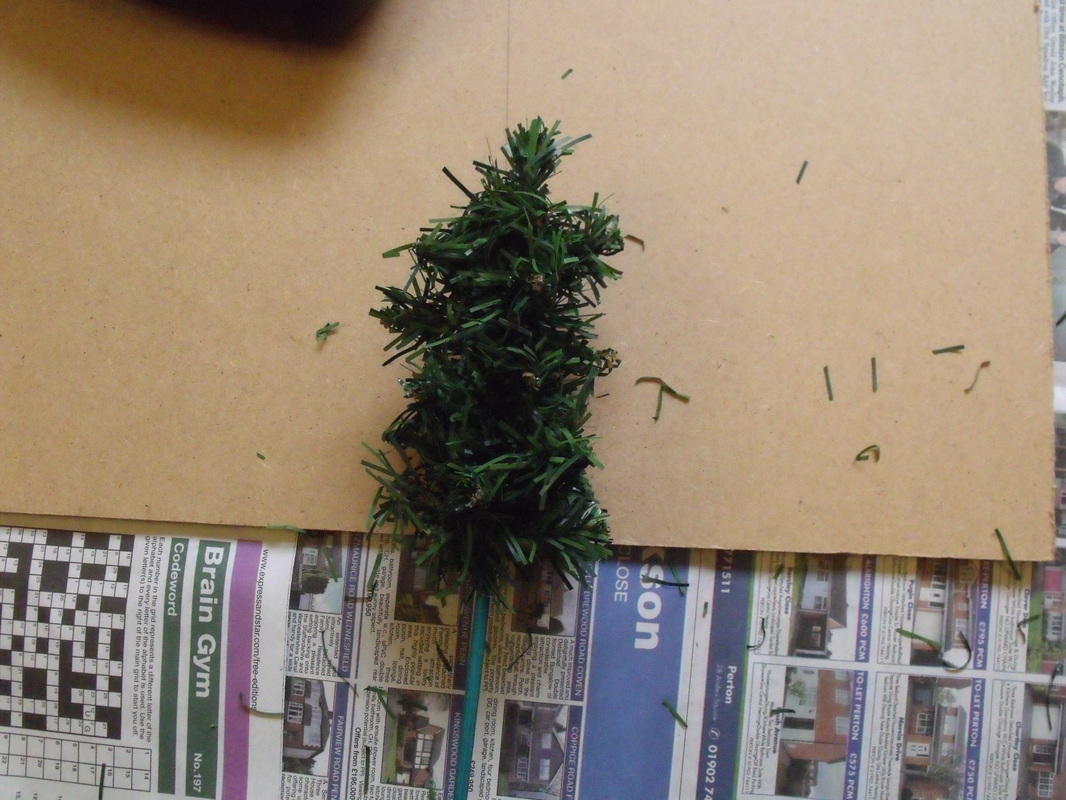
So, I carried on down the trunk adding new branches at about three quarter inch intervals until I had enough left to look like a lower trunk. This I repeated until all of the branches were used up.
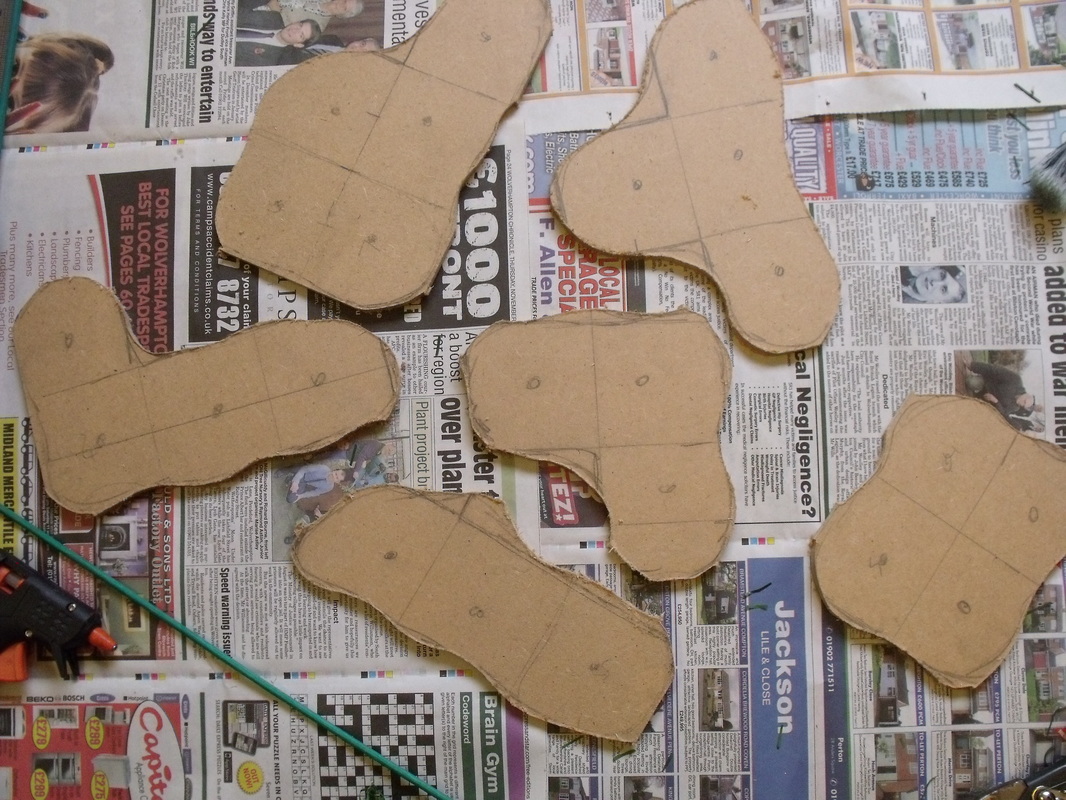
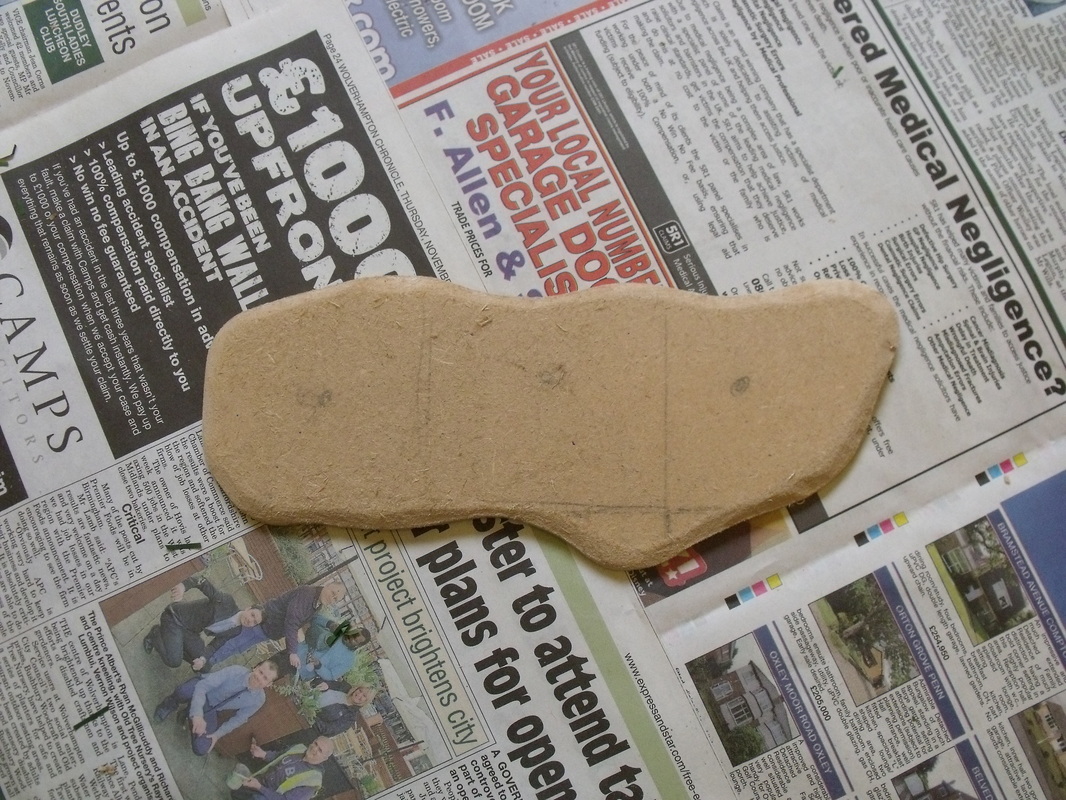
With the trees made I decided to make bases, now these could be single grouped, removable or done in any way I wanted but I decided to go for groups of between 3 and five trees. I simply took my MDF and marked a 3 inch grid in pencil, after which I marked a circle roughly at the centre of each grid square. Then I marked on the shape of each group of trees rounding off edges and making the group shapes look more organic. Once done and happy with the configuration I took the jigsaw and cut them out, trimming off any unwanted bits. With a sharp knife and sandpaper I bevelled the edges of the bases and and sanded them until they looked nice and neat.
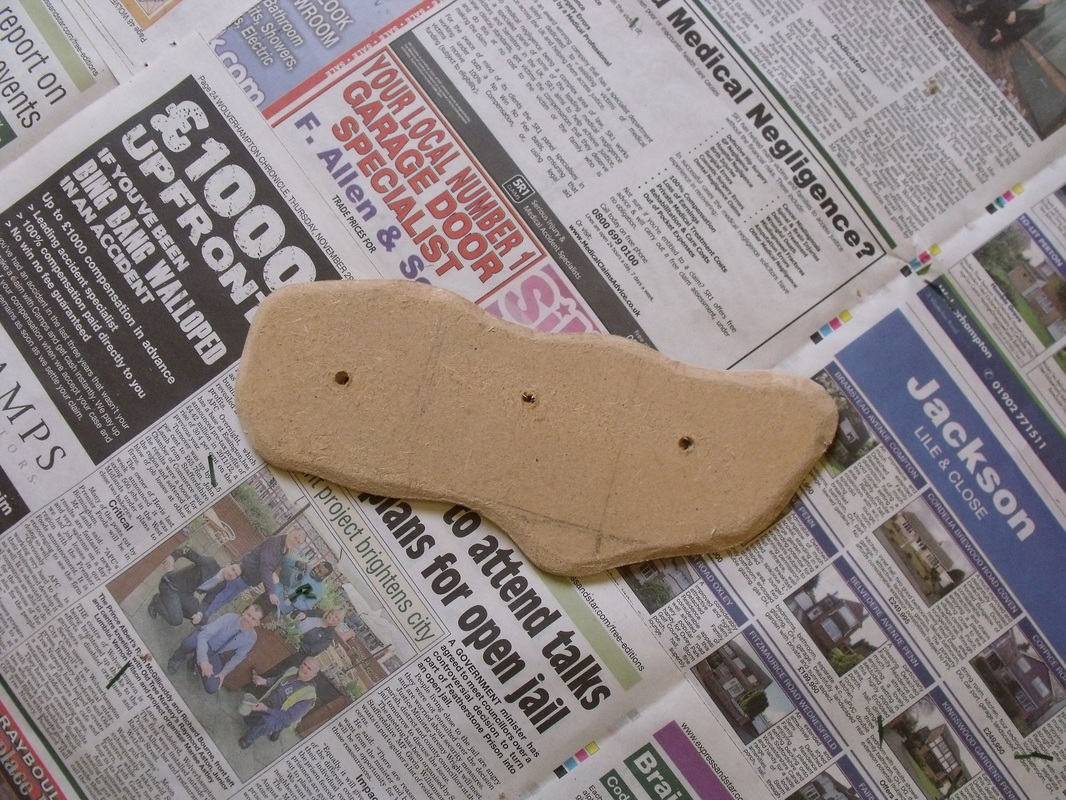
I took each base and drilled out an hole as marked at the rough centre of each grid box and lightly sanded them to take off any burrs. with the bases totally ready I started gluing the trees in place with my hot glue gun, making sure the bottoms of the holes were well filled with glue and any extra trimmed off with my knife.
At this stage I had 53 trees each between 5 to 8 inches tall all ready to be flocked. Now this could be done with spray glue and flock, but I used PVA glue and a paint brush, which to be fair was quite quick and easy to do especially as the trees were on bases. The PVA also glues the trees to each other which helps to strengthen them. The last thing to do was to texture the bases and that was it, 53 very large trees for the price of an old Xmas tree and some pretty cheap materials.
As you can see in the photo's above the trees are pretty large and imposing and look far more natural than perfectly shaped bottle brush trees. As for getting trees, now is a great time of the year to shop for such things, and I do happen to know that on ebay you can get them for less than £15.00 including postage. Also look out for them being sold off cheap after Xmas at various shops.
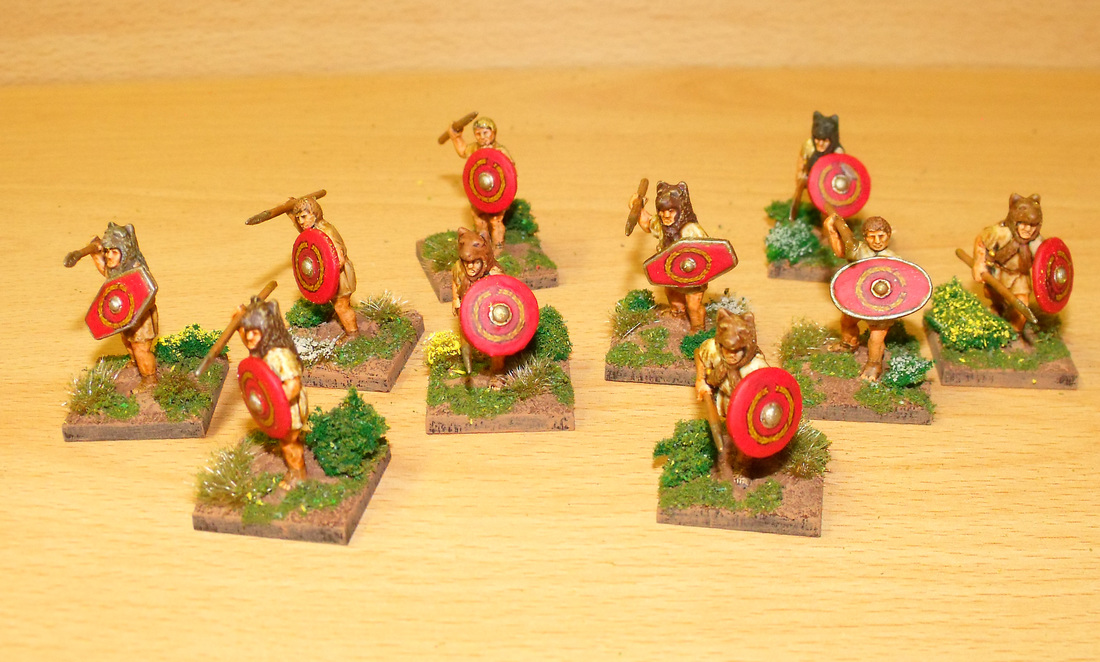
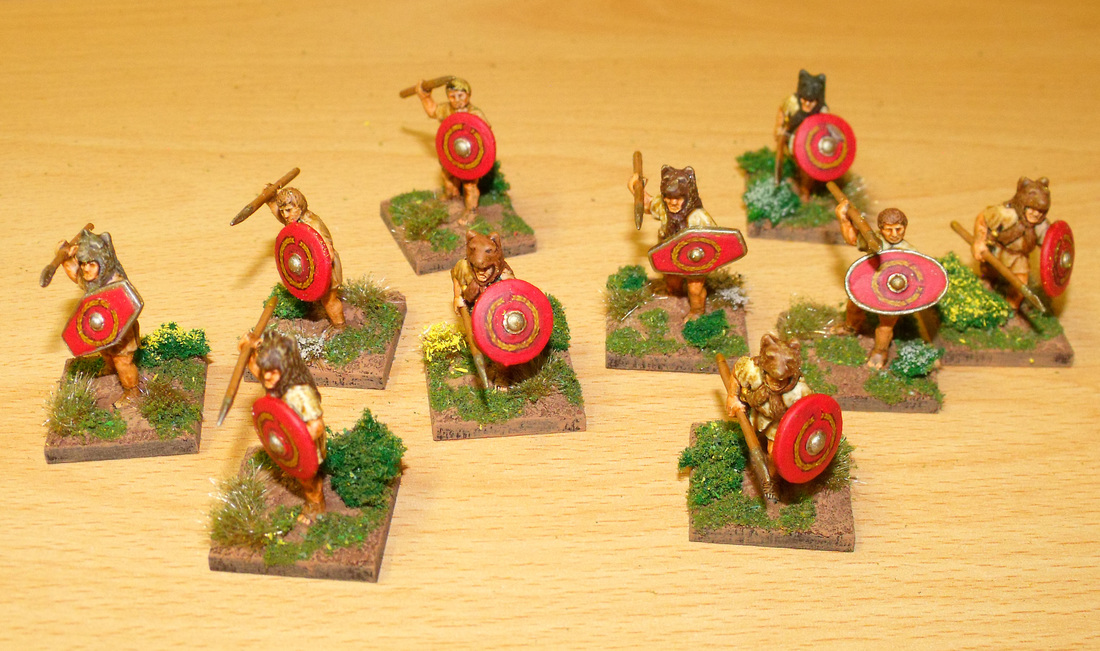
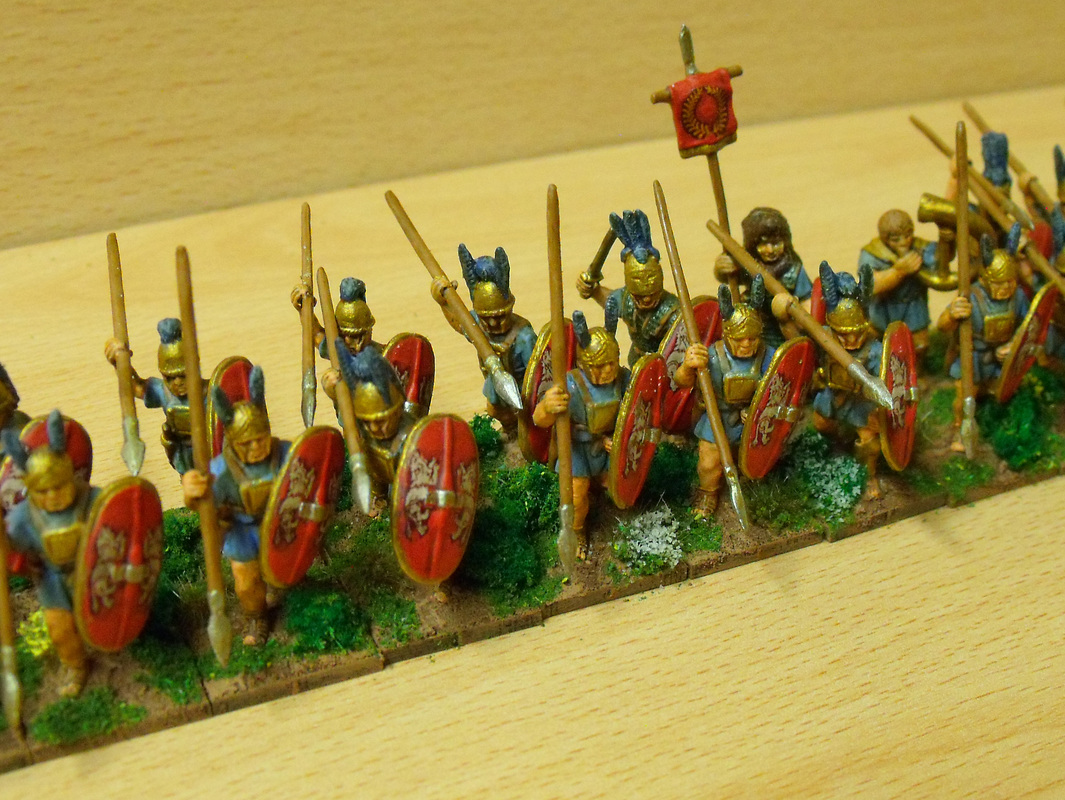
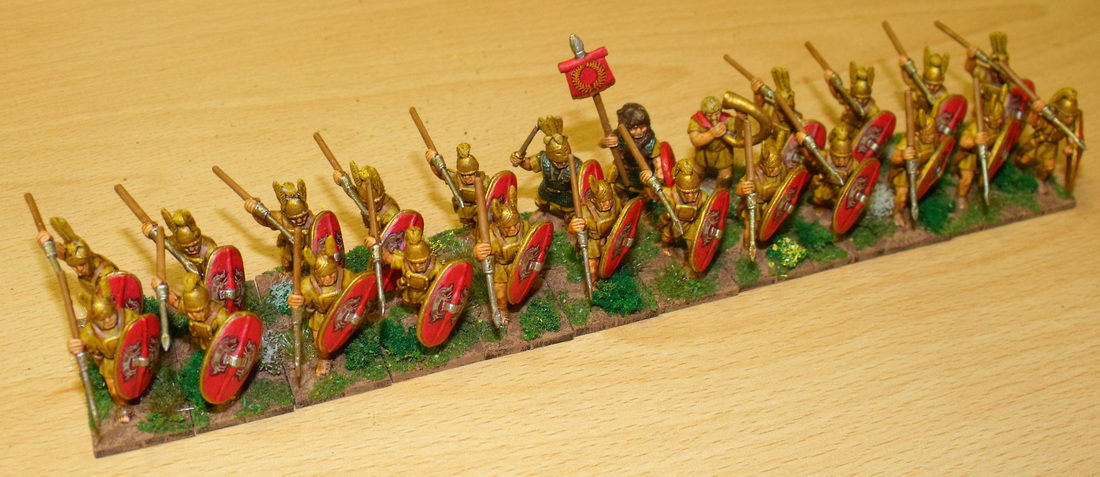
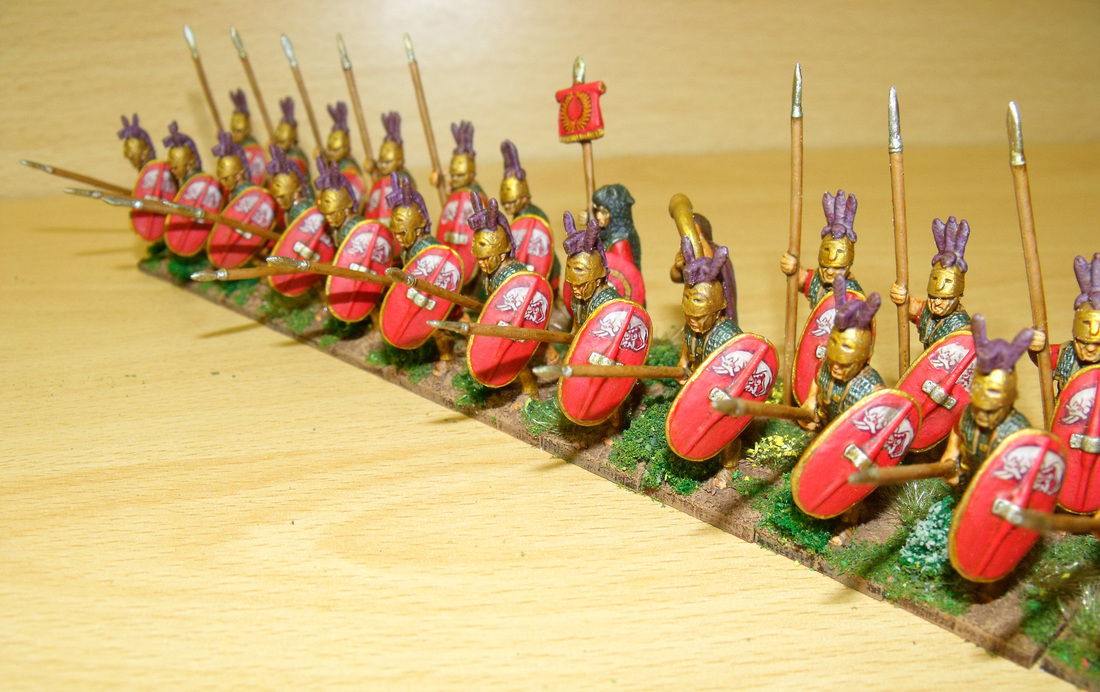
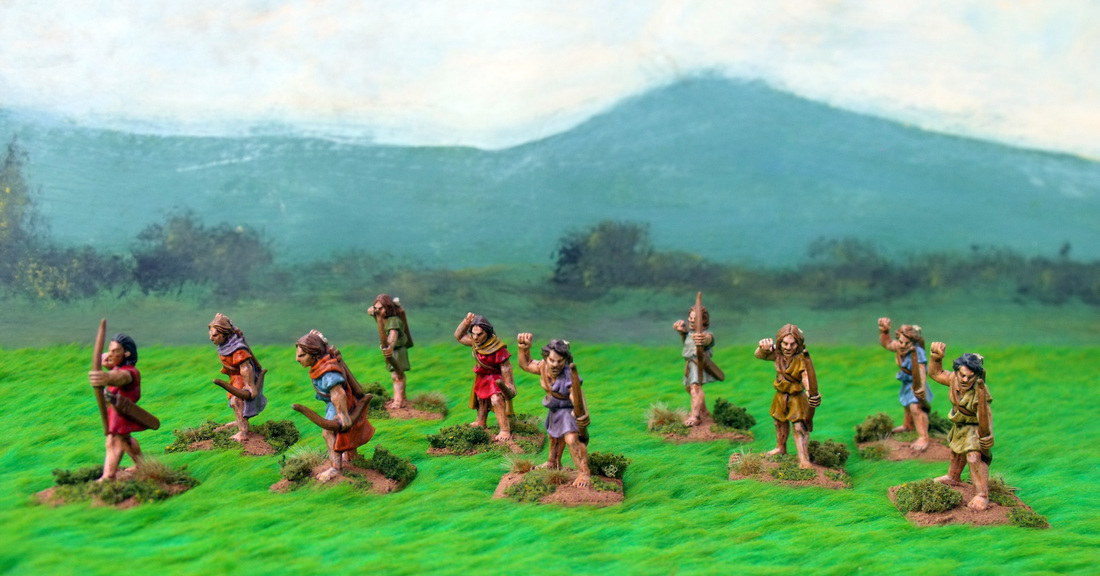
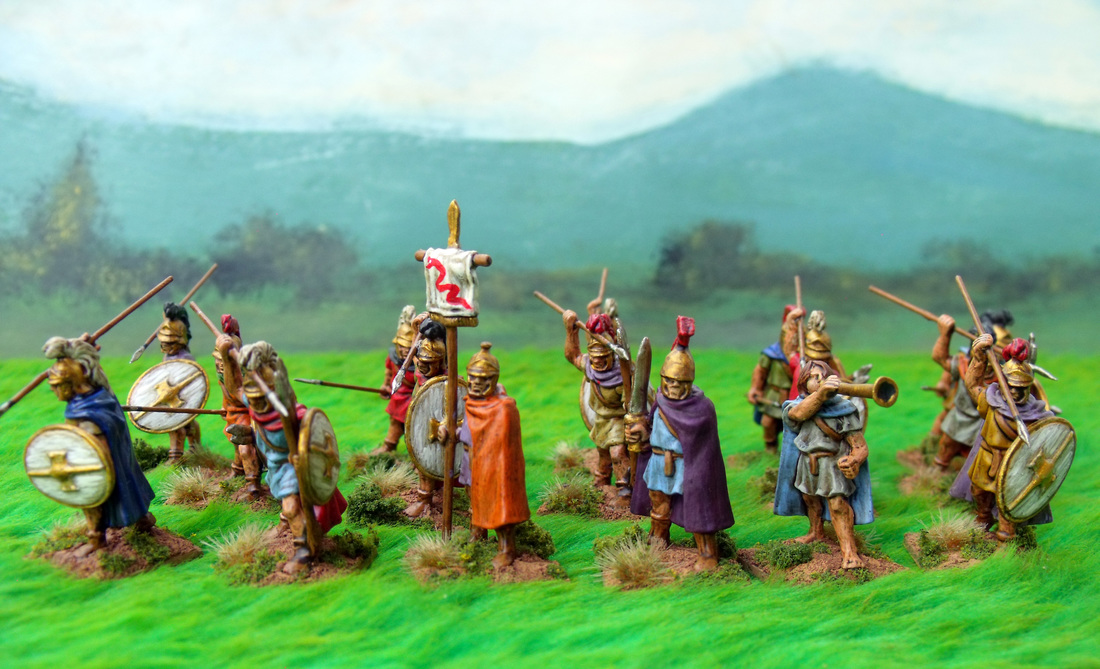
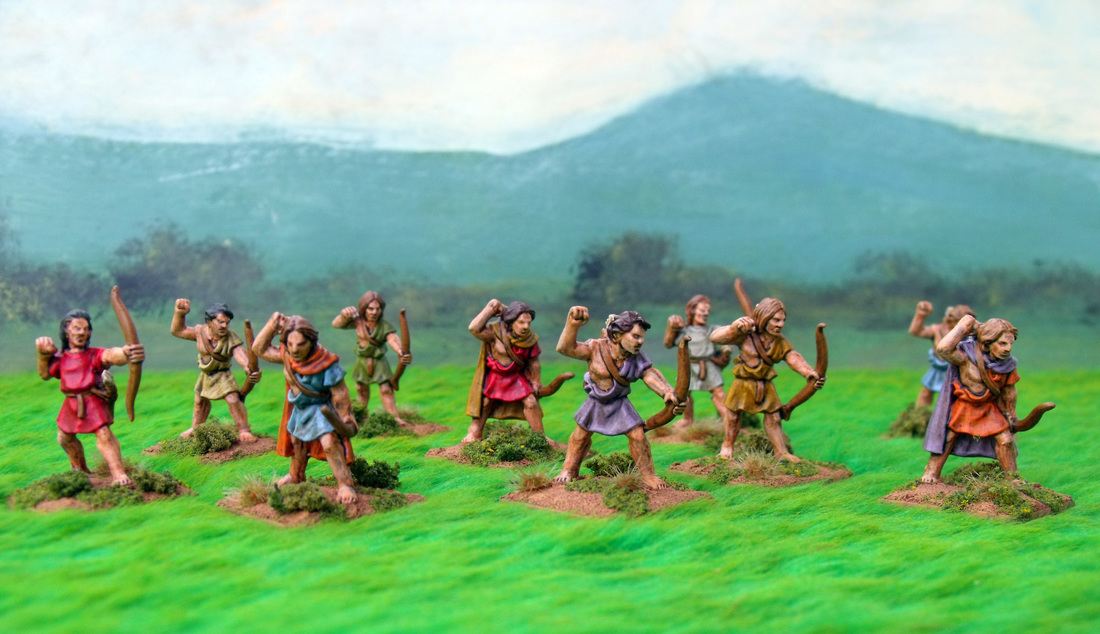
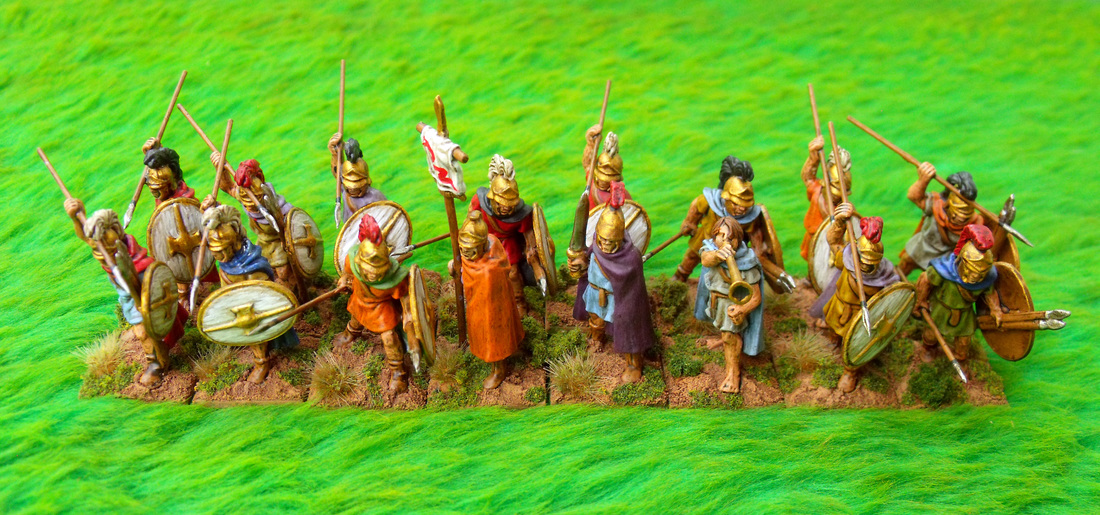
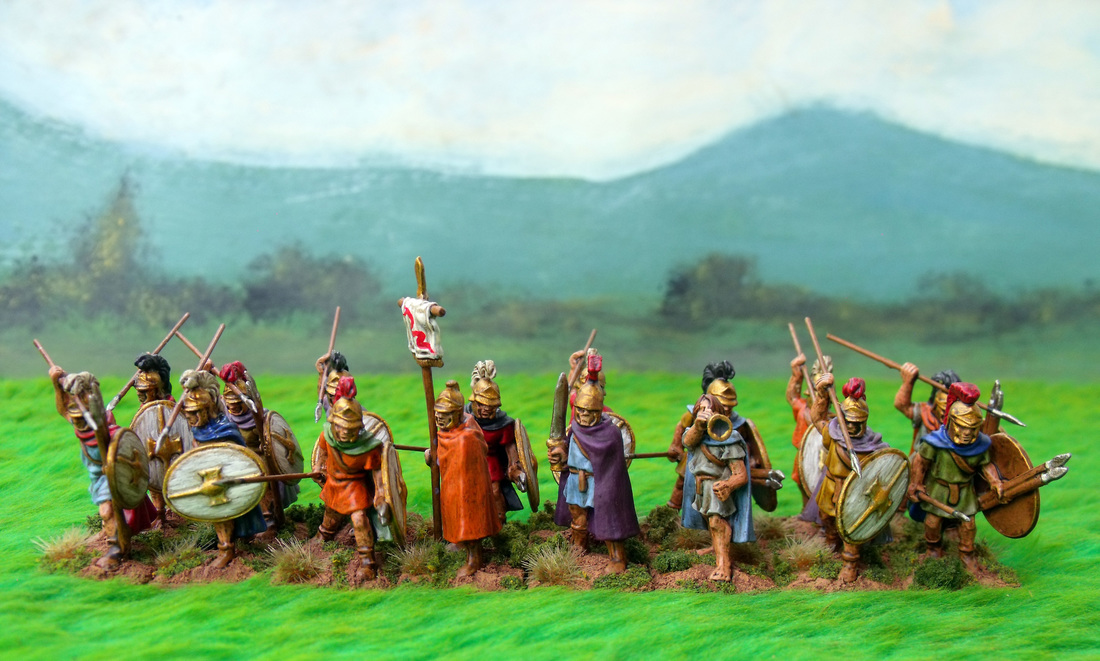
These are some Republican Romans I was commissioned to paint earlier this year. The make of figure is Newline Designs and although I wasn't overly struck by them at first I have to admit that they painted up really well.
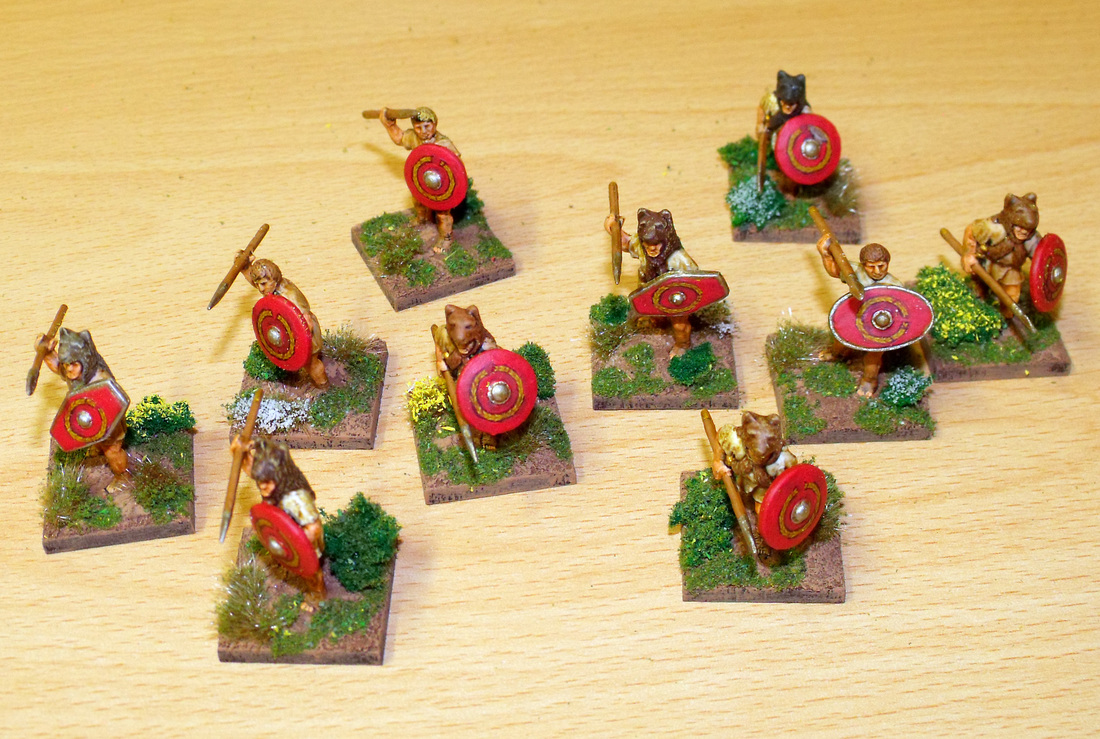
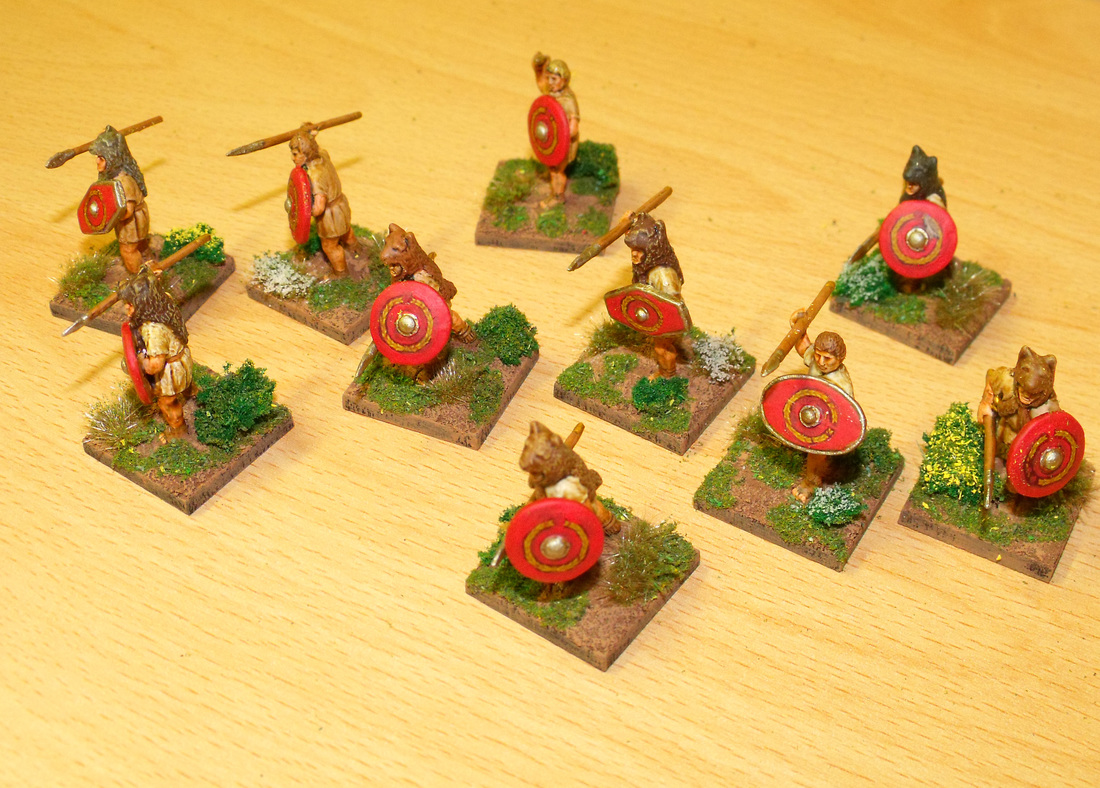
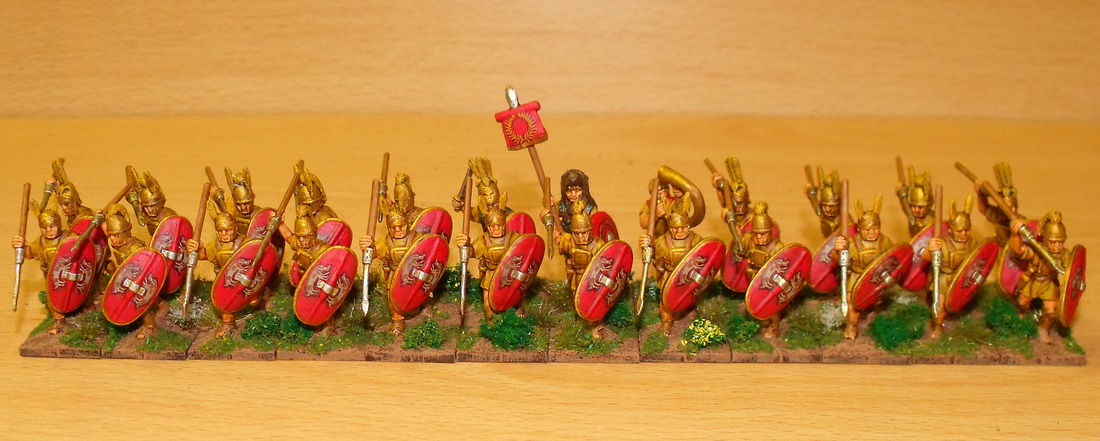
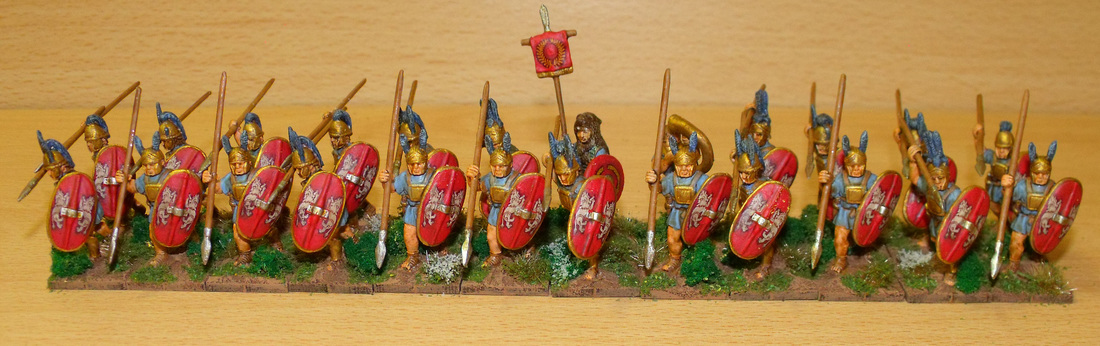
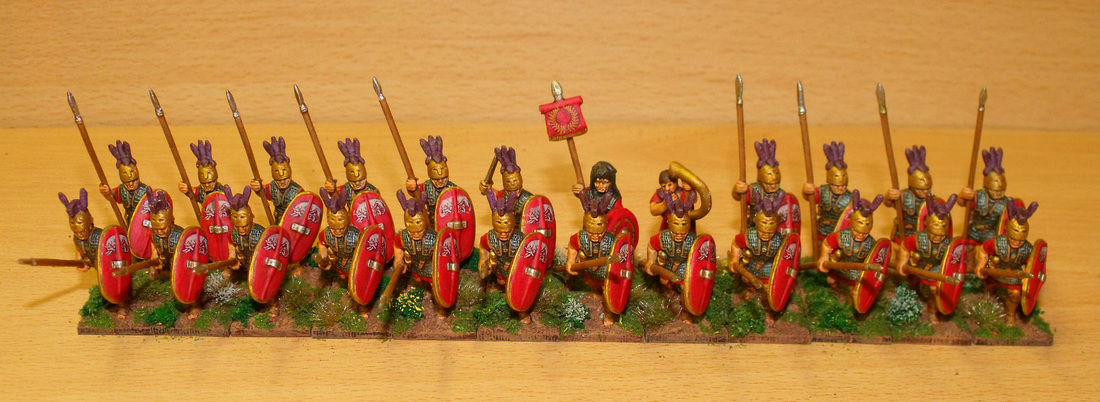
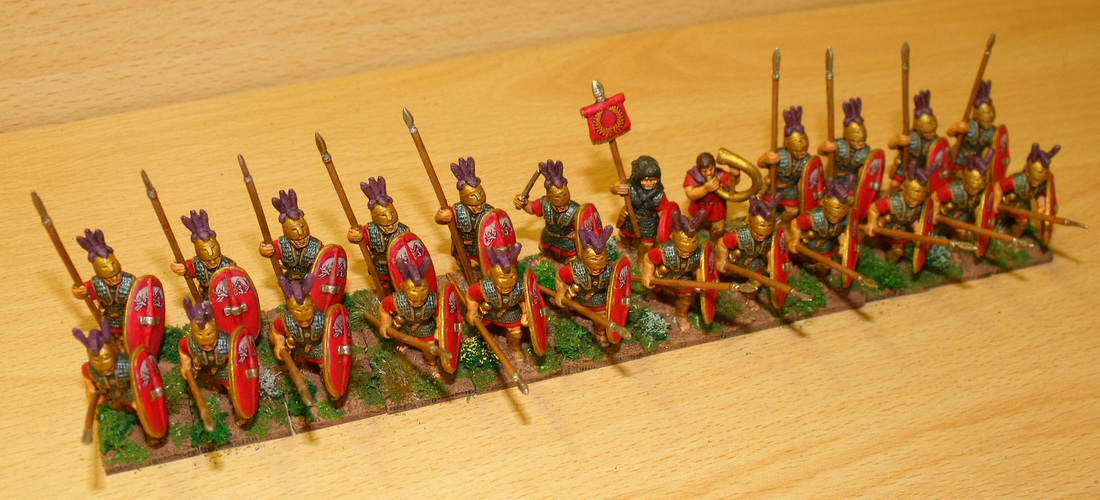
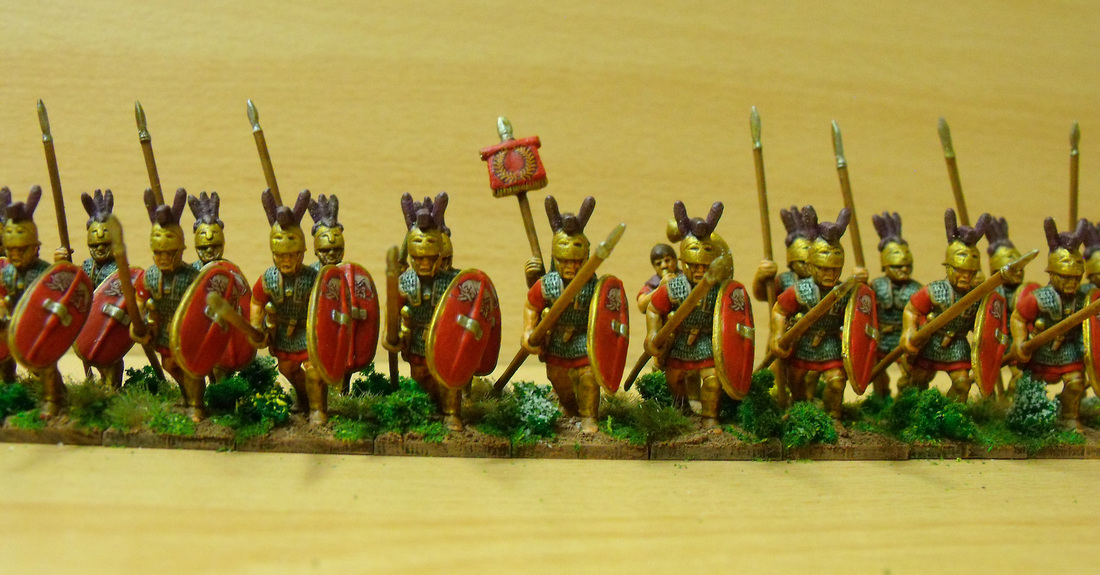
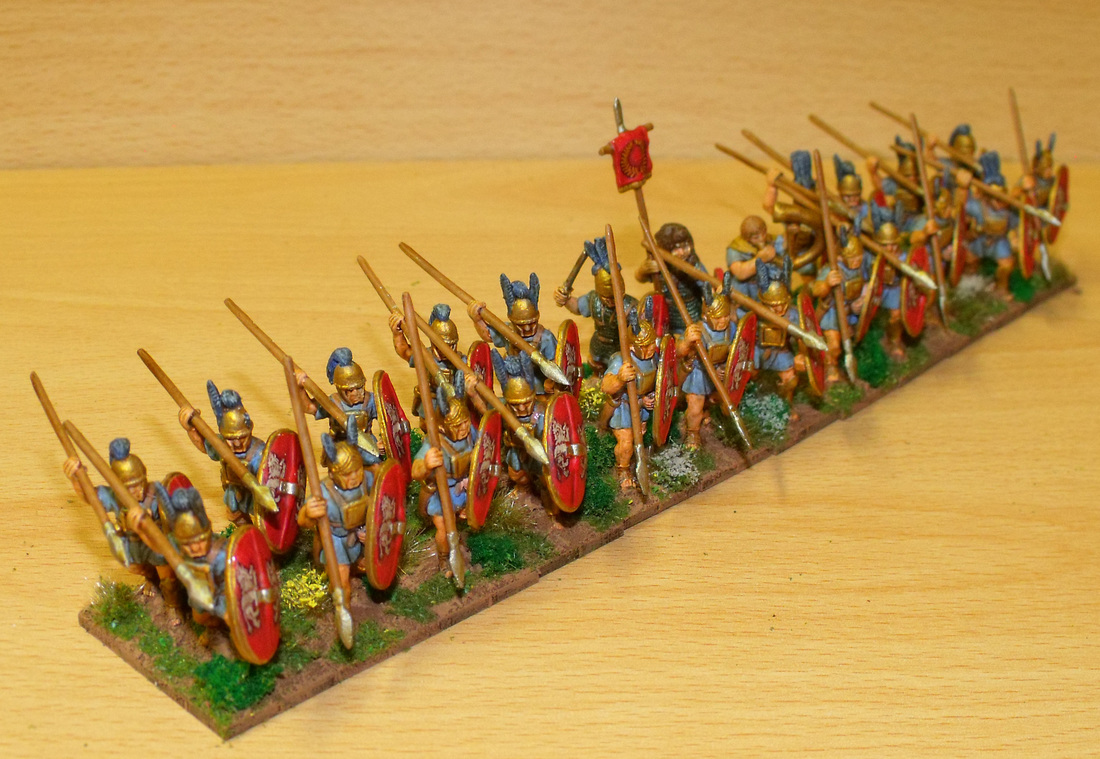
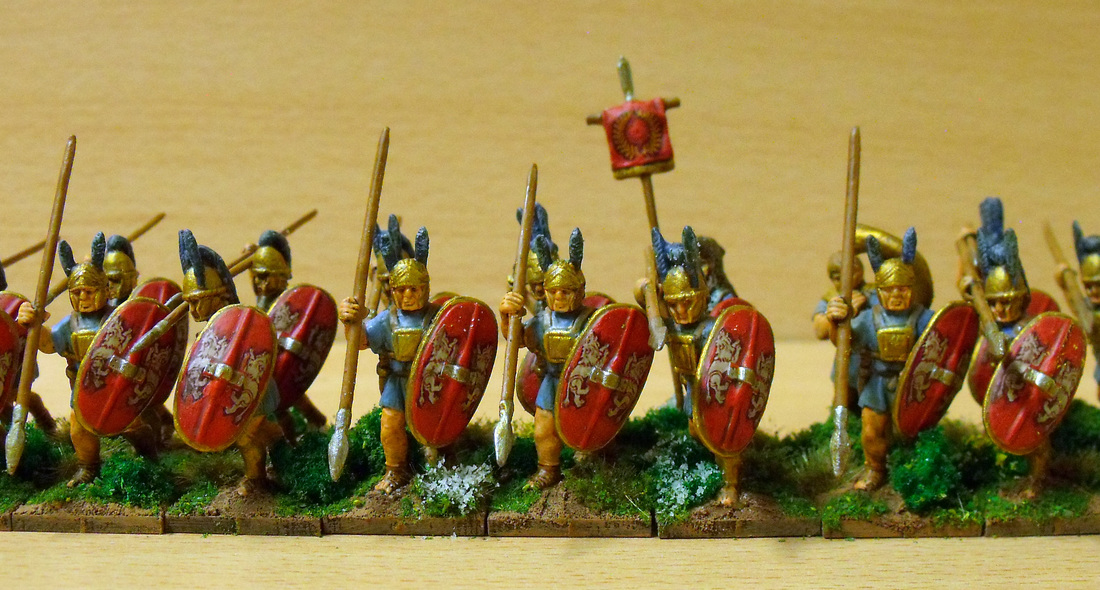
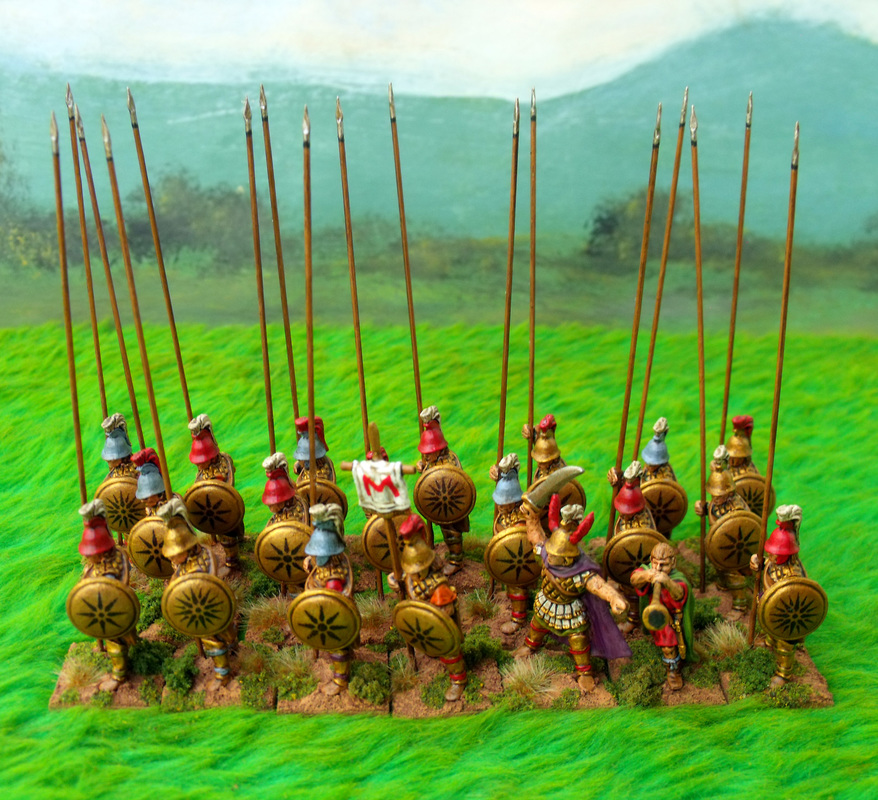
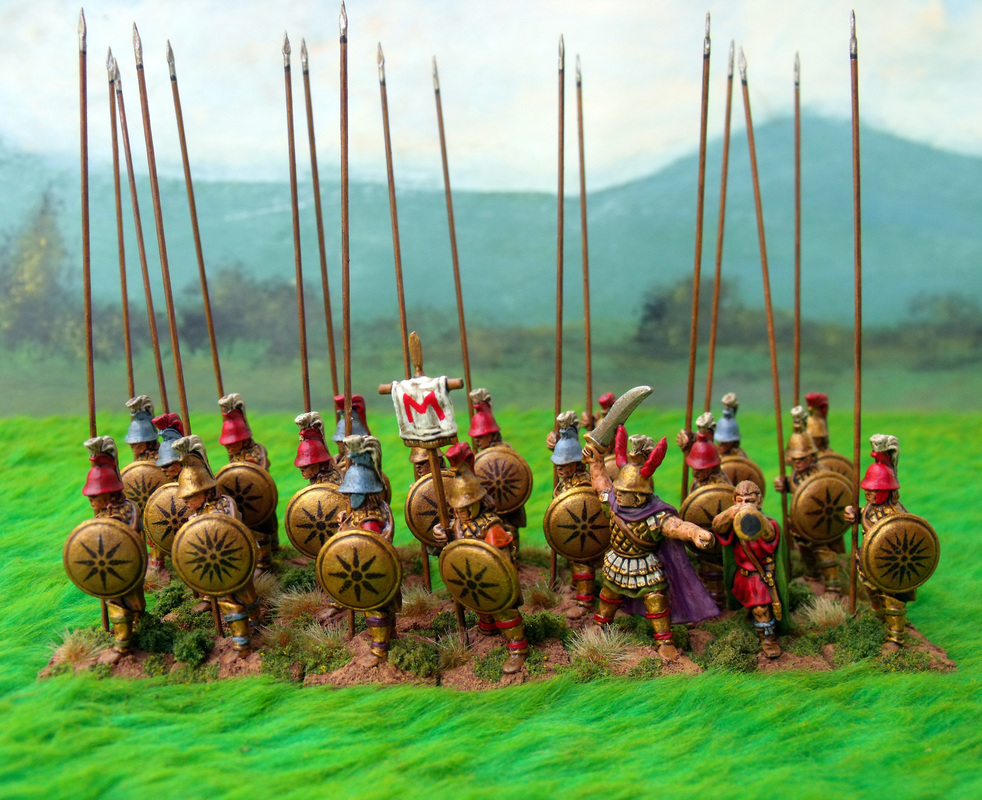
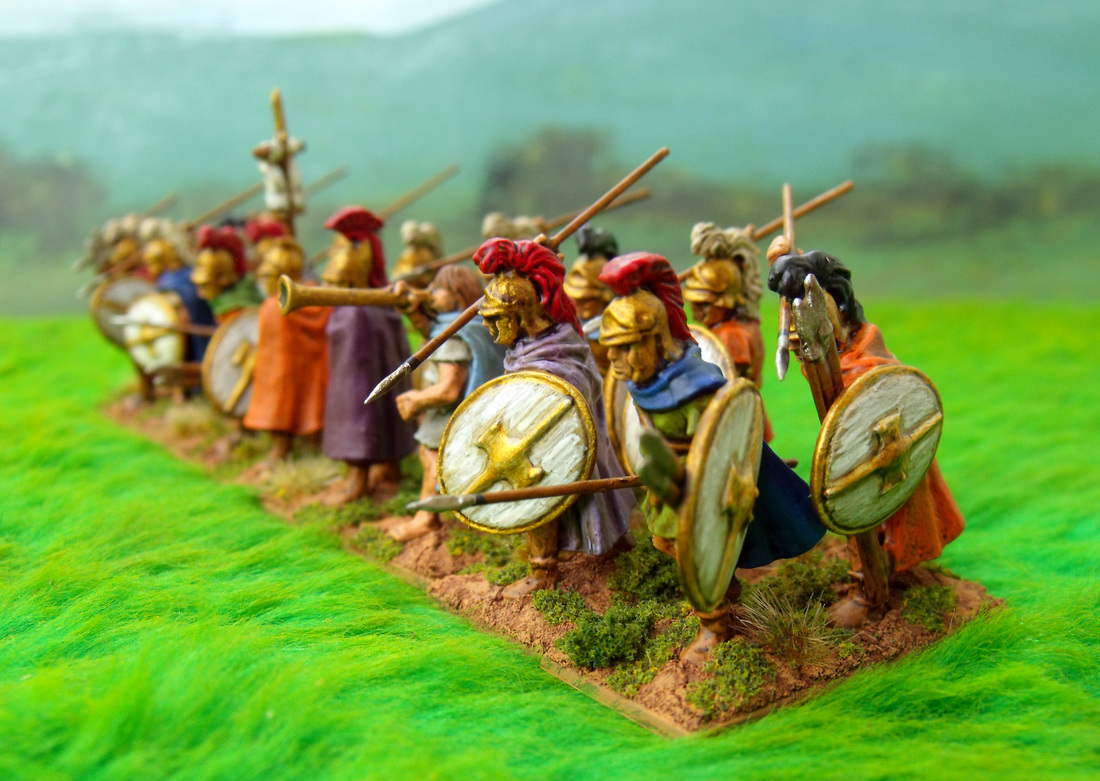
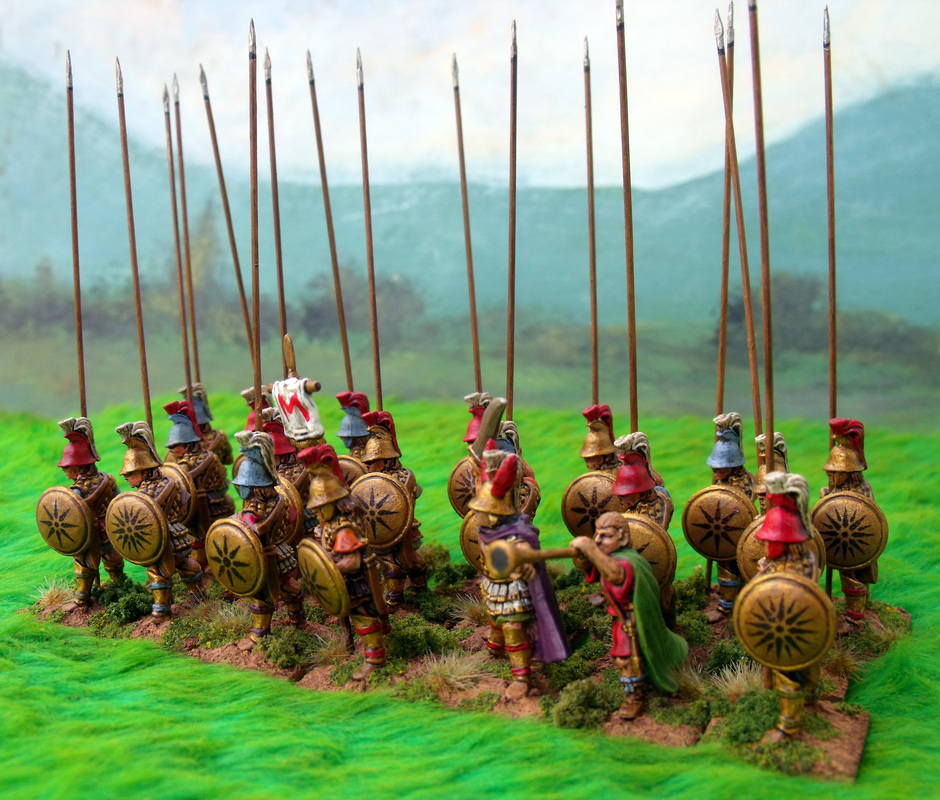
These are some figures that I recently painted and actually totally enjoyed doing. They are Gripping Beast figures and if you look really closely you will see Sean Bean blowing a horn in the front rank of the Phalangites.
|
AuthorStephen Wylde BA (hons) Archives
April 2020
Categories
All
|


 RSS Feed