
WARGAMES DESIGNS BLOG
|
|
THE BLOG FOR ALL THE OTHER WARGAMES STUFF THAT I DO
|
|
|
|
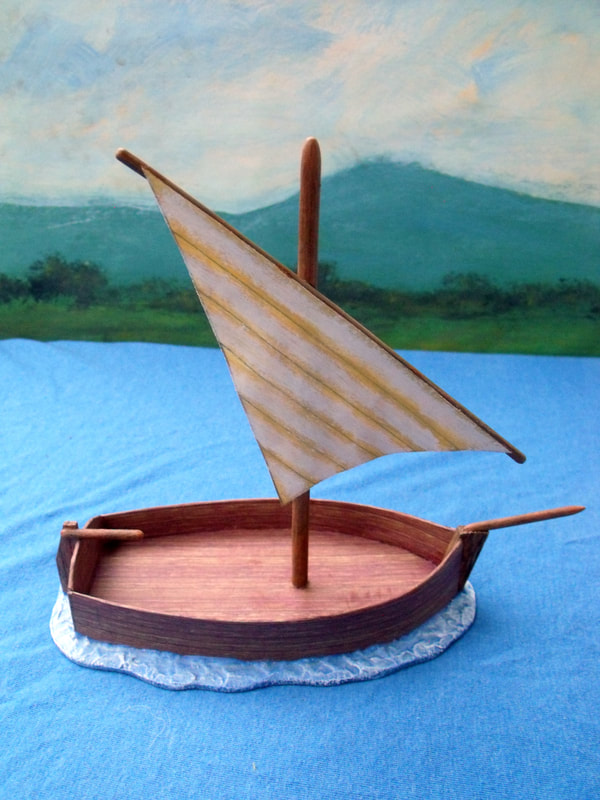
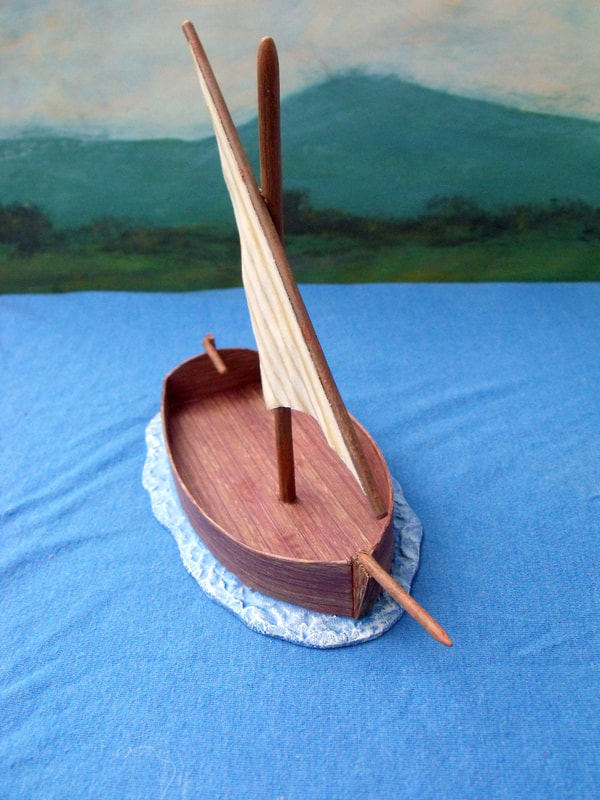
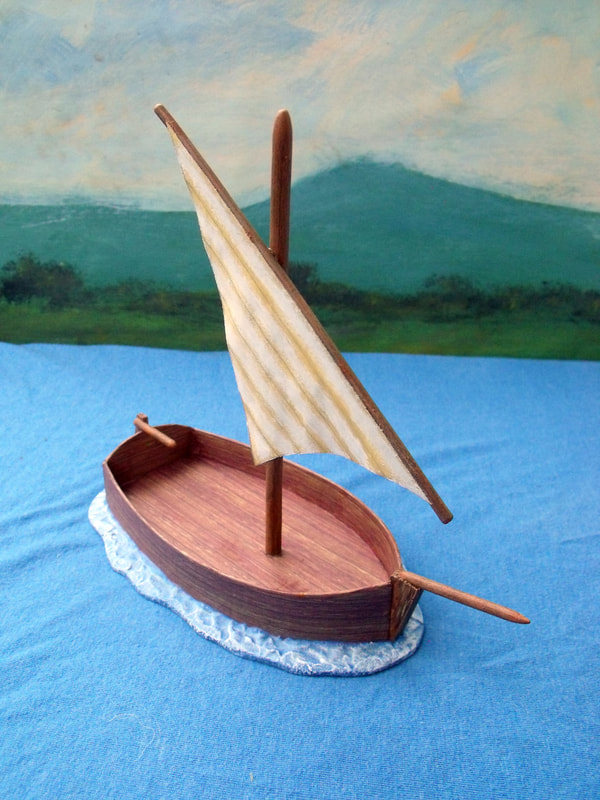
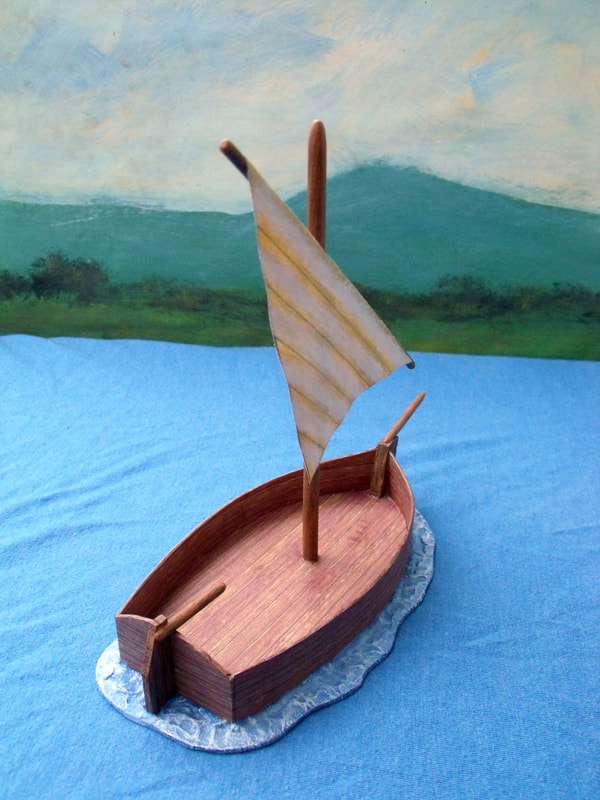
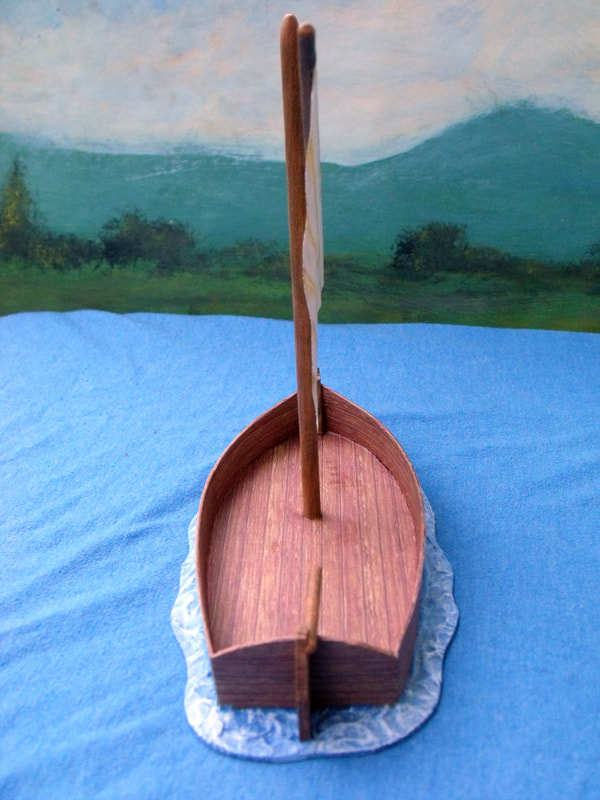
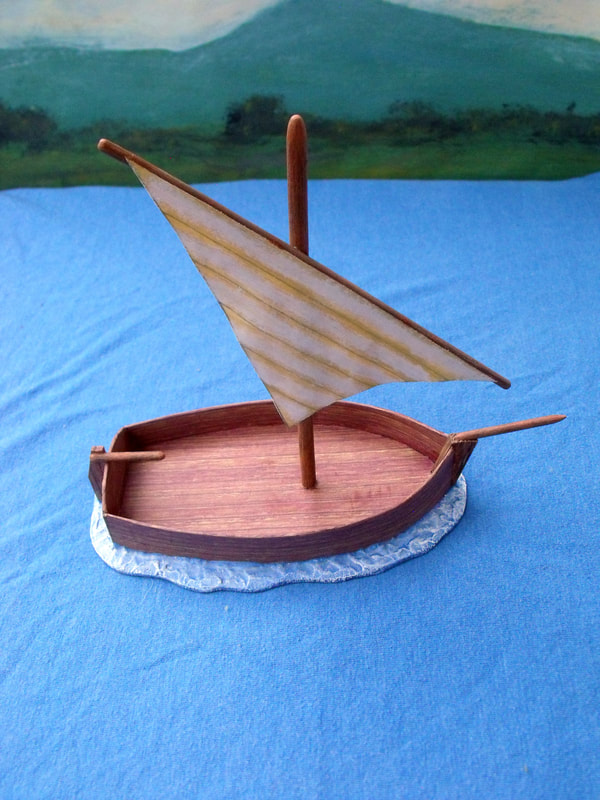
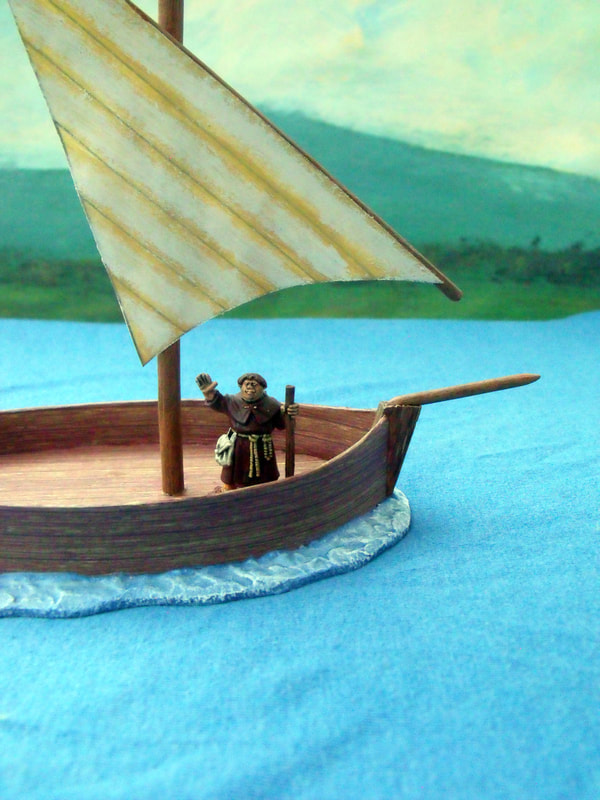
I made this small Pirate boat for my buddy Nick so that he could sail his brave band of adventurers to the Ghost Archipelago in the not too distant future, where he could have many a happy time hunting for treasure and fighting monsters. I had an idea of what I wanted to make which was a ships longboat much in the style of ones I had seen in many a pirate movie and in particular one I had seen in a wargames magazine many years ago. I did actually find plans to the pirate ship and longboat from the wargames magazine and whilst the ship itself is a lovely piece I felt that the longboat was somewhat lacking and not well shaped. I still took inspiration from the way it was built and decided to make it more shapely and then drew out the templates for this. With the templates made which I saw as future proofing for when I want to make more of these, I decided to draw around them onto thin cereal packet card to make two sets each of side walls and stern. The deck of the boat was made from 5mm foamboard and the prow made from 5mm balsa wood. So I had a total of 8 pieces for my model being for side pieces, 2 stern pieces, 1 deck and 1 prow, an easy build. The first job was to glue the prow to the deck of the boat and once dried I cut a 5mm strips of double sided tape which I attached all the way around the side of the deck. I then took one of the side pieces and with some super glue along the front inside edge that made contact with the prow I pressed the whole piece into place until the glue has set. The other side piece followed and then the stern piece, which was glued to the rear edges of the side pieces with super glue. Once all the glue was fully dry I decided to attach the second set of side and stern pieces to the boat to add thickness and strength to the boat, this was done by attaching double sided to each new piece and pressing the pieces into place and again using superglue on the edges. Next job was to cover the whole piece with one of my handy wallpapers which I had made to simulate wood planking, which was done in a few minutes and it was at this time that I thought that the prow should have been covered or painted first. Anyway it was too late now, so I allowed the whole piece to dry out thoroughly and once dry I painted the prow to match with the rest of the boat. So now the boat was built, or so I thought and I decided to make a base which was to add some waves and also weight to the piece so I cut an irregular shaped base out of vinyl tile and put it to one side for later use. This led to me think that the boat needed a sail, so I made a mast out of 6mm dowel and a yardarm for a lateen rigged sail out of 3mm dowel. These were painted and the mast fixed into place by poking a hole through the deck in the place I wanted the mast and glued it into place with PVA glue. With the mast in place and the yardarm offered up to where I wanted to later attach it I realised that the boat needed a bowsprit and a rudder. The bowsprit was cut out of 3mm dowel and painted to match the mast and glued in place on top of the prow with super glue, and the rudder was made from 3mm balsa wood which which was glued in place and painted to match the plank effect sides. A rudder arm was made from 3mm dowel and painted to match the mast and glued to the rudder with super glue. With the construction almost complete I glued the boat to the base and left it to dry while I tackled the sail. Funnily enough and most coincidentally the lateen sail on the original plans from the pirate ship from the magazine was exactly the right size for what I wanted and so I printed out a copy and simply cut it out and painted it cream with white highlights. Once dry I ran a bead of superglue along the top edge and offered up the yardarm and pressed it into placeand once dry I attached it to the mast in a position I felt looked good. The next job was the sea effect which was simply ready mixed filler applied to the base to make choppy little waves, something I used to do years ago when I owned a fleet of WW2 micro ships, this was left to thoroughly dry out on a totally flat surface. The sea was painted a darkish blue and again left to dry thoroughly as I had to thin the paint so it would carry into all the nooks and crannies of the choppy surface. the next thing was to paint over the dark blue with a nice mid blue allowing a little of the darker blue to creep through in places and finally a few minutes later I dry brushed some white over the waves to complete the painting. The boat was left to dry out for a few hours and then I varnished it all with a coat of matt acrylic varnish and left to dry out again. At this stage I decided I did not was to rig the boat as it would only get in the way when playing a game with clumsy hands putting figures in and out of the boat. The only thing left to do was varnish the sea with some gloss varnish which Nick decided he would do himself at a later date. So that was it, a simple relatively easy to build model boat which cost pennies to make and looks really nice on the table top and it carries a crew of 8 if they are on 25mm circular bases.
0 Comments
|
AuthorStephen Wylde BA (hons) Archives
April 2020
Categories
All
|

 RSS Feed