
WARGAMES DESIGNS BLOG
|
|
THE BLOG FOR ALL THE OTHER WARGAMES STUFF THAT I DO
|
|
|
|
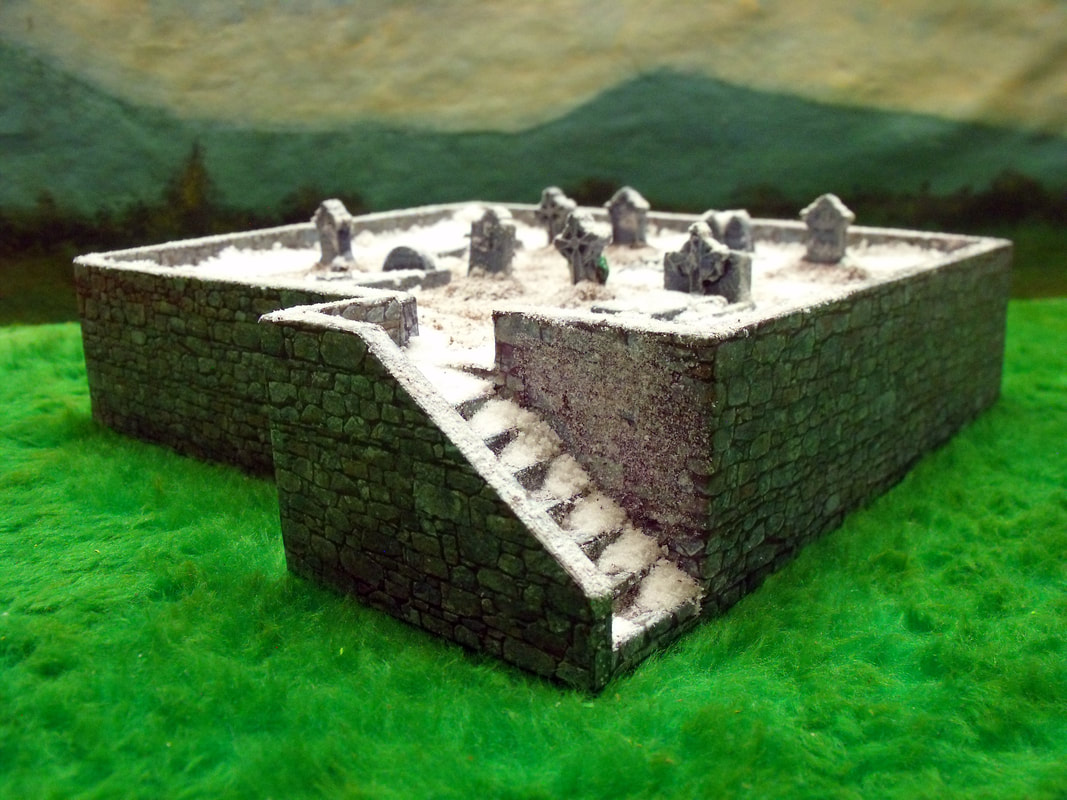
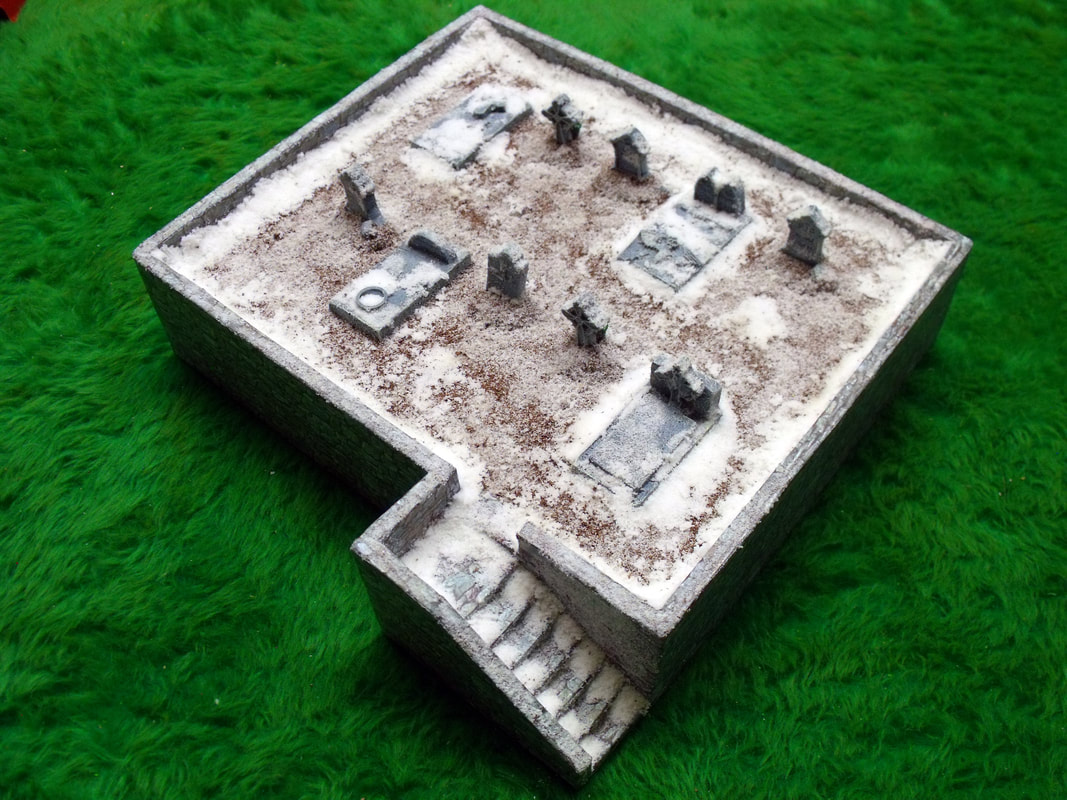
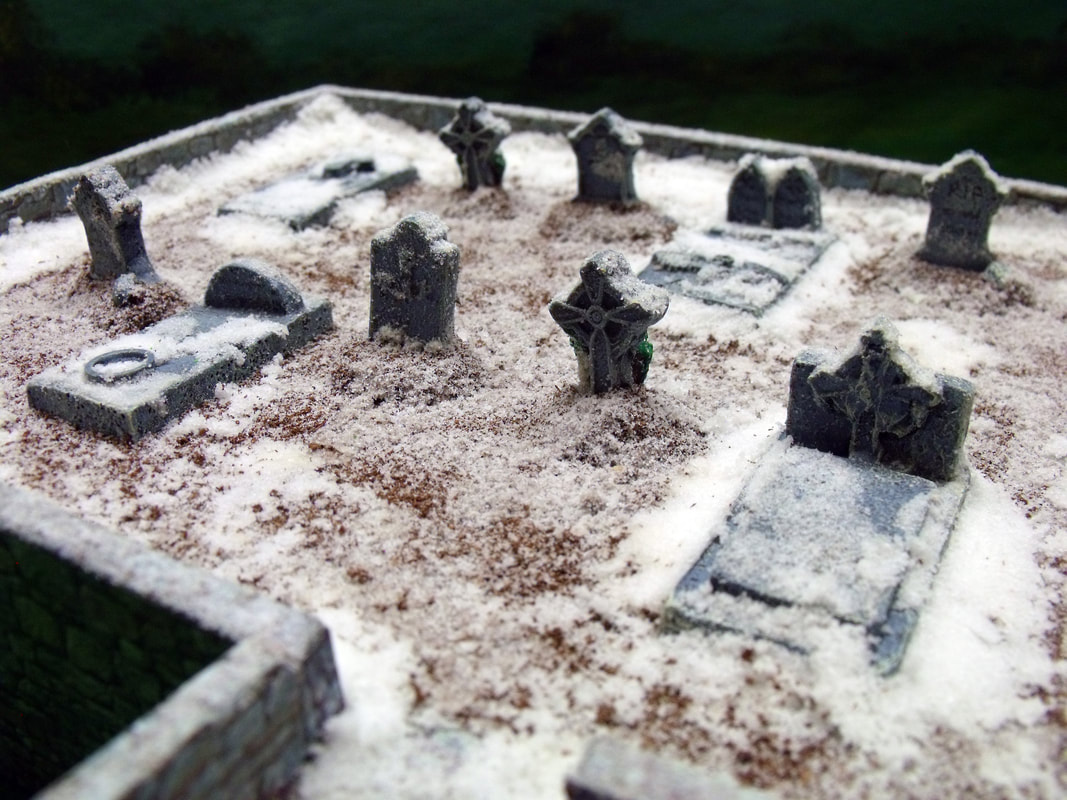
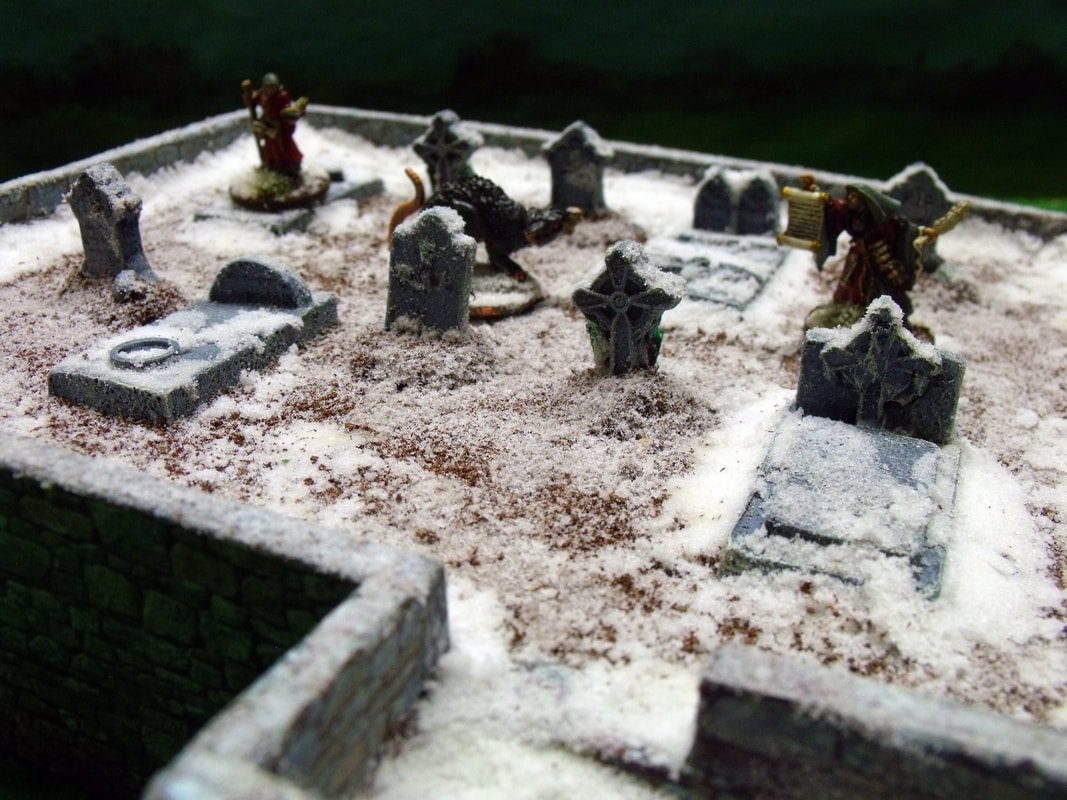
I built this a couple of months ago to go with my ever increasing lot of buildings & scenery for my Frostgrave setup. The idea came from my wanting to have different levels of terrain for my Frostgrave games as my terrain board is split over different levels to add to the general mayhem of the four player games I usually play with my gaming buddies. To that end I wanted a graveyard that was raised above the surrounding terrain with only one access point being the stairs. To start with I had a piece of cardboard packaging lying around which was 240mm long x 200mm wide x 45mm deep, which seemed about the right size for what I wanted. I then decided to fix a wall around it made from foamboard which was cut to a height of 60mm which allowed for a wall 15mm higher than the graveyard. Once glued in place I decided upon an entry point and cut an opening 30mm wide, which was so far so good and only a few short minutes of work. The next thing to do was build the stairs leading up to the graveyard level which needed some planning to get the stair treads to match the height and position of the opening, at this stage I realised that I should have built the stairs first and then cut the opening last. The stairs were made from 5mm foamboard with a width of 30mm and each one glued in place to match the position of the opening. Fortunately the stairs matched perfectly with the opening so I then built the walls to enclose them so that they looked in keeping with the rest of the graveyard. The next thing to do was to wrap the entire set of walls with a home made stone effect wallpaper which I regularly use on projects like this. The stairs were done first and separately from the main walls as they were not yet glued in place for this reason. The rest of the graveyard walls were then done and once everything was dry the stairs were glued in place, finally everything was sealed with a coat of clear acrylic matt varnish. The grave stones were next to be tackled and as I already had some resin gravestones from an old abandoned project lying around I painted them up an decided to position them. I wanted 2 rows of gravestones and allowed 30mm all around them for figure placement and 30mm between the rows for the same reason. When happy with the positioning of the gravestones I glued them all in place and painted the ground dark brown and once dry I used brown scatter material to simulate dirt. The final stage was to apply the snow and frost to the whole model, the snow banks were made from Woodland Scenics snow scatter material mixed to a paste with PVA glue and this was applied wherever I thought snow would gather. Once dry the whole model was scattered with the snow effect scatter material to simulate frost and that was it all finished.
0 Comments
Leave a Reply. |
AuthorStephen Wylde BA (hons) Archives
April 2020
Categories
All
|
 RSS Feed