
WARGAMES DESIGNS ECW BLOG
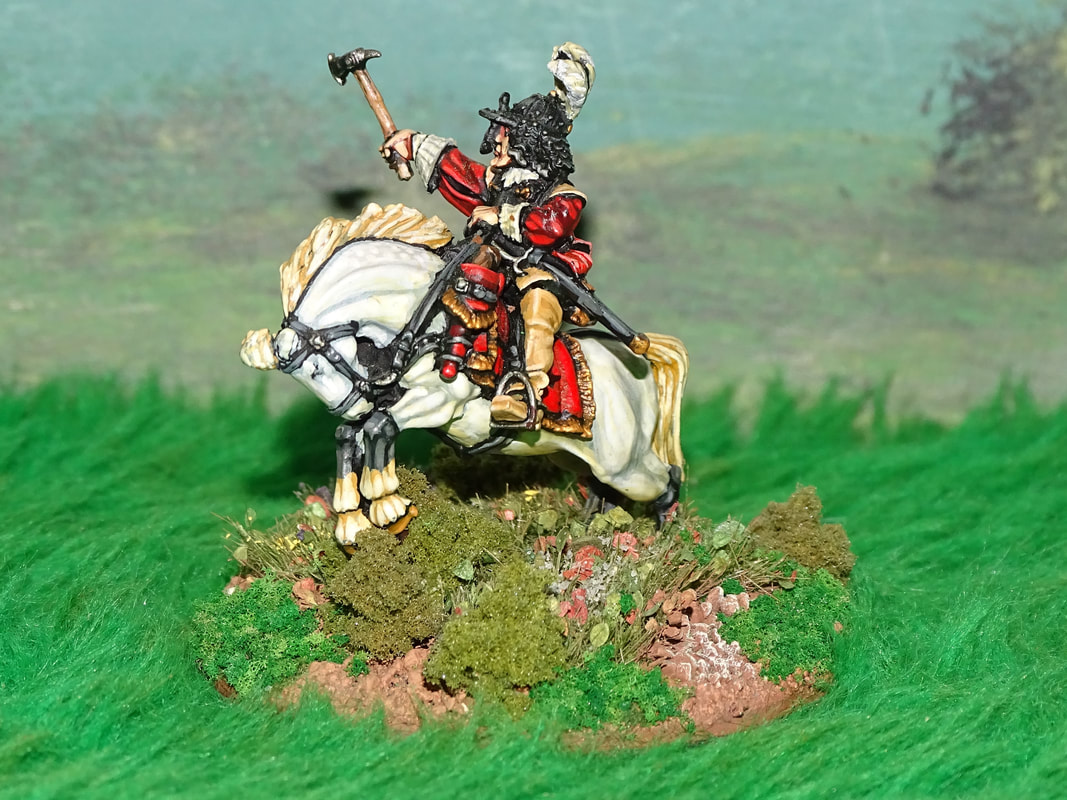
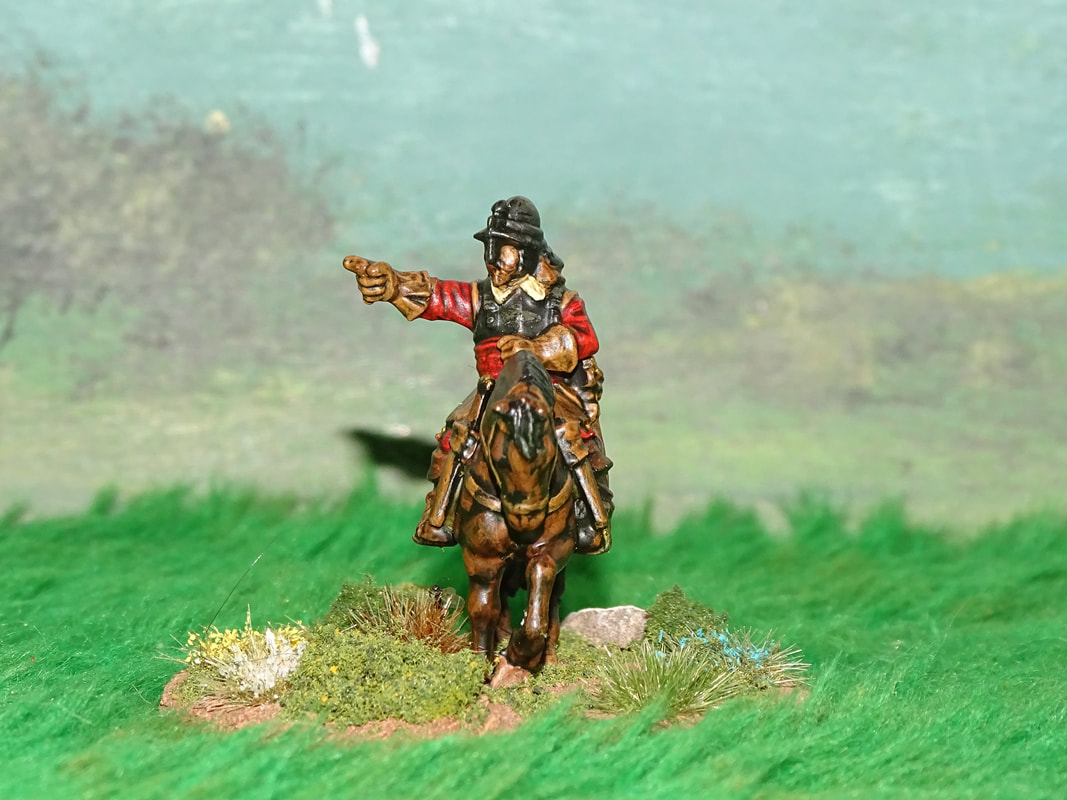
The Very Famous Royalist General Sir Stephen Wylde
|
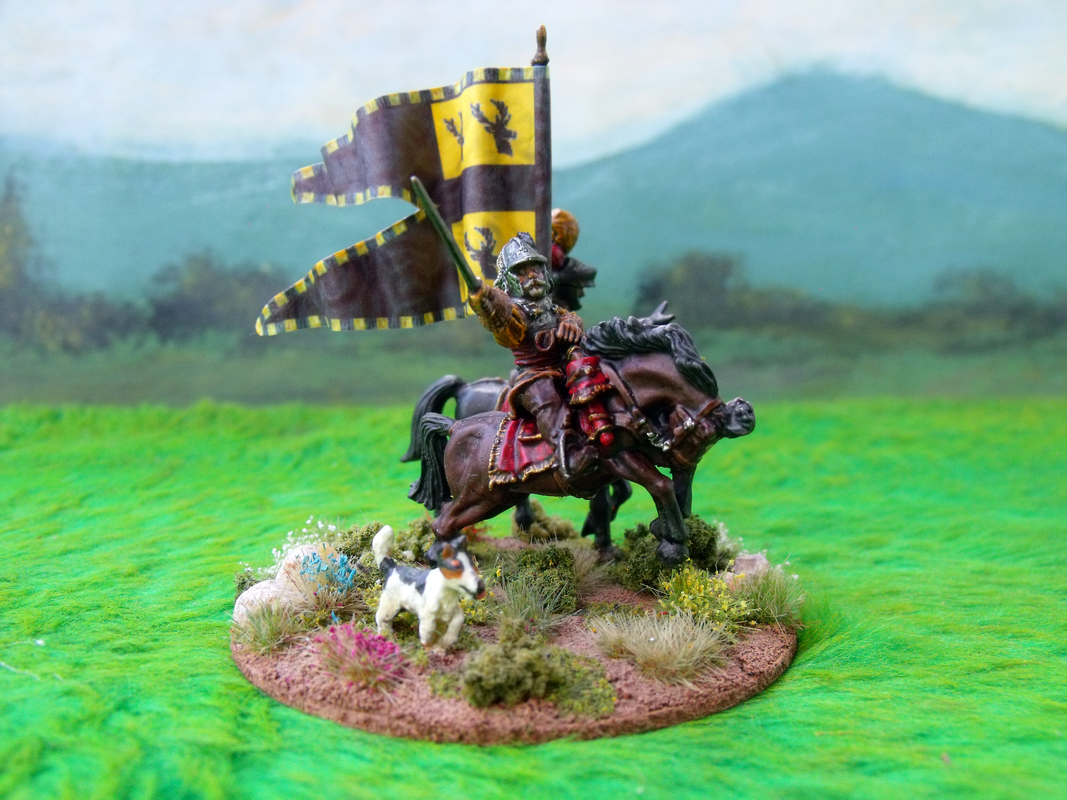
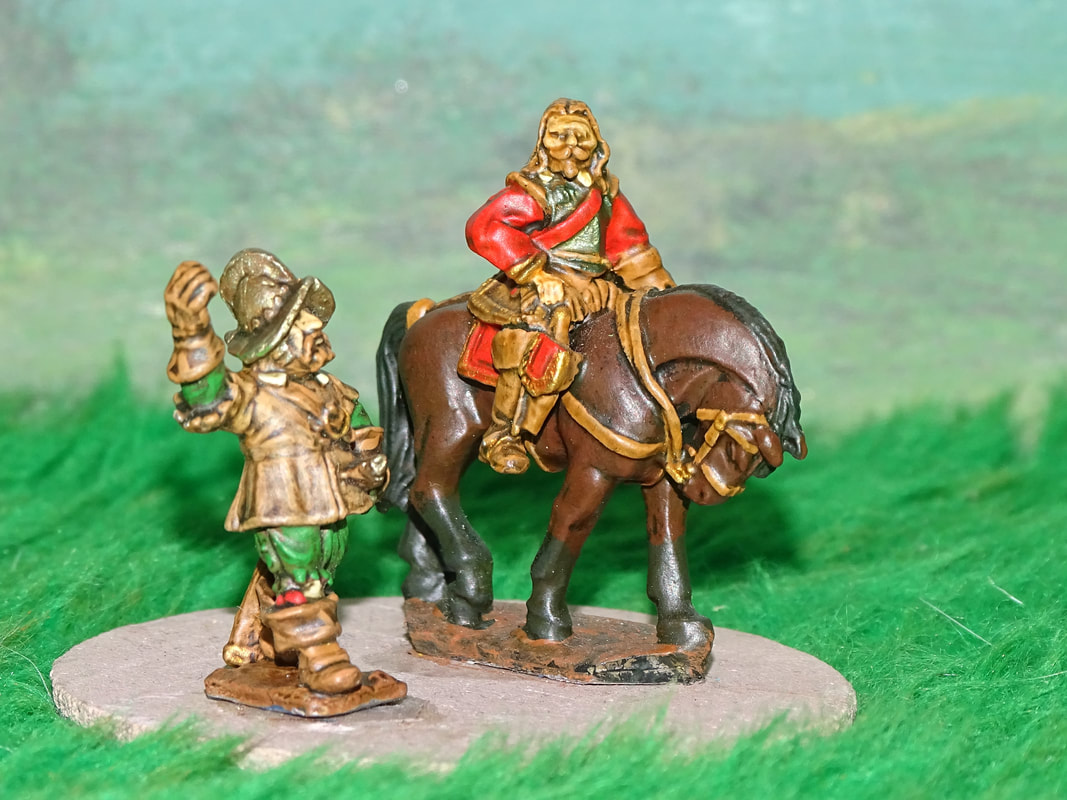
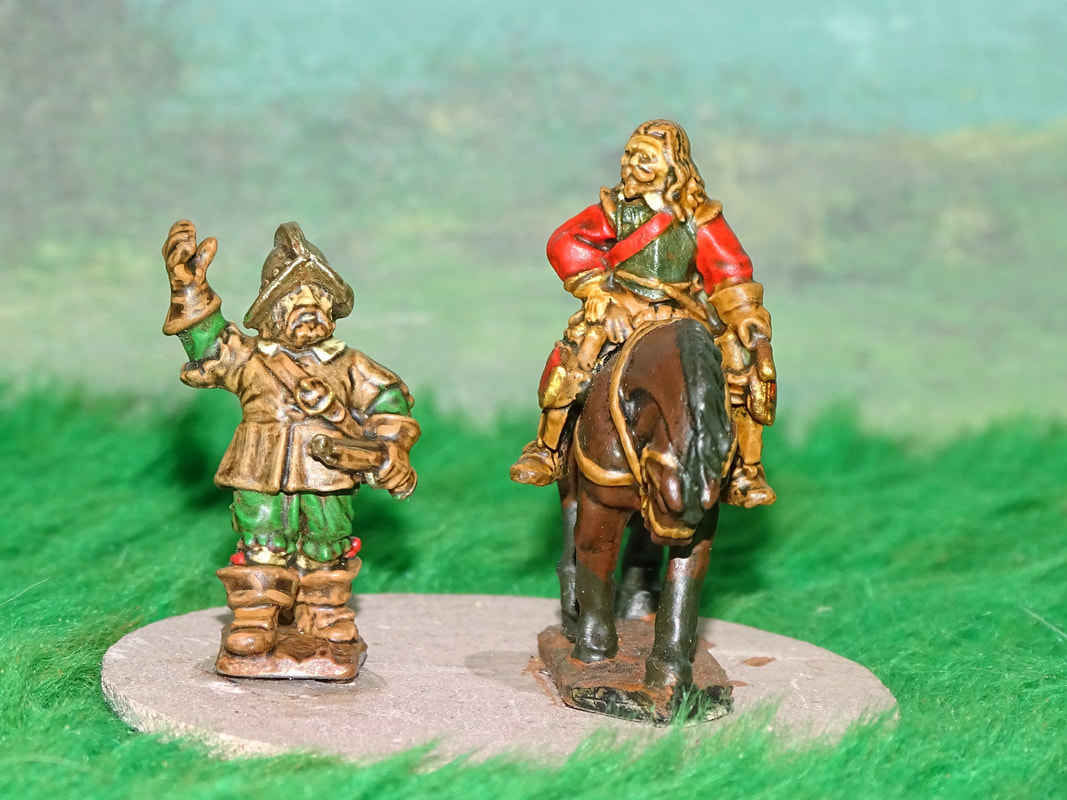
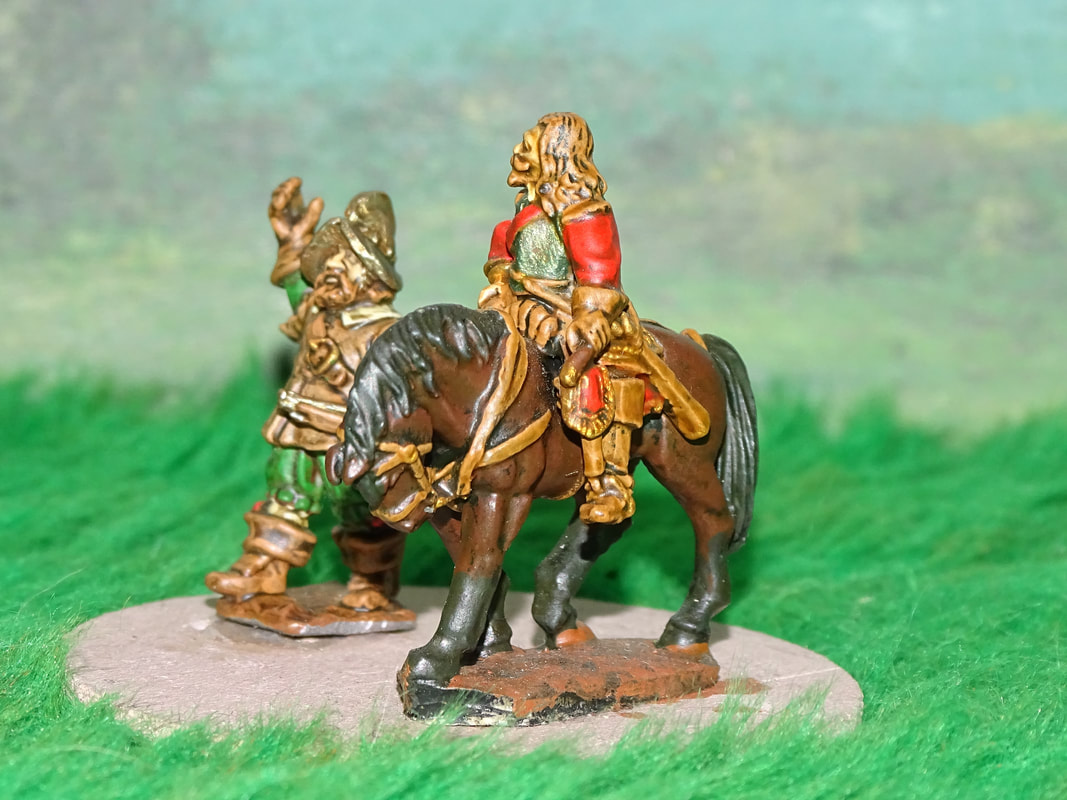
Sir Stephen with his Personal Standard Bearer and his Faithful Hound Daisy
|
|
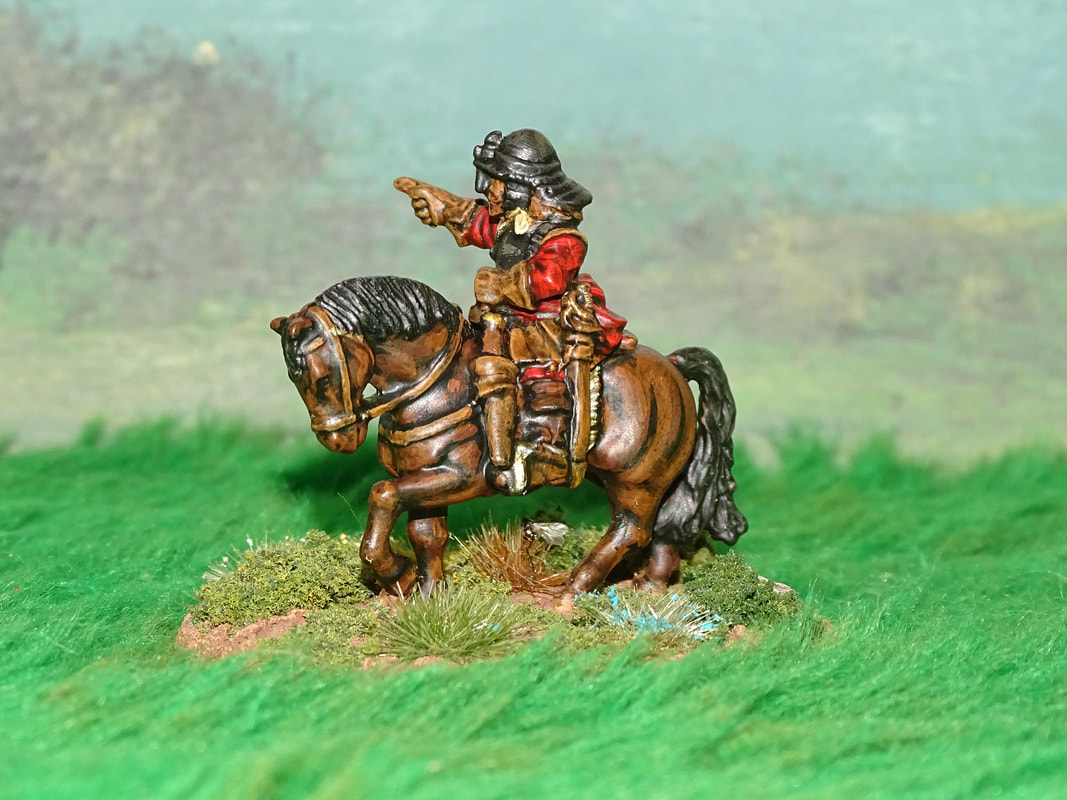
The Very Famous Royalist General Sir Stephen Wylde
|
Sir Stephen with his Personal Standard Bearer and his Faithful Hound Daisy
|
|
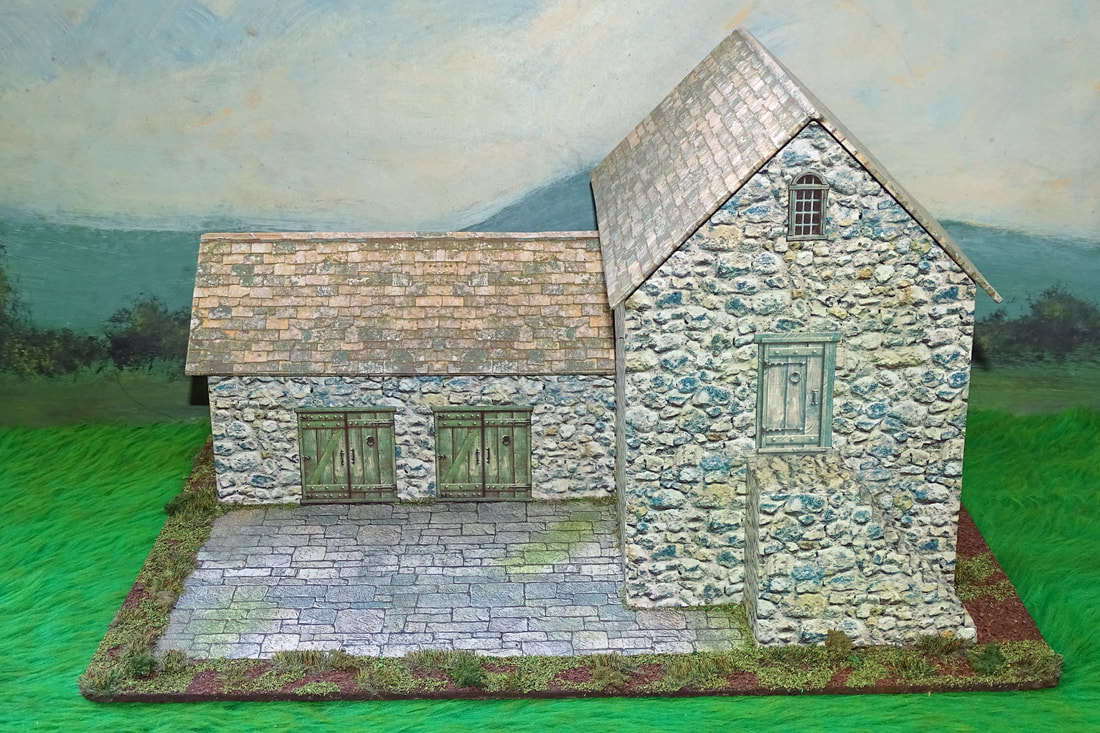
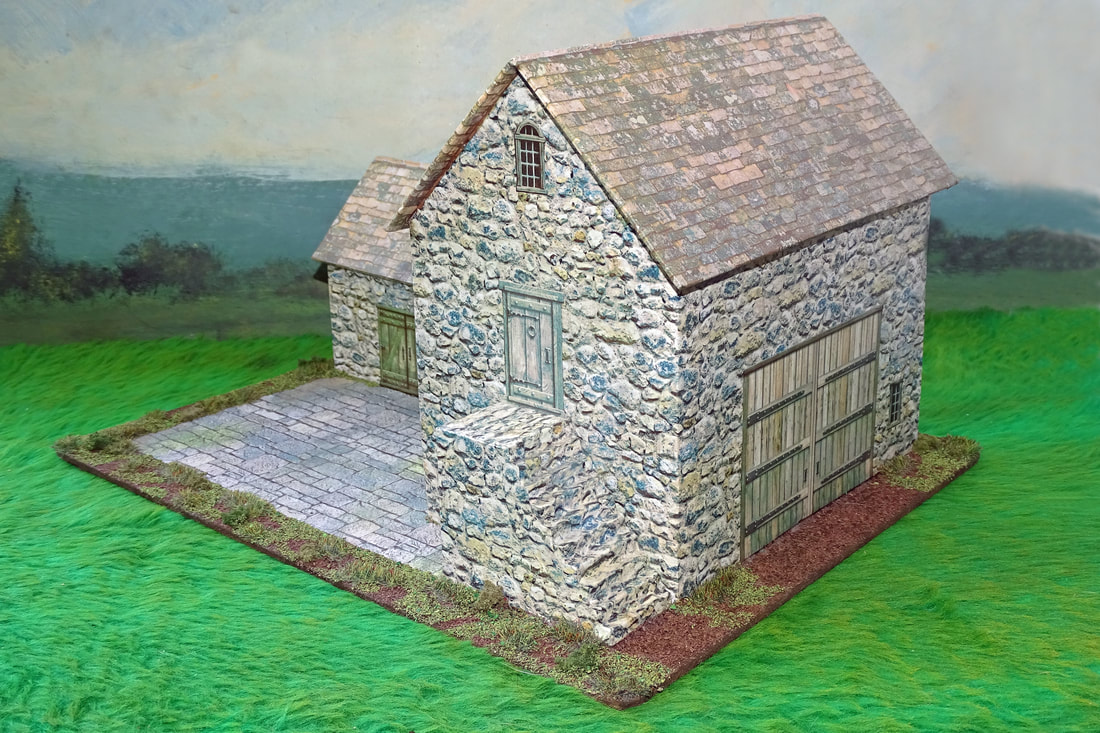
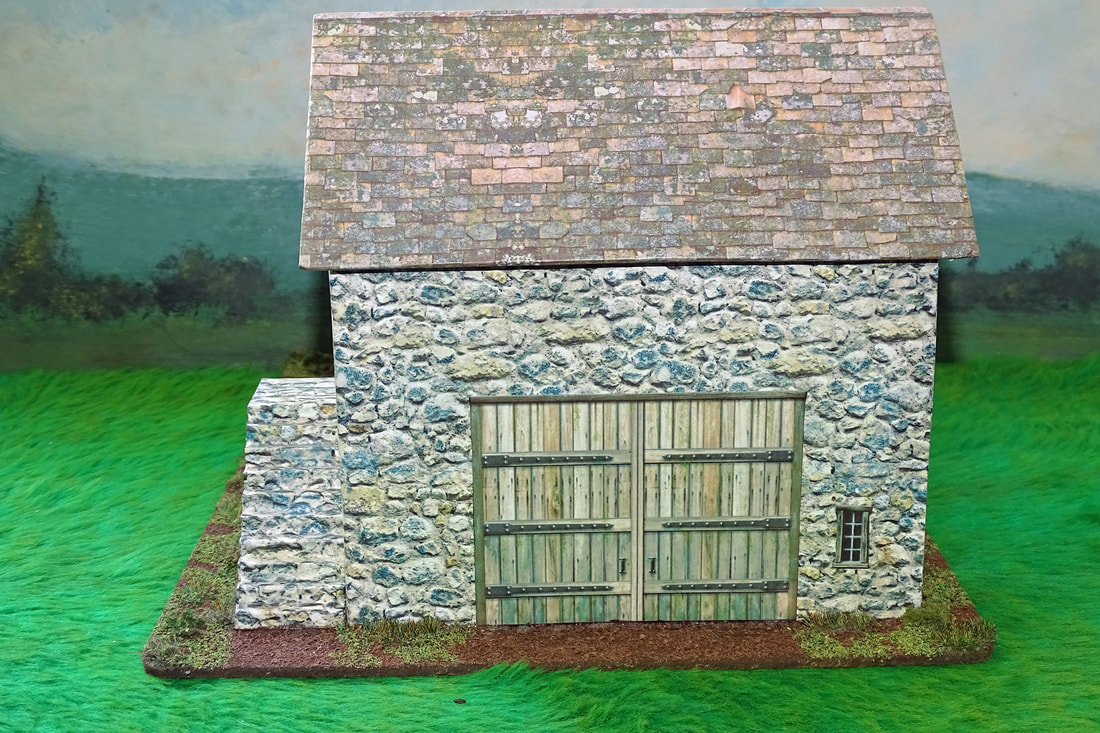
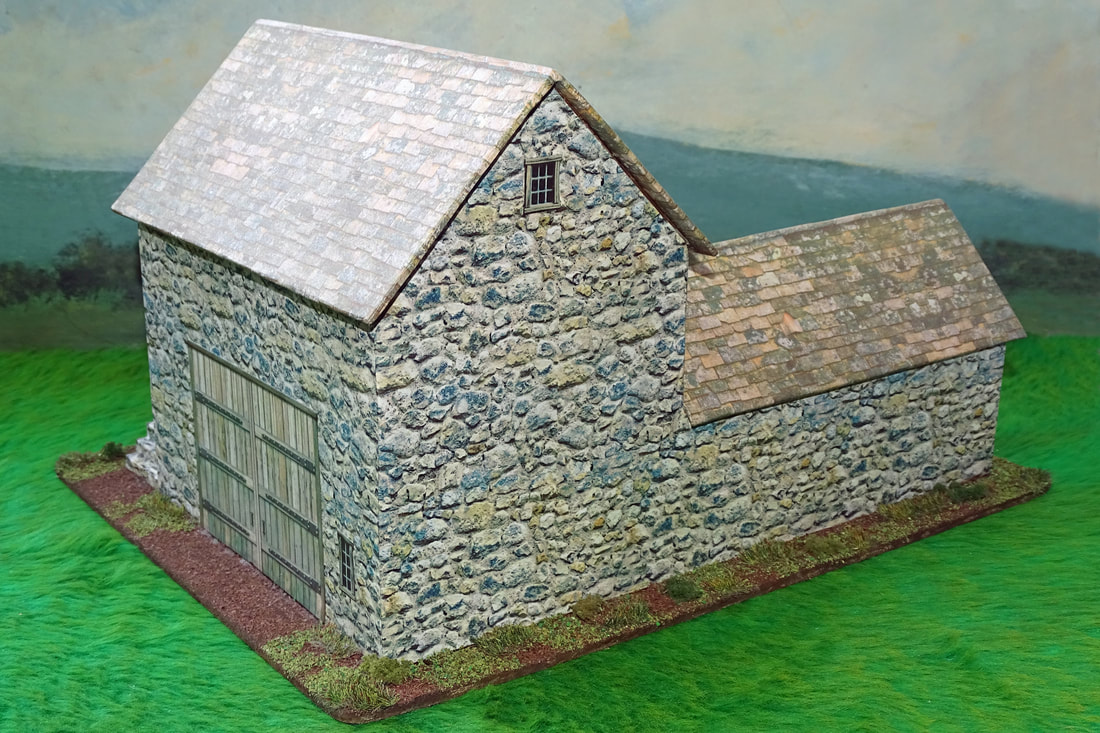
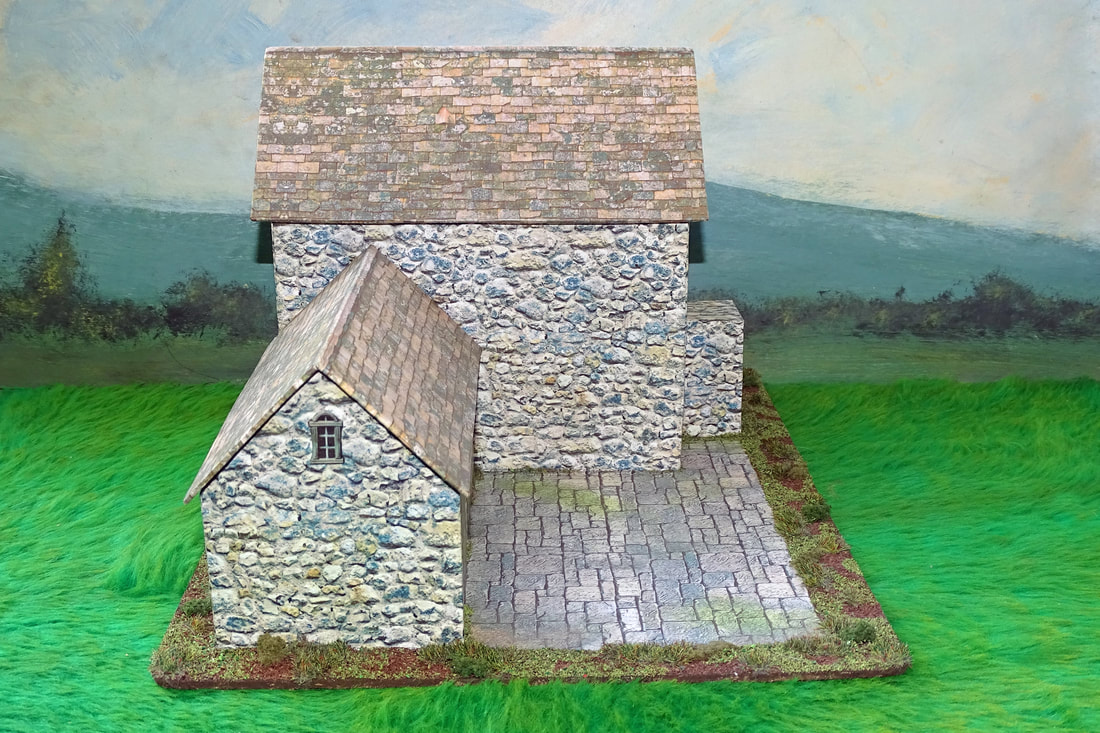
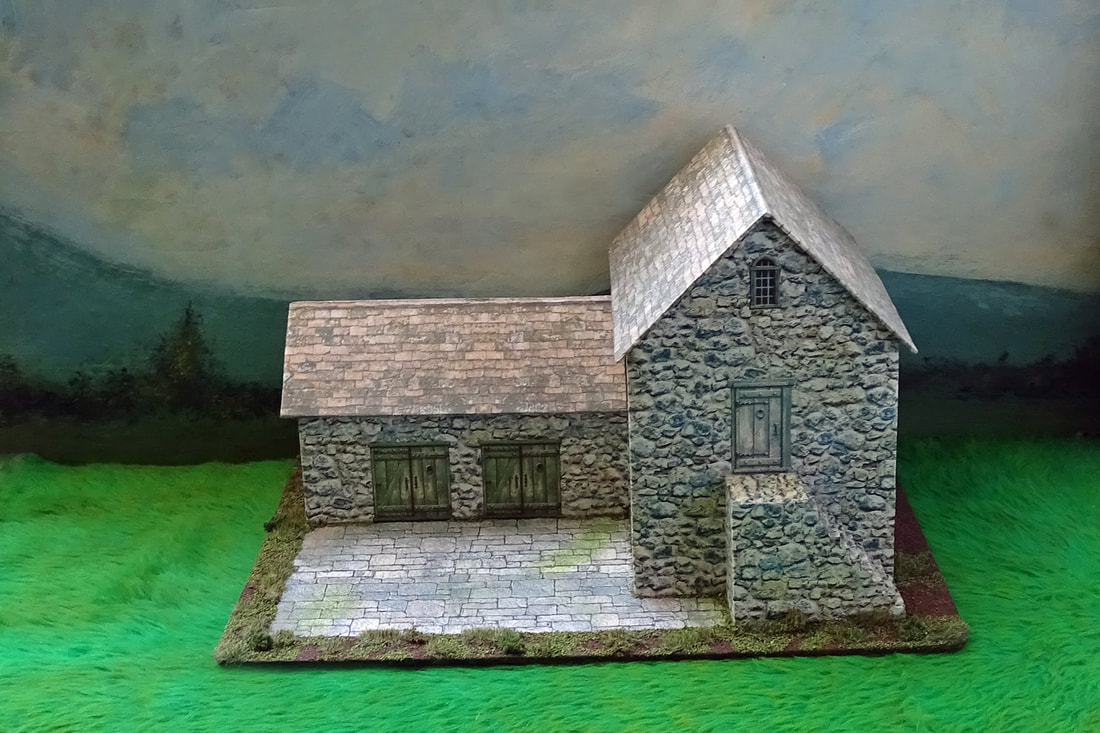
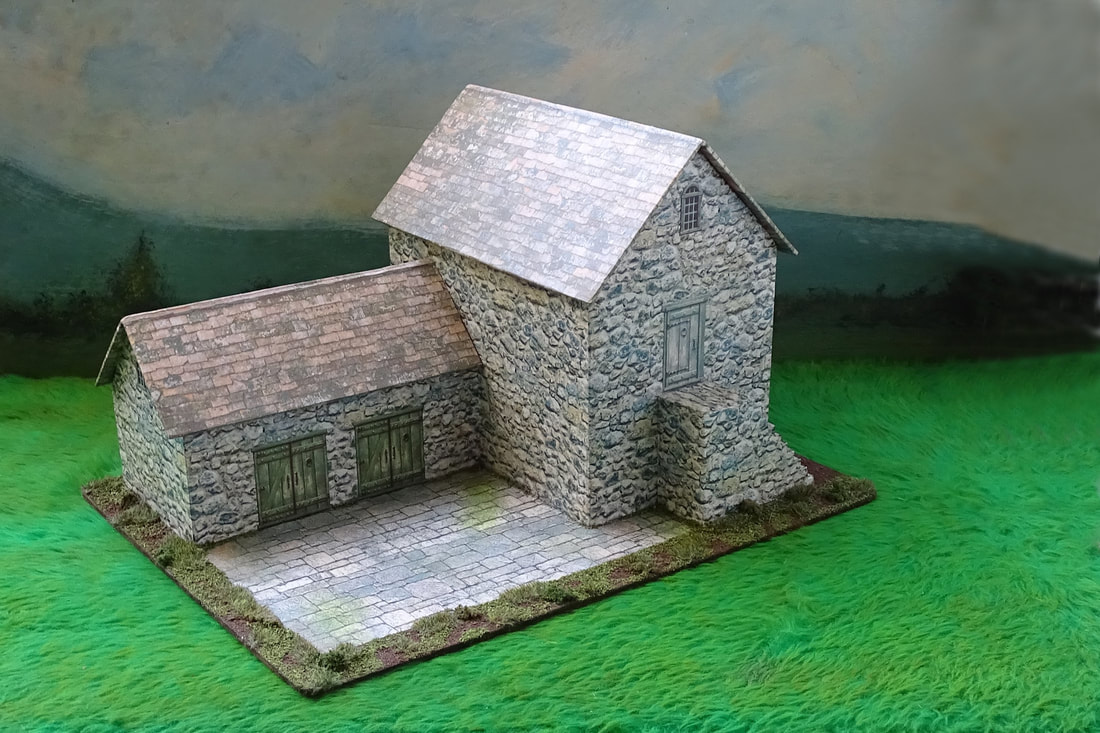
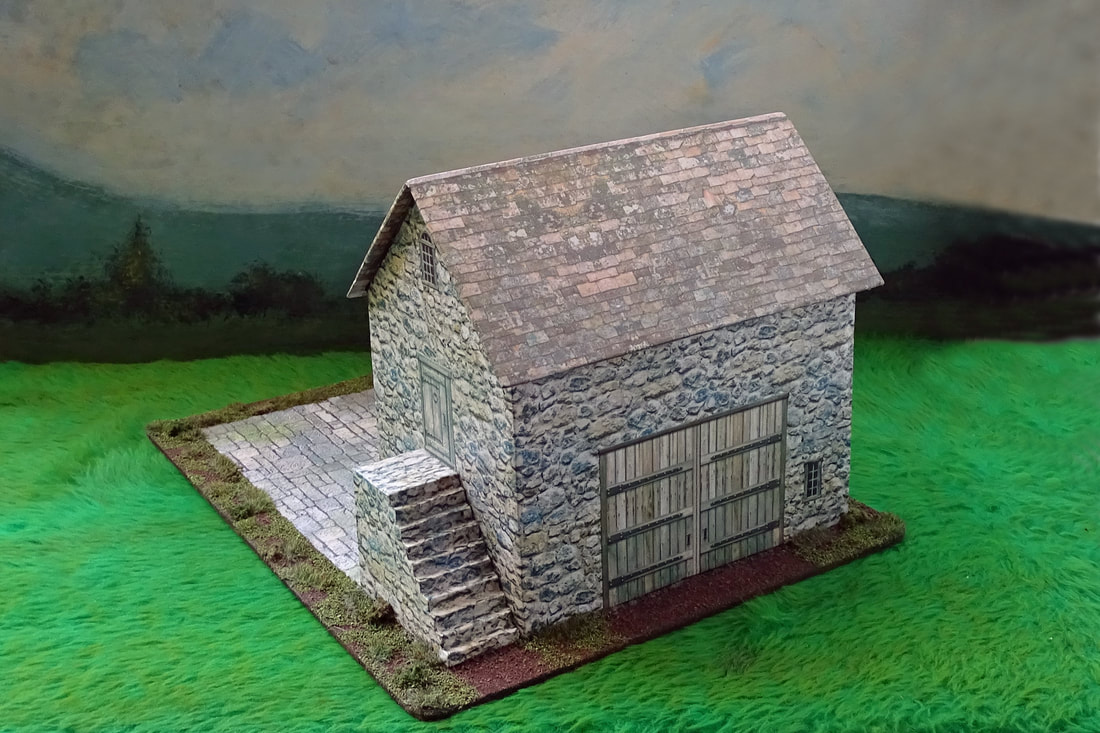
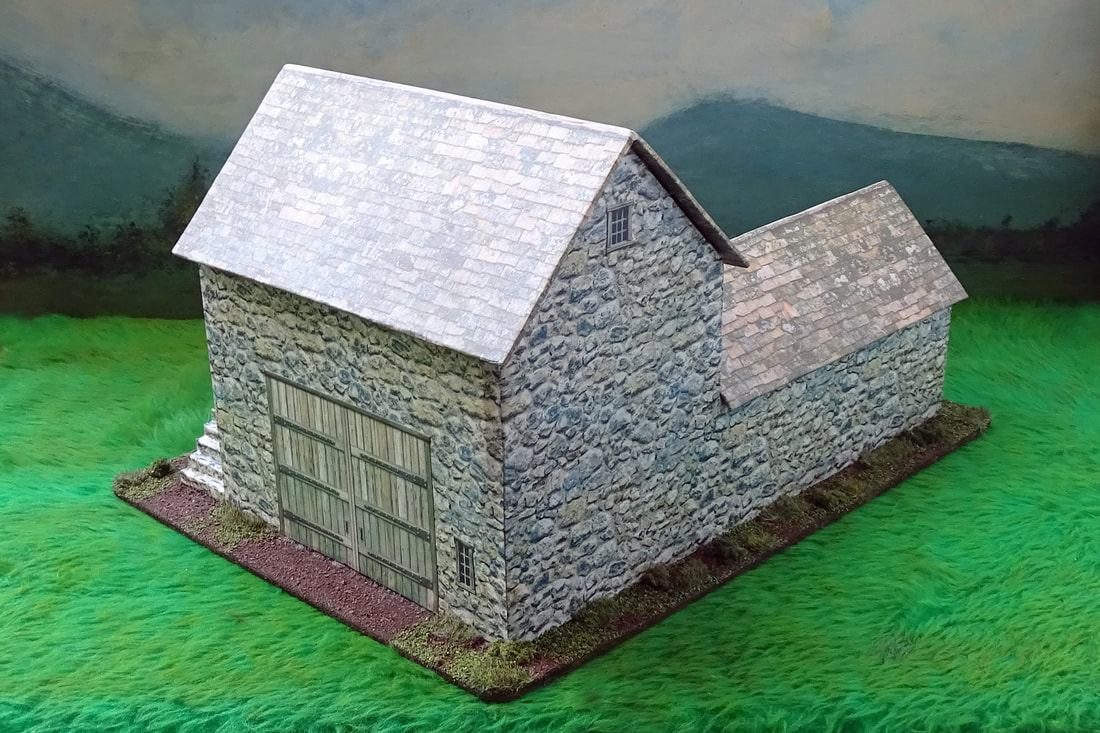
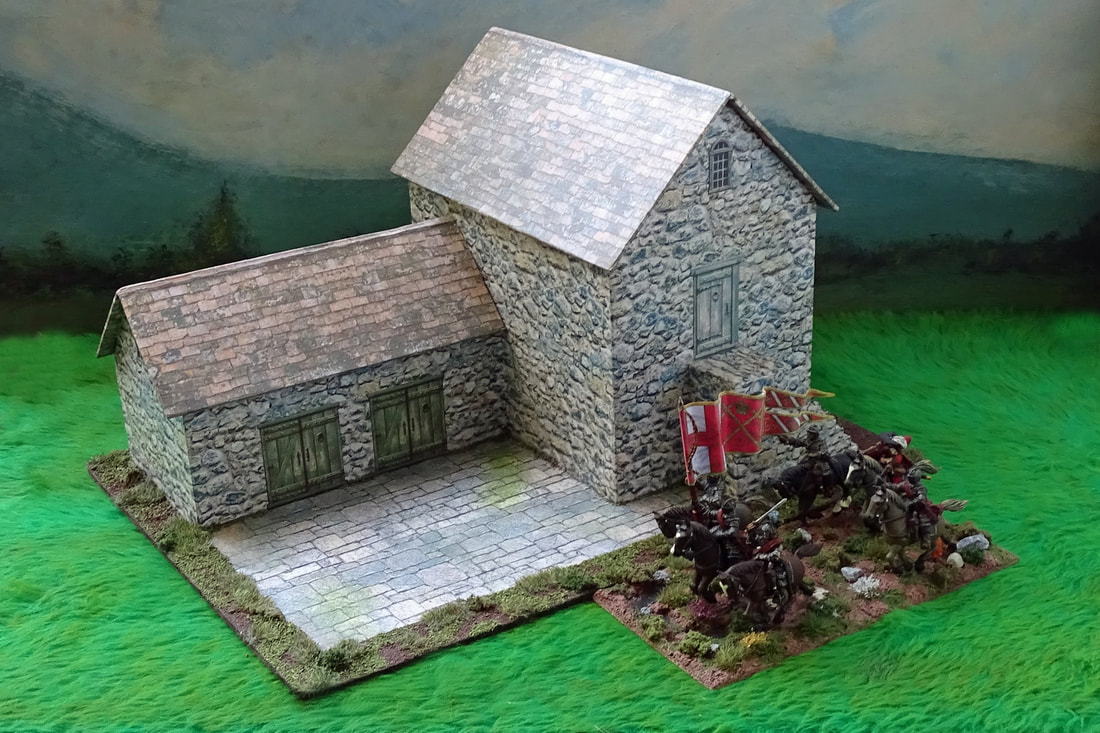
I decided to write down a list of buildings that I thought would be really useful for a village or small town setup and all the usual building types were on there including a stone barn. Having decided to pluck this one from the list as it would be a relatively simple build I looked for inspiration and the first stop was the internet. Looking at loads of pictures I came upon a picture of a 28mm Barn & Stables from Grand Manner and it did look really pretty indeed! From there I looked on their web site for more details and hopefully more pictures as I really did like the look of this structure and although there was only one picture there were some references to the base size which gave me an idea how large it might be, and here it is below.  28mm Stone Barn & Stables from Grand Manner The size given for the base was 340mm x 175mm and it has a lift off roof, which to me was not something I wanted as this is a pet hate of mine lift off roofs as they always seem to get plonked on the side of the table for most of a game when figures are inside which tends to ruin the aesthetic for me. These guys make some really lovely buildings and if you can afford to pay £360.00 painted to this standard then you are indeed very lucky indeed, even the £104.50 unpainted price is way more than I can afford to pay for one building and therefore this is why I choose to build my own. Back to the plot. Taking the base size as a reference I decided I could more or less work out the width and height of the model which I deemed to be approximately 10 inches wide by 5 inches high and the depth I could only guess at. Either way I decided that this would only be a basis for my own model and dimensions I could change to suit my own taste as well as the need to fit in with the rest of my models. Certain features I wanted to make larger such as the courtyard between the stables and the steps, other features such as the surrounding wall area I decided to completely omit as they weren't needed. As with all my buildings this was made from a foamboard shell as this is very easy & quick to build, very lightweight and surprisingly strong once constructed. The next job was to wallpaper over the shell with a cobblestone wallpaper of my own making and once done the roof was added using thin corrugated card. With the roof glued and the wallpaper left to thoroughly dry for about a hour I decided to use a roof tile wallpaper and glue this down ensuring that it would overlap the edges so it could be turned under and trimmed neatly. This part was a little fiddly at first, but I soon got the knack of it and it looked really good when finished. The steps were my favourite part of this model but the hardest part to make, in fact it is fair to say they took as long to construct and wallpaper as the rest of the building had done. To make them I used layers of foamboard each 1/4 inch longer than the last until I reached the height I wanted and then glued them together, once dry I faced up the sides with cereal packet card to make them smoother. The wallpaper was applied to the side walls first and overlapped onto the steps and then the top and step wallpaper was applied with particular care to line up the leading edge so that it blended seamlessly with the facing side. Finally the steps were glued in place against the gable end of the barn. The next job was to decide where to put windows and doors and even what type I wanted on the model. These were all chosen & placed accordingly and glued into position, the basic building was now complete and ready for its base. The base was hardboard which was cut to a suitable size and the corners snipped & rounded off as with most of my models and the position of the building marked out ready. The model was glued into position and left to dry out fully ready for the base work to be done. The courtyard wallpaper was picked out and glued into position with the base itself then being coated in dark brown paint. Before any texturing of the base I painted the whole model including the courtyard with acrylic matt varnish to add protection to the wallpapers used and also as an added bonus it strengthens the model itself. The base was then textured with various earth and grass textures In my usual way and then bushes, flowers and long grasses applied to suit. The addition of a barrel was a nice touch that was on the Grand Manner model so I will no doubt use that idea on my model. As a guide here are the basic measurements of my Stone Barn & Stables which did prove to be somewhat larger than the original estimate being: Barn gable end 4 1/4 inch wide x 4 1/4 inch to eaves x 6 1/2 inch to ridge. Barn side walls 6 1/2 inch long x 41/4 inch to eaves. Stable gable end 3 inch wide x 2 1/4 inches to eaves x 3 3/4 inches to ridge. Stable side walls 6 inches long x 2 1/4 inches to eaves. Barn Steps 2 1/4 inches high x 2 3/4 inches long x 1 1/4 inches square at the top. Finally the pictures which show it in all its glory and something that I am really happy with especially the price at well under £1.00 in total and an evenings worth of build time.
Please click on the pictures to enlarge
1 Comment
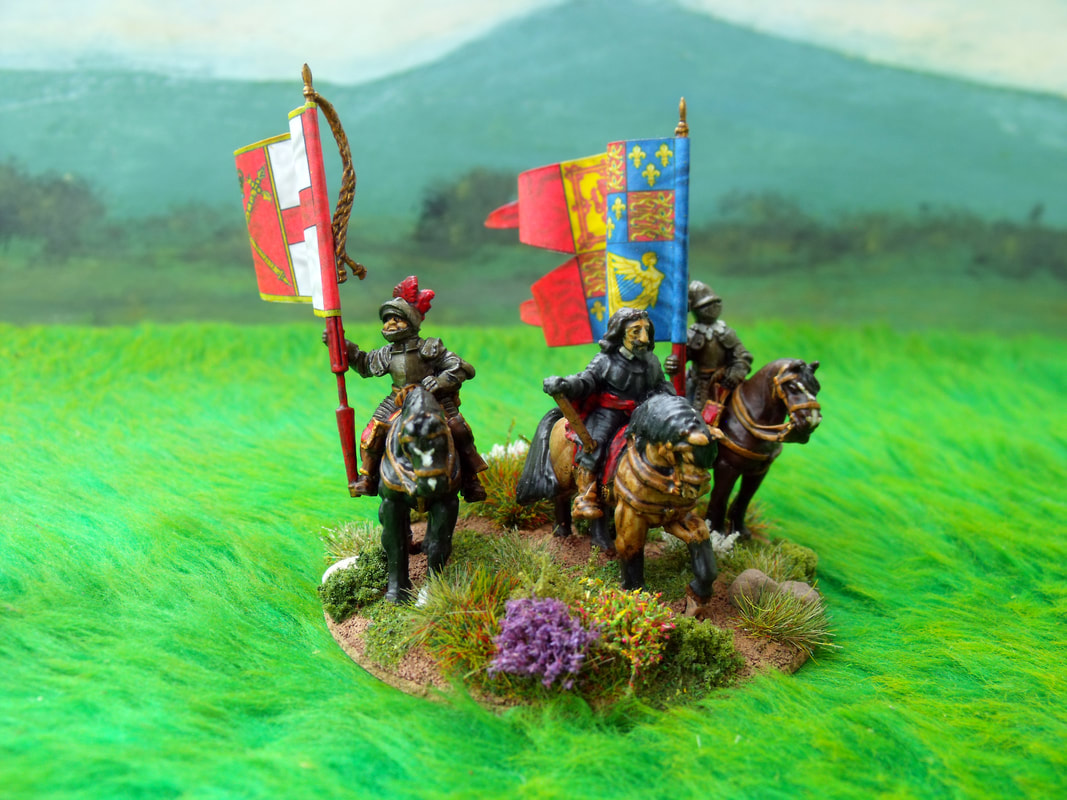
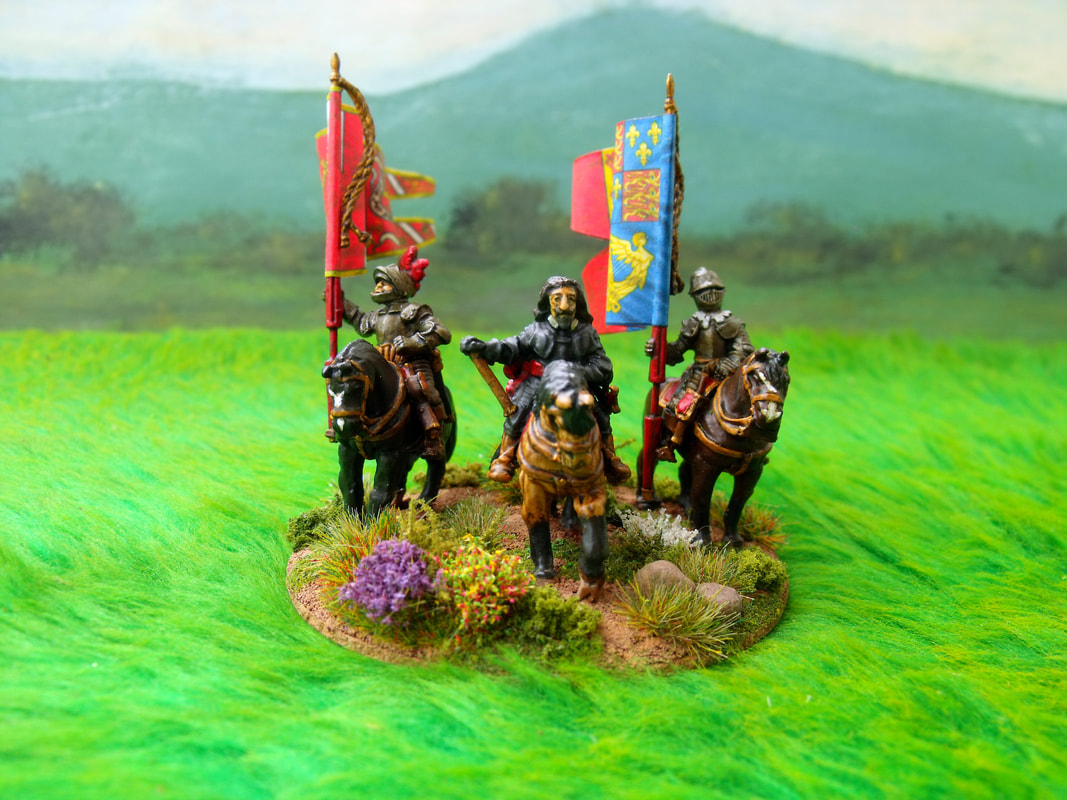
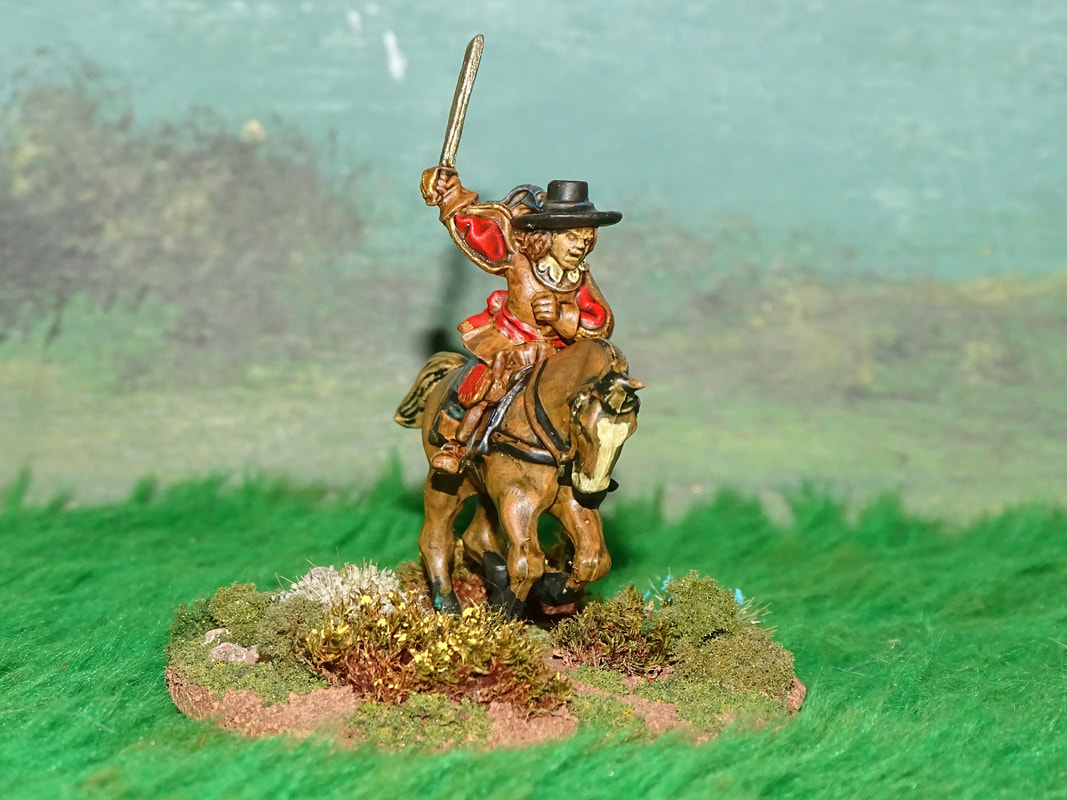
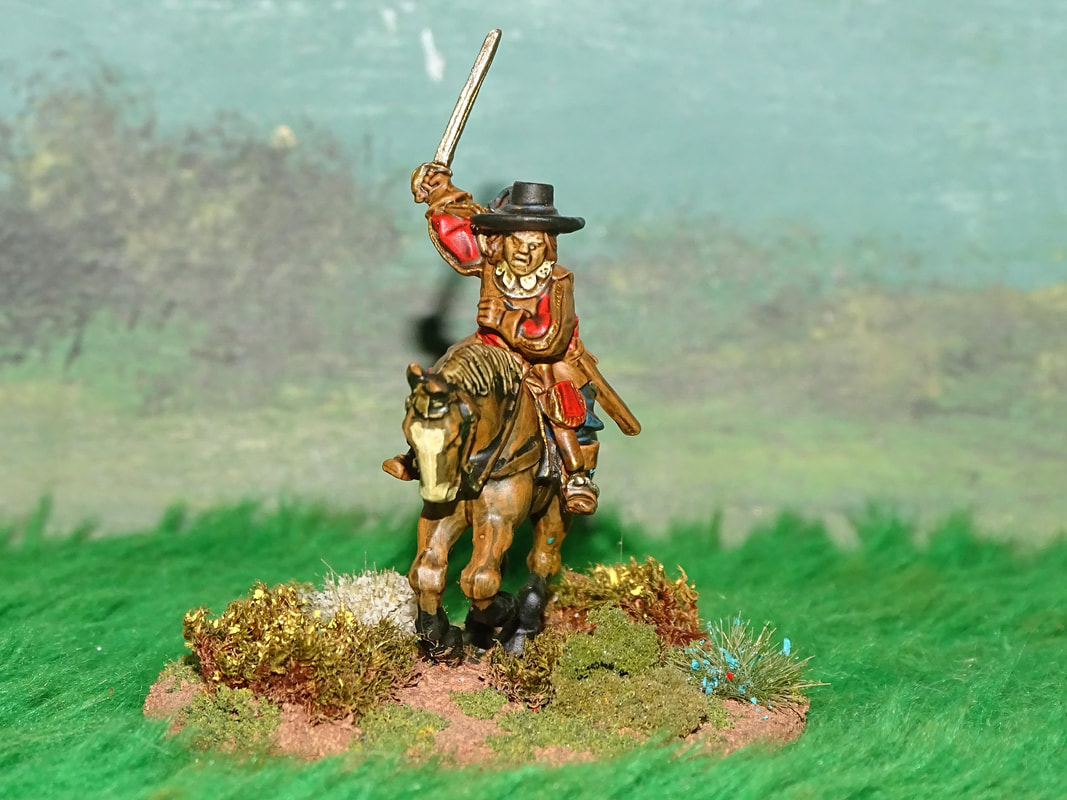
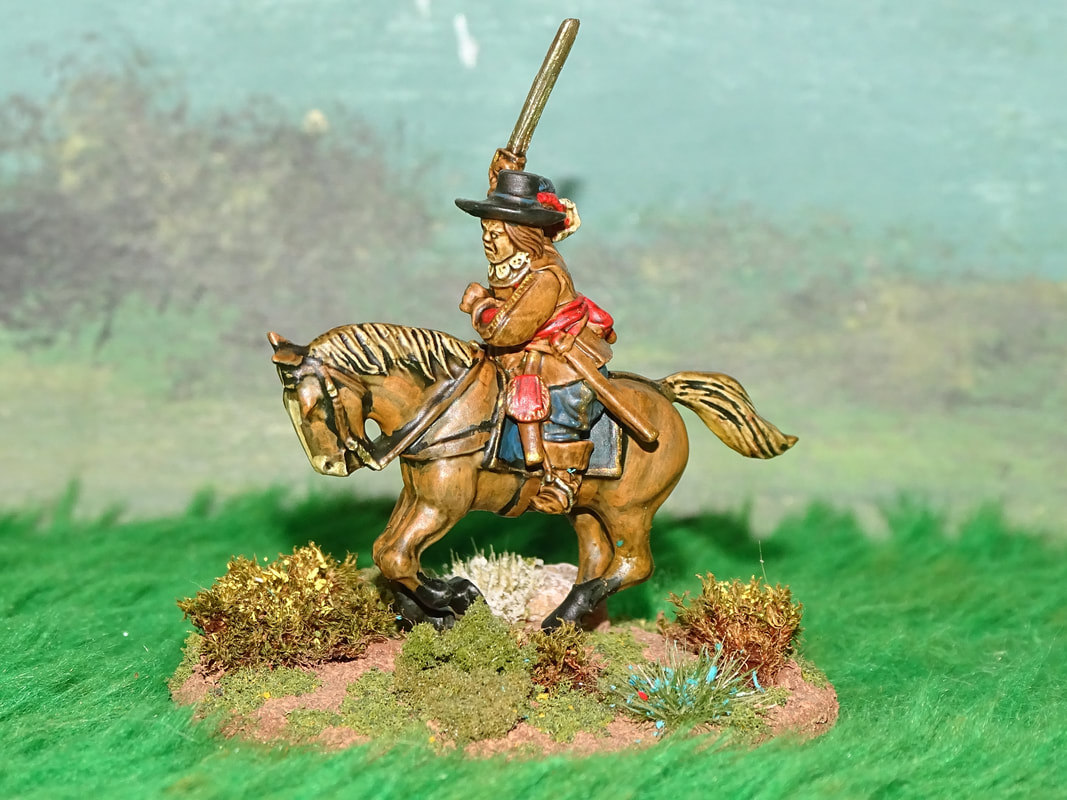
The Royalist Army - Part 1After what seems like an eternity this past couple of years I have finally decided that I must get back to doing some of my own projects and look ahead to whatever time I have to play wargames in the future. After much deliberation with what projects I should pursue and which I should sideline I found myself wondering about my favourite wargames period. This took me back to where it all started for me and that was the English Civil War and indeed the Battle of Naseby 1645, a battle which more or less ended the Royalist cause and gave control of England to Parliament. During the summer of 1983 I caught a train and travelled to a shop in Stafford town centre that sold amongst other things, wargames figures. I was hoping to buy 15mm Minifigs Wars of the Roses figures back then but they only sold them in 25mm scale and the only 15mm figures they had were either Napoleonics (which I already had in 20mm plastics) or English Civil War, both being from the Minifigs range. I liked the sound of Cavaliers vs Roundheads (as I thought back then) and duly bought £25.00 worth which at 7.5p a figure was a fair amount back then, and I spent £5.00 on a little Osprey book about the Battle of Naseby written by Stuart Asquith and Peter Gilder. After that my love for the ECW period grew and although the figures have long been sold off I have replaced them with a massive amount of 28mm ECW figures from most of the current manufacturers around. Anyway back to the plot, I have recreated the battle before at least three times in 15mm and mostly enjoyed the game although I have always wanted to do the battle in 28mm and felt that having built up a massive amount of figures over the years I would really like to do this sometime soon as it would focus my efforts on some of my own figures/armies with my free time. Although the rules I use have changed many times and my understanding and knowledge of the period has grown I still have that Osprey book and I still think that it is a very useful aid to wargaming the battle. For a start off I need a pretty large table this being around 18ft wide and 8ft deep given the unit sizes and dispositions. The depth is a bit troubling as who can reach to the centre of an 8ft deep table, but I have a work around for that so a 6ft deep table will suffice with an extended depth where the Royalist reserve is. The terrain is fairly simple with only Sulby Hedges required as a main building project. The armies weren't overly large unless you count the cavalry which numbered at least the same as the infantry, so all in all about 500 foot and 650 horse, with maybe 4 small field guns. This being based upon my own mostly standardised unit sizes. As for rules I have several sets that I could use which all equally give a good game, so no real problems there. I do already have a 12ft wargames table but cannot reasonably fit a table of 18ft in my house, however a marquee tent and outside table could easily be doable in the garden which perhaps would be quite nice really. For me the easiest place to start is the Royalist army, I already have most of what it takes to field this so it is well worth looking at this in detail and then assessing what I need to paint or finish off to field the army in full. So, starting off I need to look at the commanders and see how they are looking. Firstly, King Charles I. This vignette of King Charles I and his standard bearers I painted a few years ago and very happy I am with how it turned out. The model of Charles is a Wargames Foundry figure with a Warlord Games plastic sword attached and he is seated upon an Old Glory horse with some additional modelling work to add length to the mane, all of which was inspired by the Sir Anthony van Dyck painting. The Royal Standard Bearer is an Old Glory cuirassier and horse with the addition of a metal arm and plastic flag pole from Warlord Games. The King's Gentlemen Pensioners Standard Bearer is another Old Glory cuirassier and horse with the addition of a plastic flag pole from Warlord Games. The flags of course are from my own Wargames Designs collection. Looking at it now I am less happy about the Woodland Scenics fine turf grass scatter as it looks more suitable for 15mm scale figures so I will redo that with a course turf scatter at my convenience.
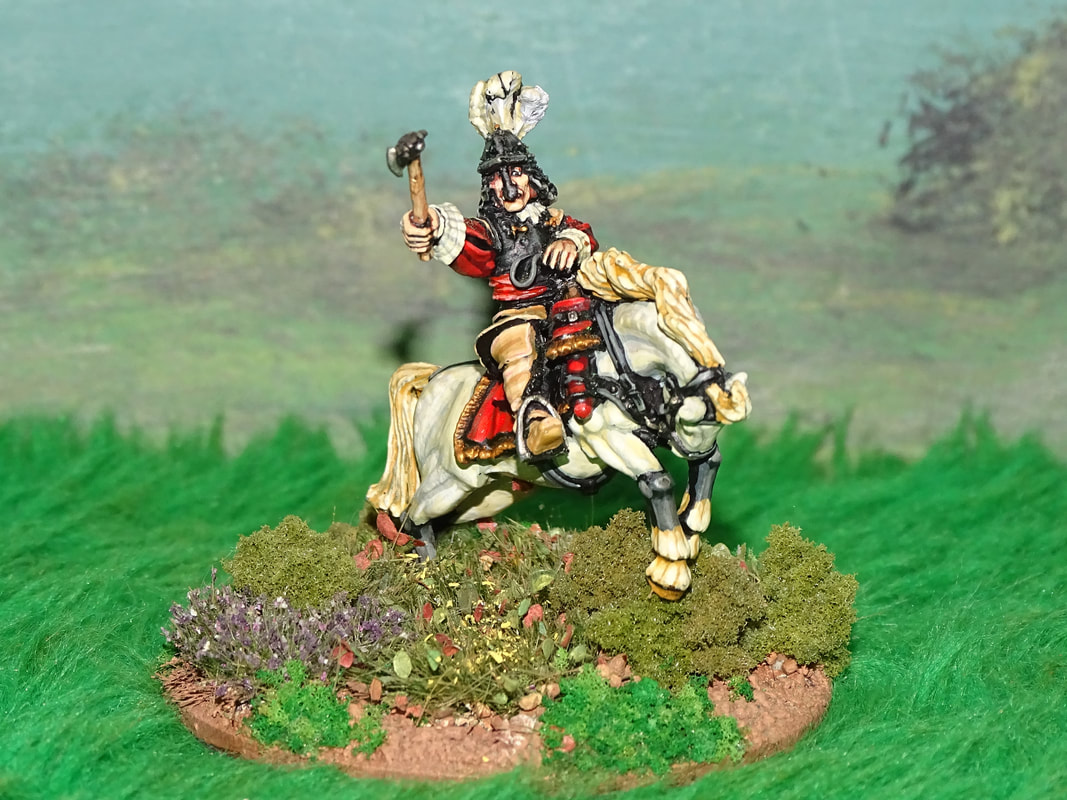
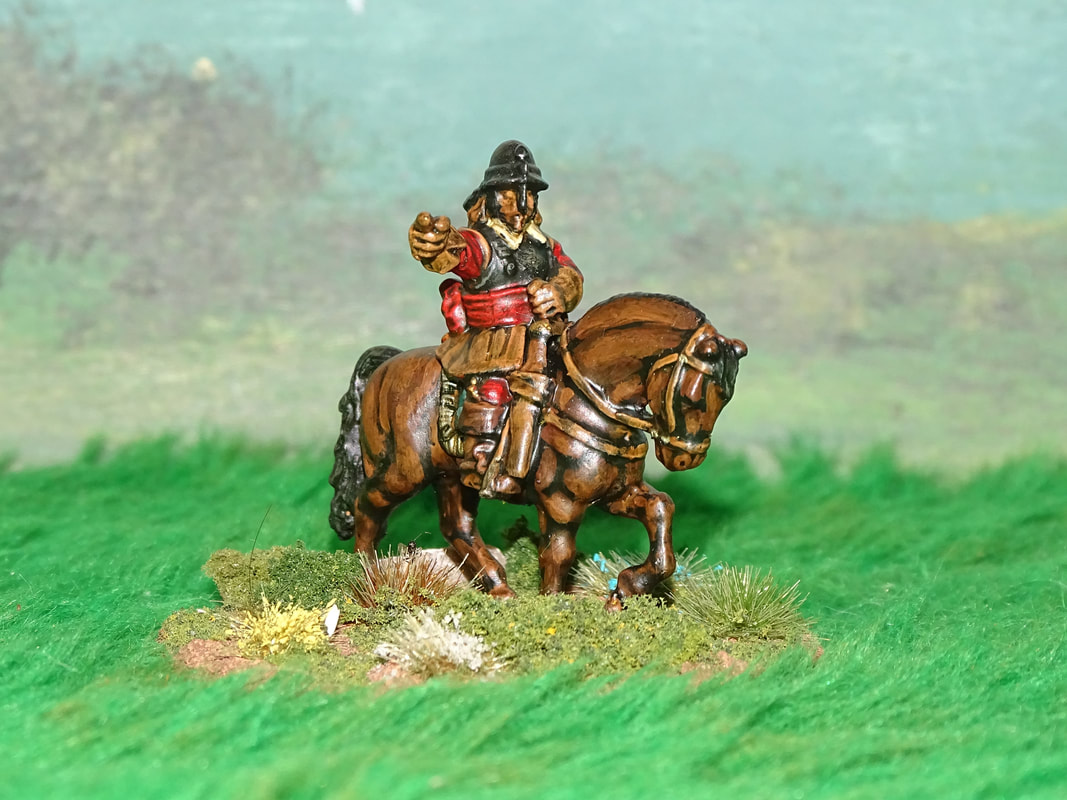
Next we have the irrepressible Prince Rupert. This lovely little vignette was painted for me as a gift many years ago and represents Rupert on his way to Naseby. The figure is of course from Warlord Games and really does look great, but I do have a few other versions of Rupert and would love to see him with a personal standard bearer. So maybe I should paint one of them and see which one I like best, also I do like the Empress Miniatures version which has Rupert in a Montero cap which is apparently from an eyewitness account.
Prince Maurice. This is an Old Glory figure of Prince Rupert converted to sit upon a Plastic Warlord Games horse. This is a nice enough figure but maybe requiring the bulky sword blade to be replaced with a nice slim plastic blade from Warlord Games.
Sir Bernard Astley. This is again another Old Glory ECW figure and horse, and I do actually think it is indeed supposed to represent Lord Astley, either way it is Lord Astley in my army, it also doubles as Sir Jacob Astley but don't tell anyone. I think maybe one or two foot figures added to the base and he will look fine.
Sir Marmaduke Langdale. I wanted him to look like a no nonsense sort of fellow so I chose a simple Essex Miniatures horse sculpted on a saddlecloth and converted a Trent Miniatures miscast Lord Byron and a head from I think, Redoubt Enterprises. He certainly looks the part and just needs a suitable standard bearer to go on the base with him.
Well that's it for the main commanders, I now know what I need to do to finish them off to the standard that I require so expect an update fairly soon.
|
AuthorStephen Wylde BA (hons) Archives
July 2022
Categories
All
ECW Blogs
ECW Sites
|


 RSS Feed