
WARGAMES DESIGNS ECW BLOG

The Very Famous Royalist General Sir Stephen Wylde
|
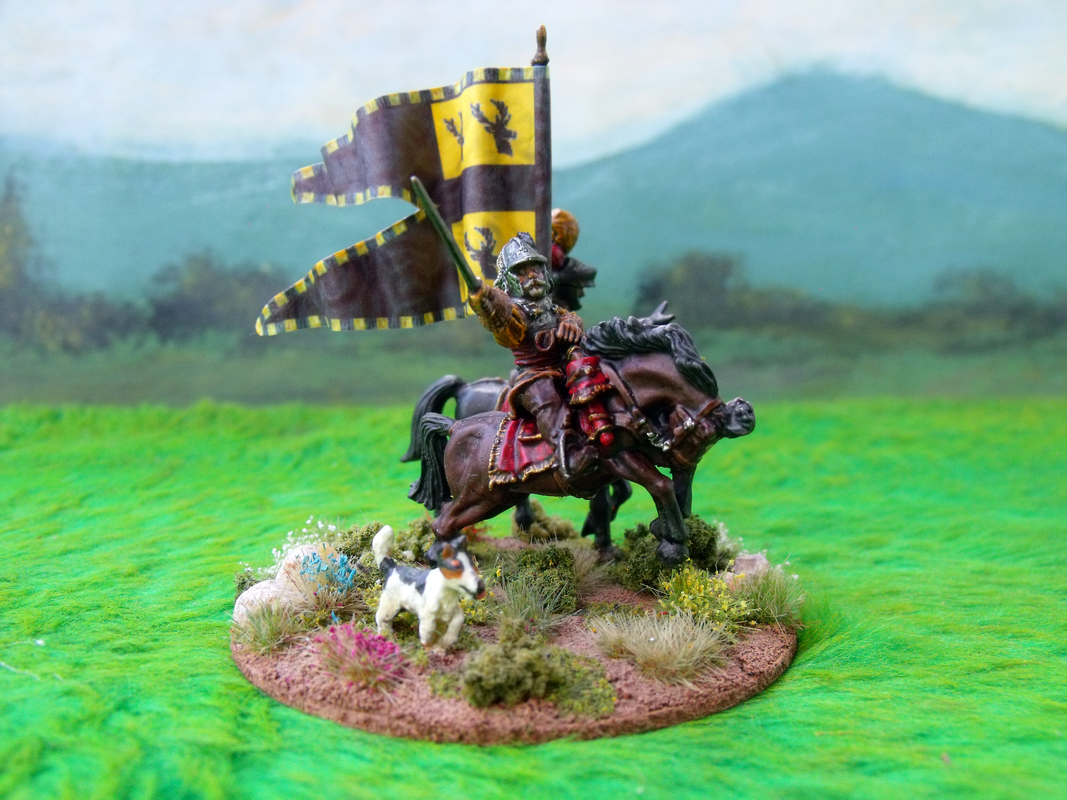
Sir Stephen with his Personal Standard Bearer and his Faithful Hound Daisy
|
|
The Very Famous Royalist General Sir Stephen Wylde
|
Sir Stephen with his Personal Standard Bearer and his Faithful Hound Daisy
|
|
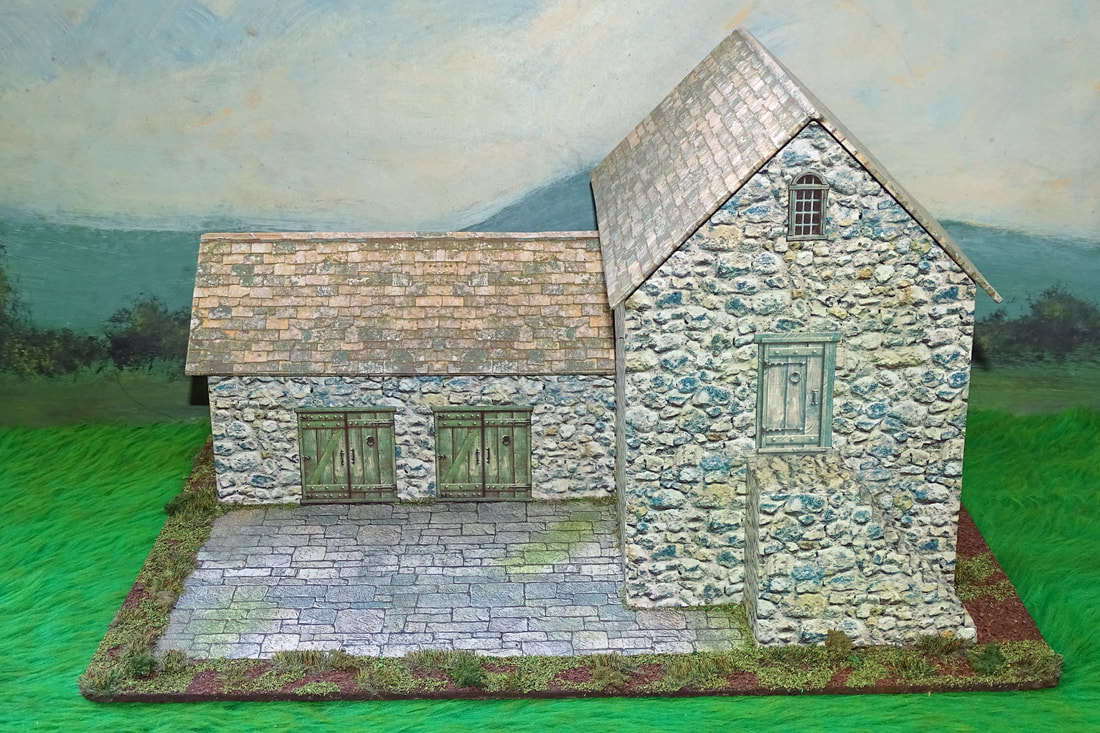
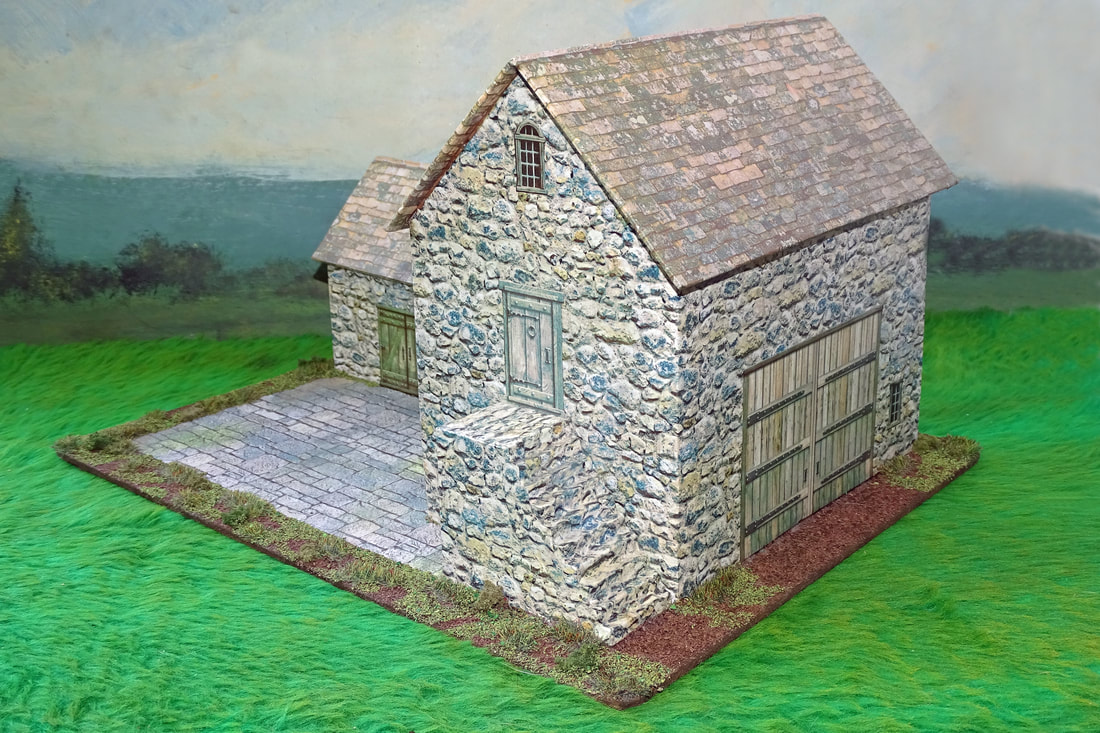
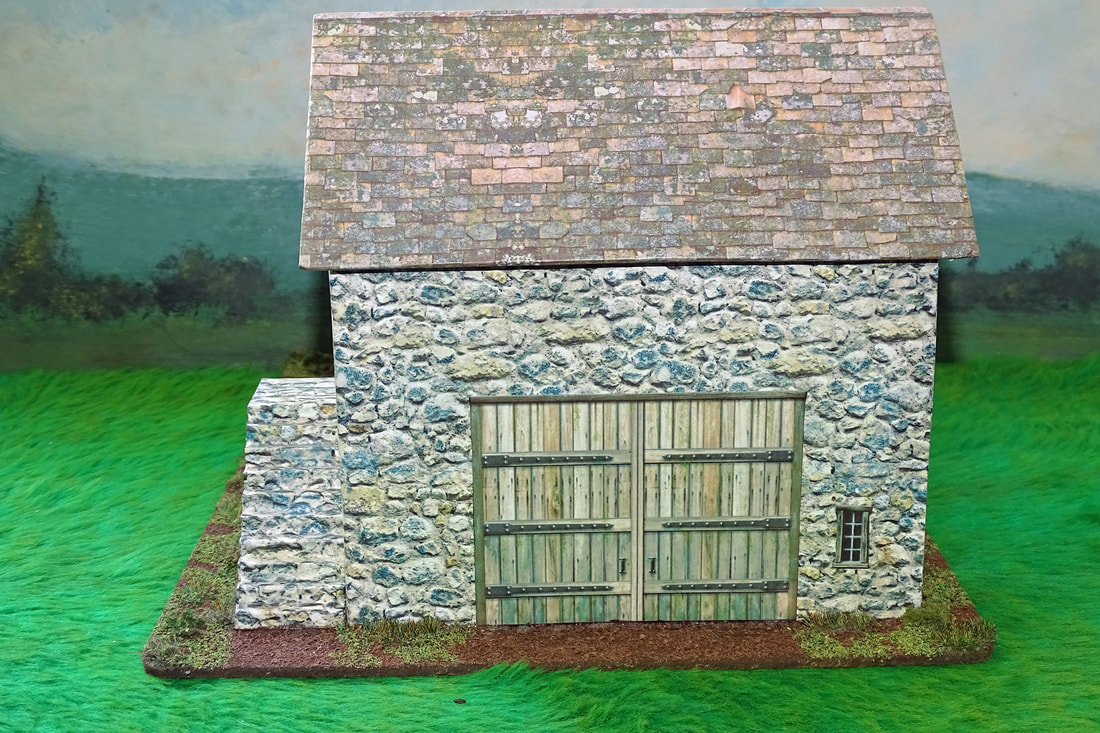
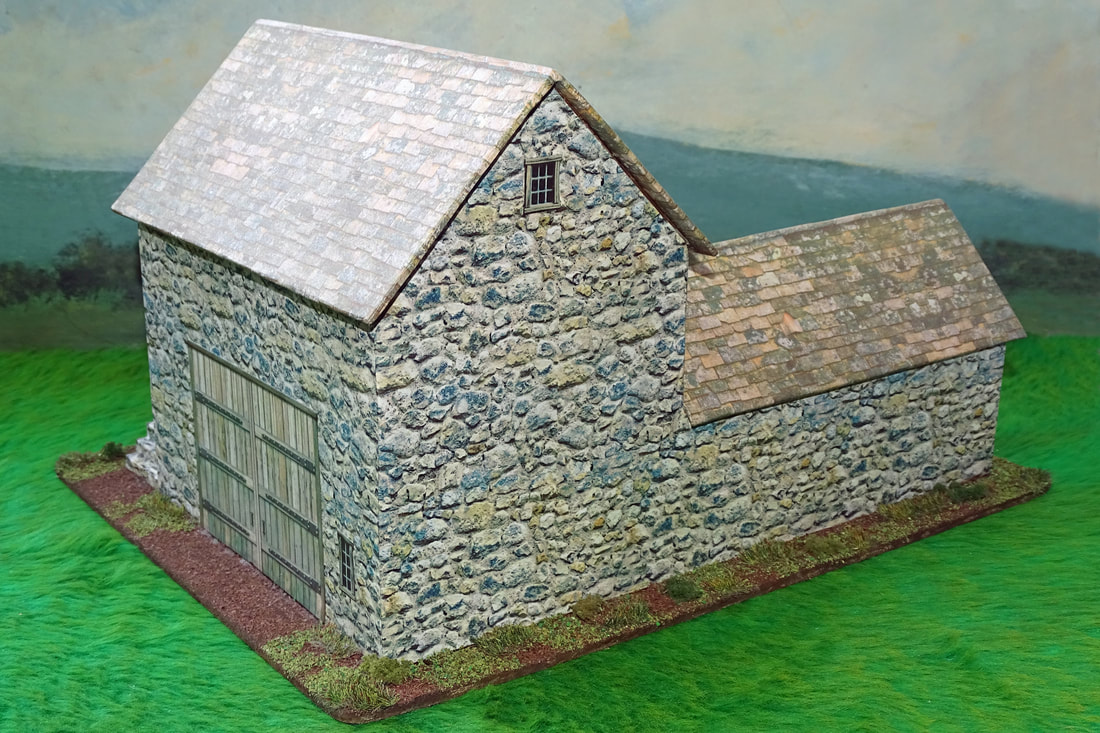
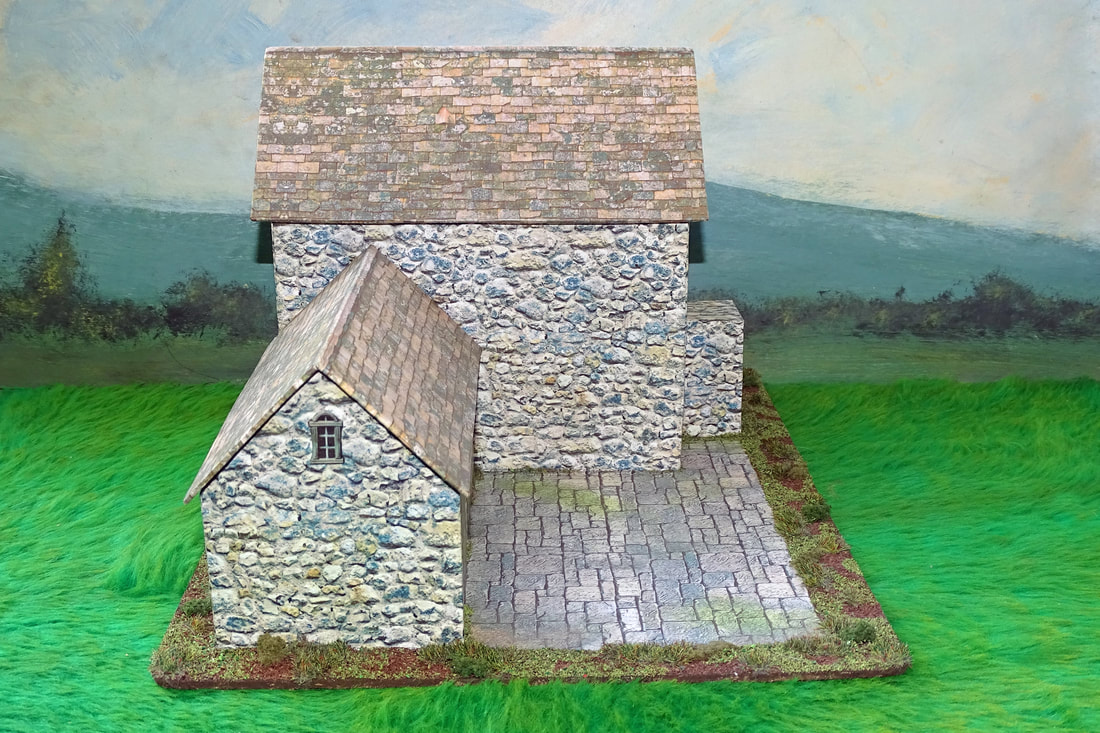
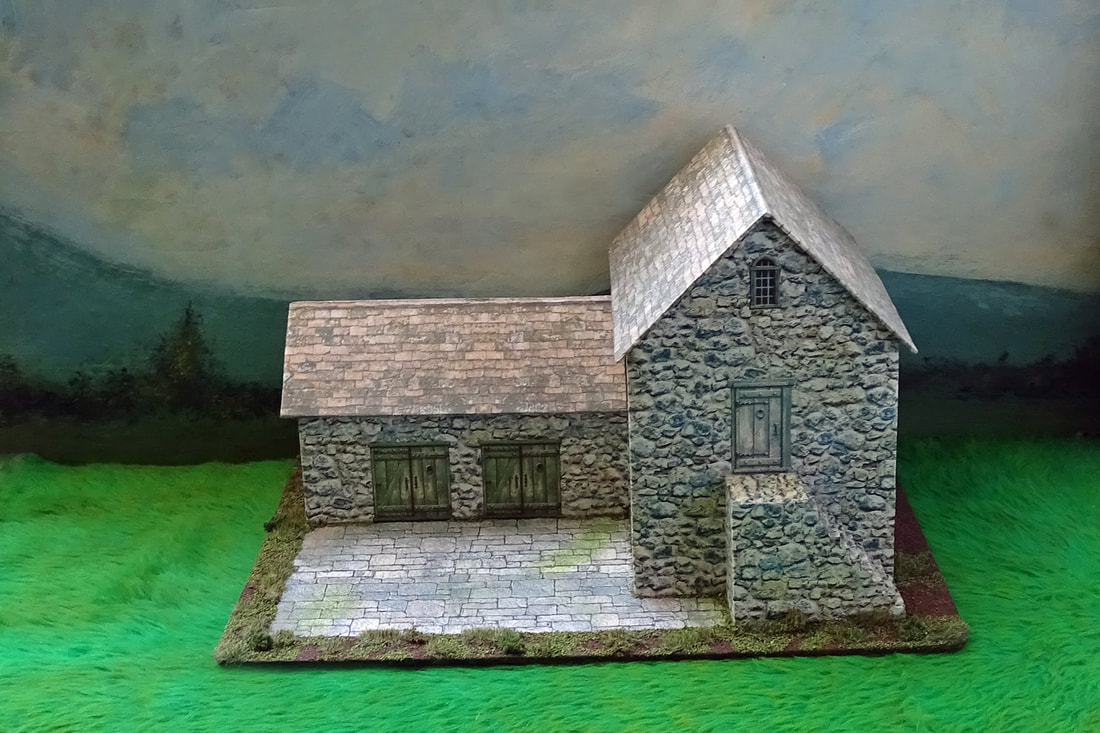
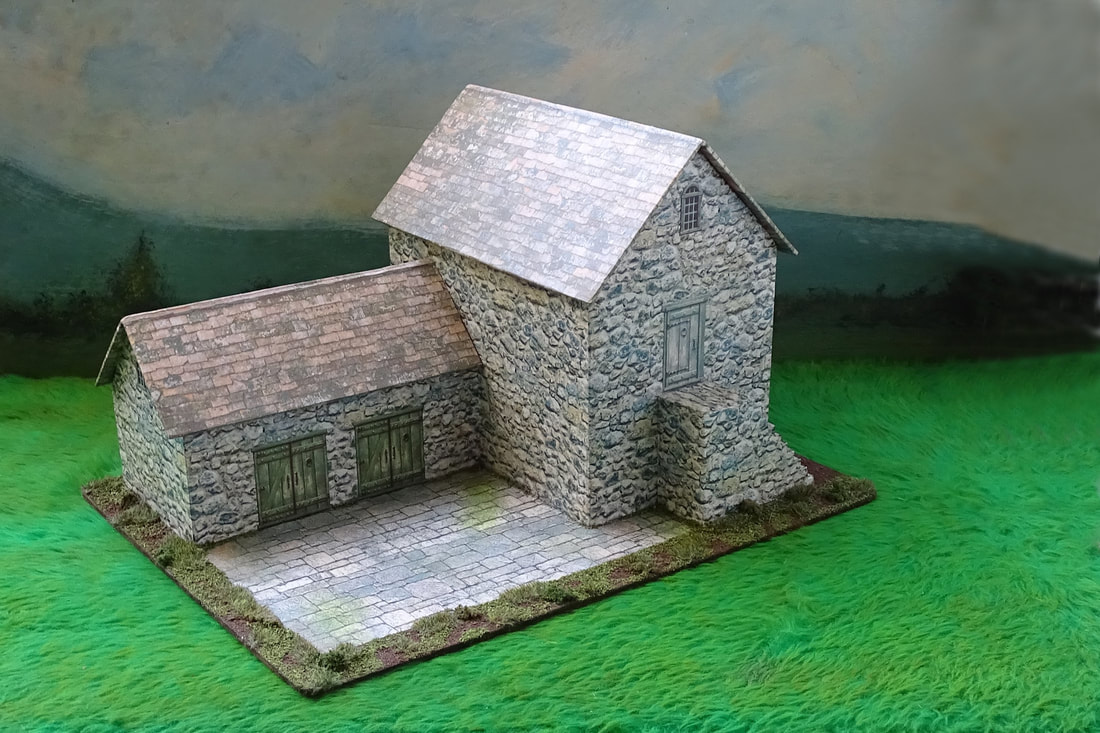
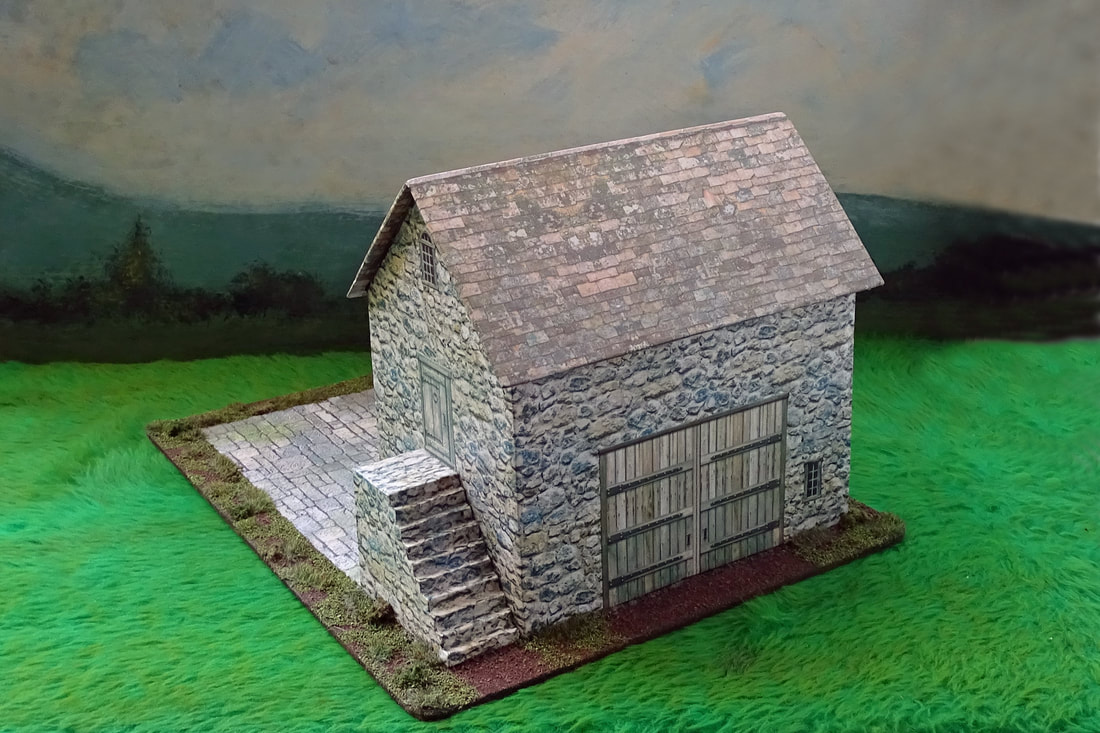
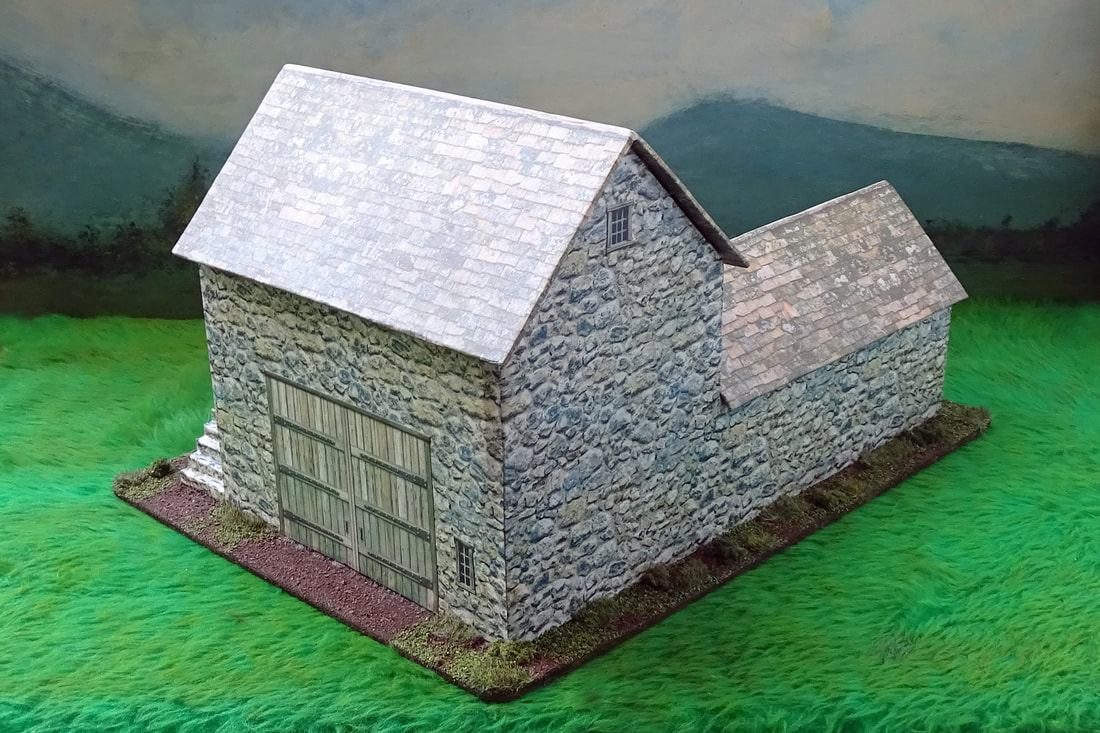
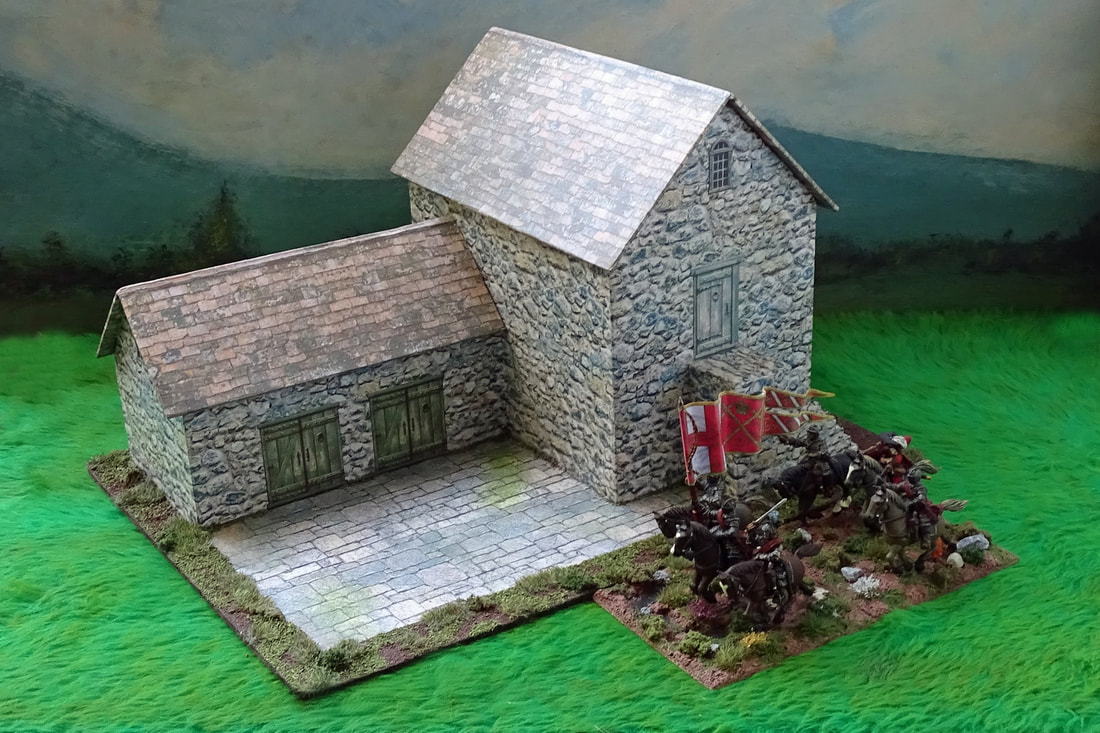
I decided to write down a list of buildings that I thought would be really useful for a village or small town setup and all the usual building types were on there including a stone barn. Having decided to pluck this one from the list as it would be a relatively simple build I looked for inspiration and the first stop was the internet. Looking at loads of pictures I came upon a picture of a 28mm Barn & Stables from Grand Manner and it did look really pretty indeed! From there I looked on their web site for more details and hopefully more pictures as I really did like the look of this structure and although there was only one picture there were some references to the base size which gave me an idea how large it might be, and here it is below. 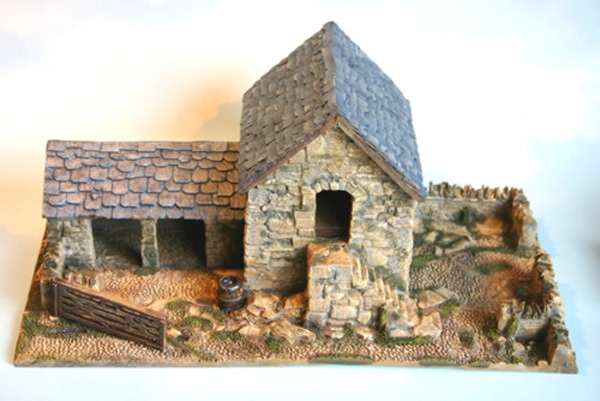 28mm Stone Barn & Stables from Grand Manner The size given for the base was 340mm x 175mm and it has a lift off roof, which to me was not something I wanted as this is a pet hate of mine lift off roofs as they always seem to get plonked on the side of the table for most of a game when figures are inside which tends to ruin the aesthetic for me. These guys make some really lovely buildings and if you can afford to pay £360.00 painted to this standard then you are indeed very lucky indeed, even the £104.50 unpainted price is way more than I can afford to pay for one building and therefore this is why I choose to build my own. Back to the plot. Taking the base size as a reference I decided I could more or less work out the width and height of the model which I deemed to be approximately 10 inches wide by 5 inches high and the depth I could only guess at. Either way I decided that this would only be a basis for my own model and dimensions I could change to suit my own taste as well as the need to fit in with the rest of my models. Certain features I wanted to make larger such as the courtyard between the stables and the steps, other features such as the surrounding wall area I decided to completely omit as they weren't needed. As with all my buildings this was made from a foamboard shell as this is very easy & quick to build, very lightweight and surprisingly strong once constructed. The next job was to wallpaper over the shell with a cobblestone wallpaper of my own making and once done the roof was added using thin corrugated card. With the roof glued and the wallpaper left to thoroughly dry for about a hour I decided to use a roof tile wallpaper and glue this down ensuring that it would overlap the edges so it could be turned under and trimmed neatly. This part was a little fiddly at first, but I soon got the knack of it and it looked really good when finished. The steps were my favourite part of this model but the hardest part to make, in fact it is fair to say they took as long to construct and wallpaper as the rest of the building had done. To make them I used layers of foamboard each 1/4 inch longer than the last until I reached the height I wanted and then glued them together, once dry I faced up the sides with cereal packet card to make them smoother. The wallpaper was applied to the side walls first and overlapped onto the steps and then the top and step wallpaper was applied with particular care to line up the leading edge so that it blended seamlessly with the facing side. Finally the steps were glued in place against the gable end of the barn. The next job was to decide where to put windows and doors and even what type I wanted on the model. These were all chosen & placed accordingly and glued into position, the basic building was now complete and ready for its base. The base was hardboard which was cut to a suitable size and the corners snipped & rounded off as with most of my models and the position of the building marked out ready. The model was glued into position and left to dry out fully ready for the base work to be done. The courtyard wallpaper was picked out and glued into position with the base itself then being coated in dark brown paint. Before any texturing of the base I painted the whole model including the courtyard with acrylic matt varnish to add protection to the wallpapers used and also as an added bonus it strengthens the model itself. The base was then textured with various earth and grass textures In my usual way and then bushes, flowers and long grasses applied to suit. The addition of a barrel was a nice touch that was on the Grand Manner model so I will no doubt use that idea on my model. As a guide here are the basic measurements of my Stone Barn & Stables which did prove to be somewhat larger than the original estimate being: Barn gable end 4 1/4 inch wide x 4 1/4 inch to eaves x 6 1/2 inch to ridge. Barn side walls 6 1/2 inch long x 41/4 inch to eaves. Stable gable end 3 inch wide x 2 1/4 inches to eaves x 3 3/4 inches to ridge. Stable side walls 6 inches long x 2 1/4 inches to eaves. Barn Steps 2 1/4 inches high x 2 3/4 inches long x 1 1/4 inches square at the top. Finally the pictures which show it in all its glory and something that I am really happy with especially the price at well under £1.00 in total and an evenings worth of build time.
Please click on the pictures to enlarge
1 Comment
Gallocelt
1/8/2022 06:11:58 pm
These look great! I am imagining all the ECW houses etc. that can be designed and built. What an inspiration! Leave a Reply. |
AuthorStephen Wylde BA (hons) Archives
July 2022
Categories
All
ECW Blogs
ECW Sites
|


 RSS Feed