
WARGAMES DESIGNS ECW BLOG
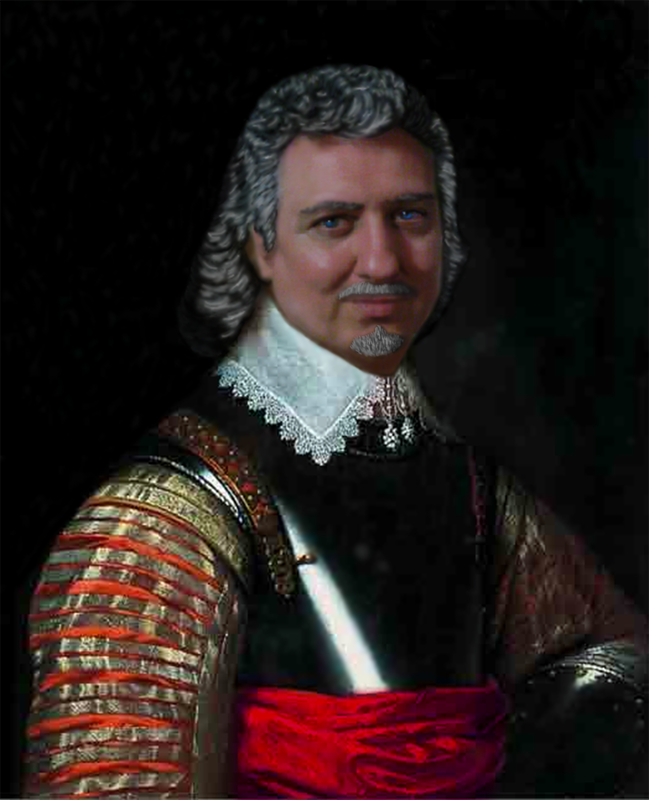
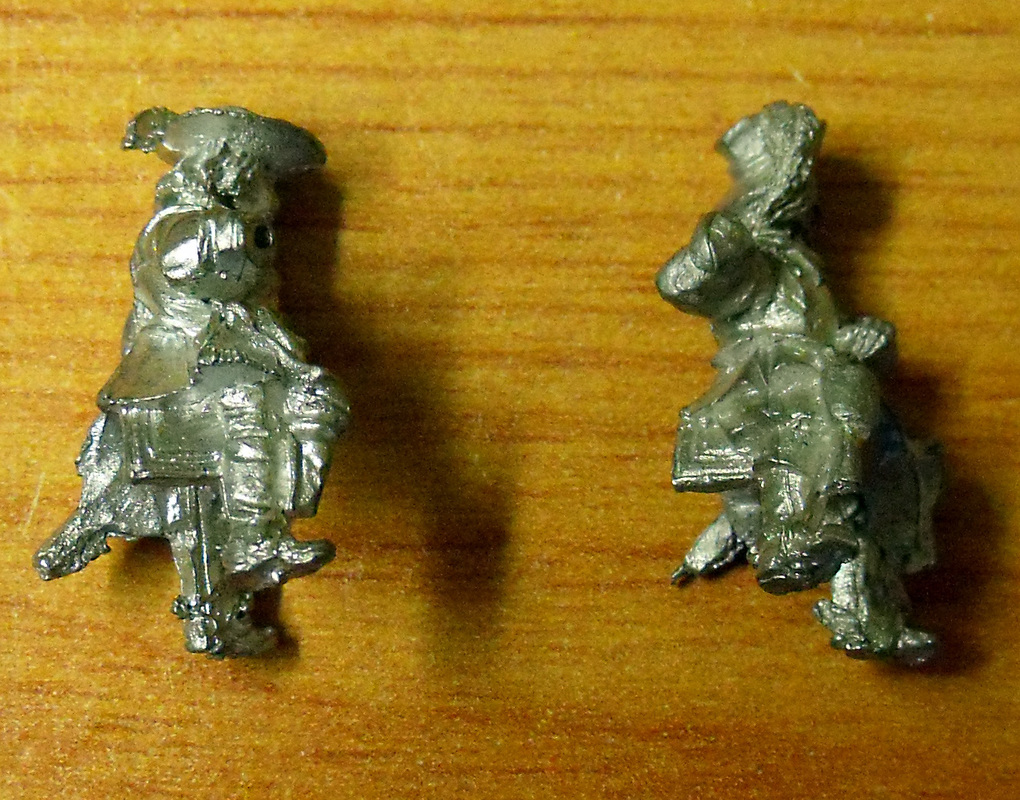
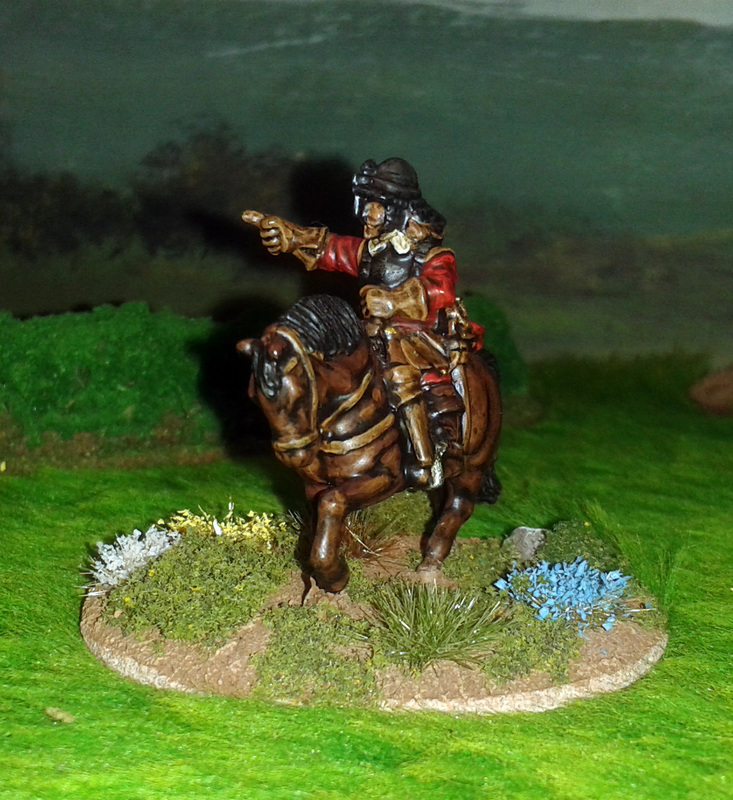
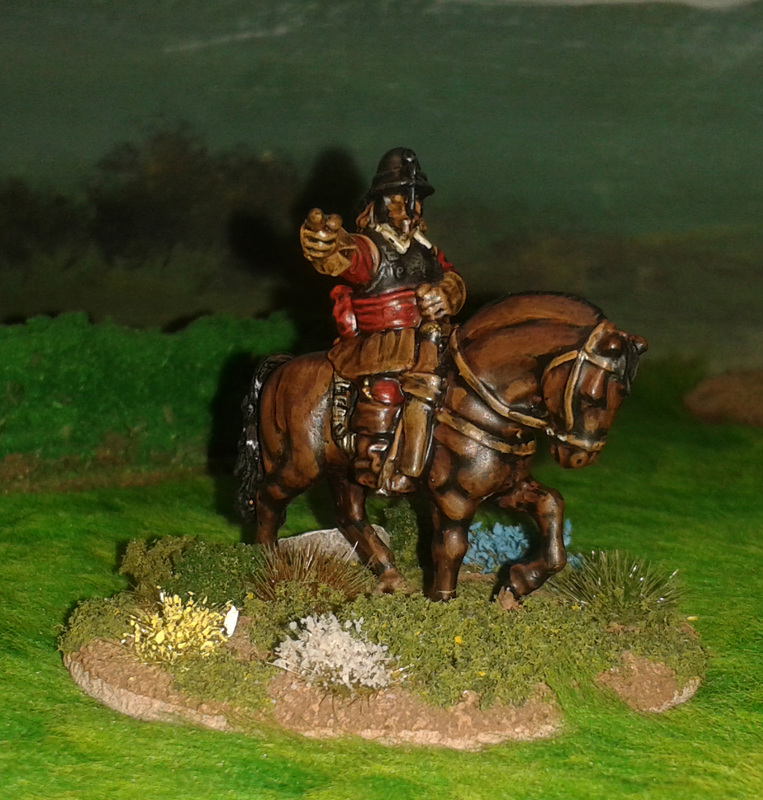
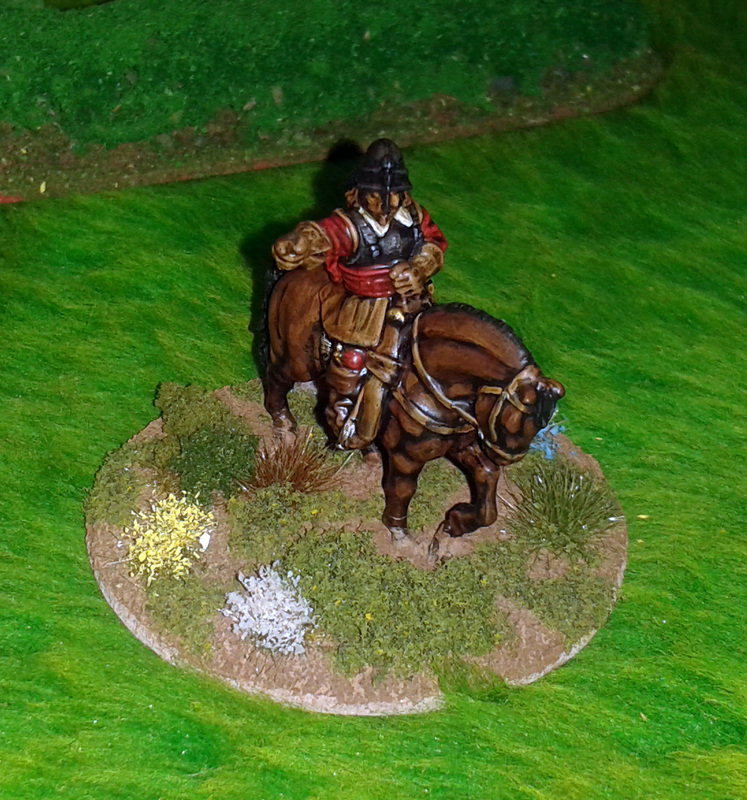
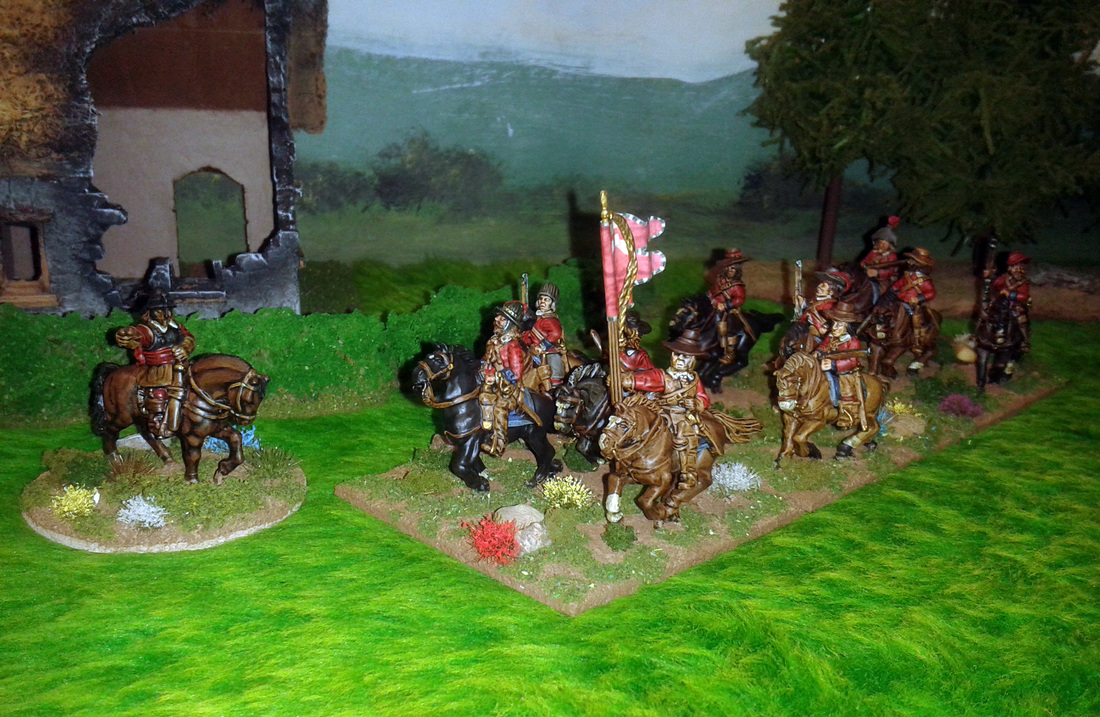
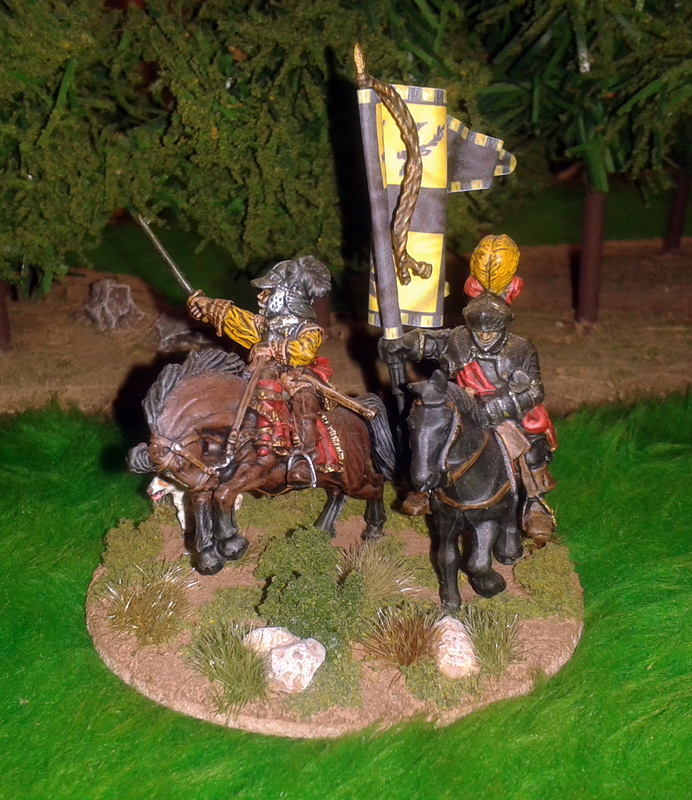
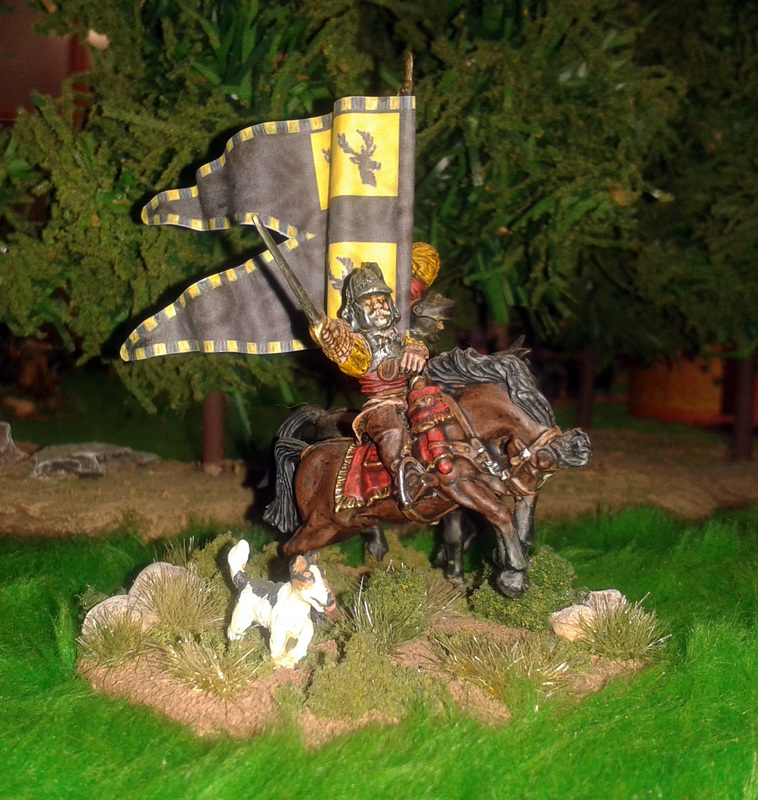
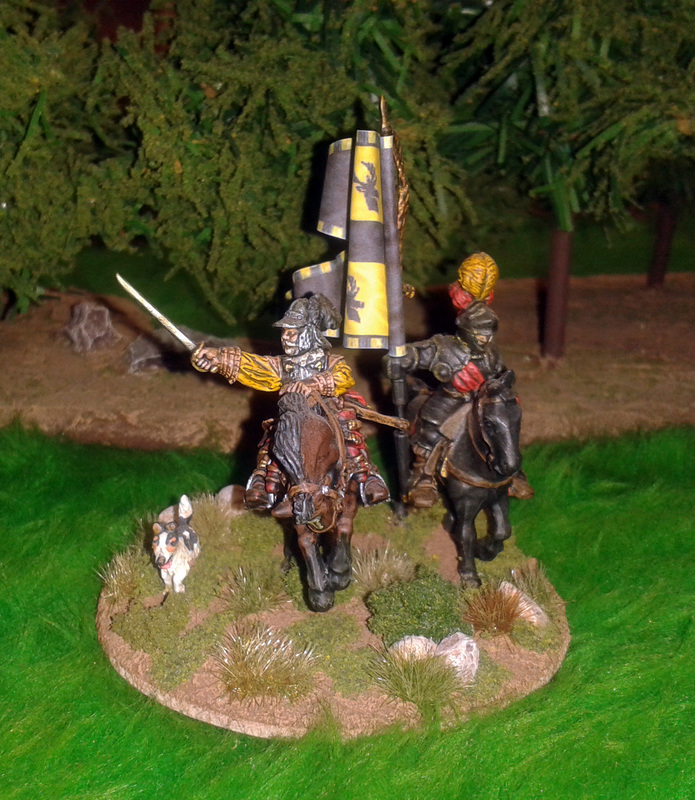
The Very Famous Royalist General Sir Stephen Wylde
|
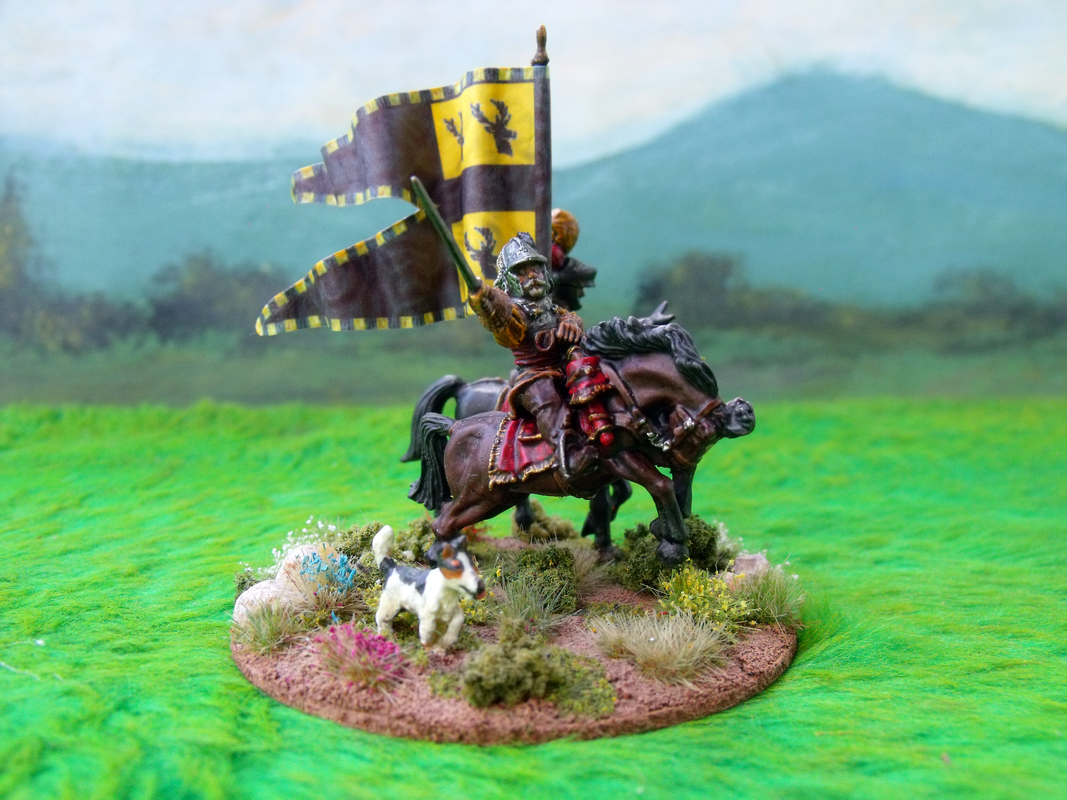
Sir Stephen with his Personal Standard Bearer and his Faithful Hound Daisy
|
|
The Very Famous Royalist General Sir Stephen Wylde
|
Sir Stephen with his Personal Standard Bearer and his Faithful Hound Daisy
|
|
For some time now I have been looking for a decent, fun set of skirmish rules for use with my ECW figures that involve very small amounts of figures, anything really from about 10 to 50 figures. I have looked at other sets and found them not really to my taste, either being too complex or for too large an action. Recently I started looking elsewhere and found 'Lion Rampant' which although not ECW they looked worthy of converting as they are a really good fun set of rules. A few days ago however I found 'Smooth & Rifled' which is a set of skirmish rules for use with multiple periods from ECW to Colonial and they are a great little set of rules. They are just perfect for low level actions and you have the freedom to make units as you wish, what's more the army lists are all free to download. I go my copy as a PDF for only £8.00 from Wargames Vault and are great for use on my tablet PC as well as being able to have a back up printed version. On the subject of PDF rules I do wish that many more companies would make their rules in this format as it is very much the way forward for wargames rules in this digital age.
1 Comment
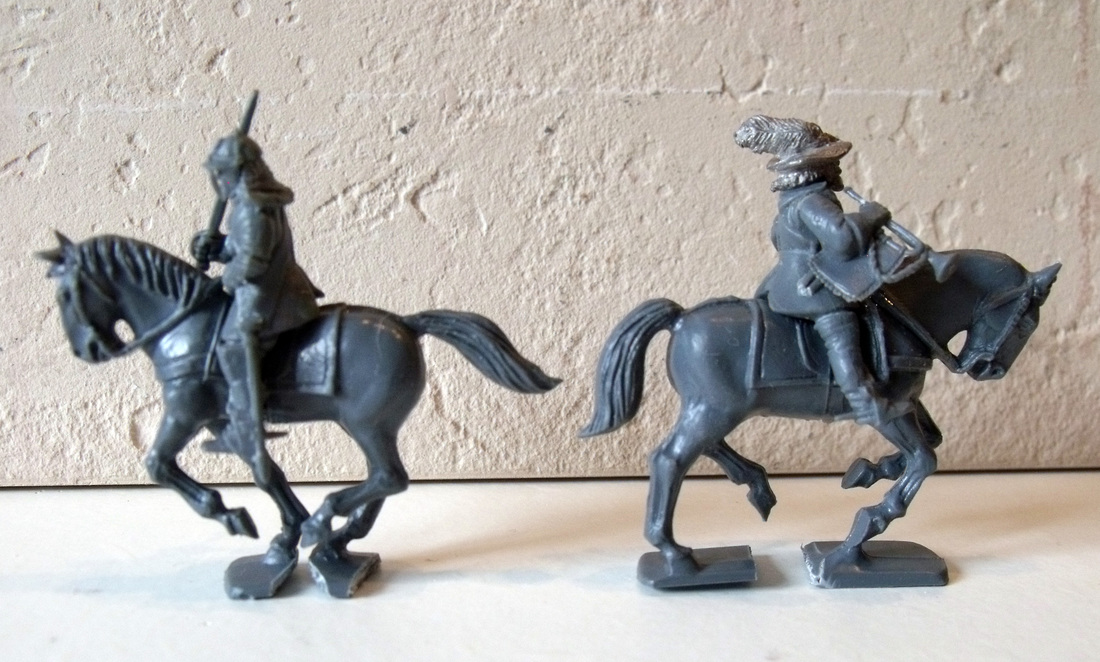
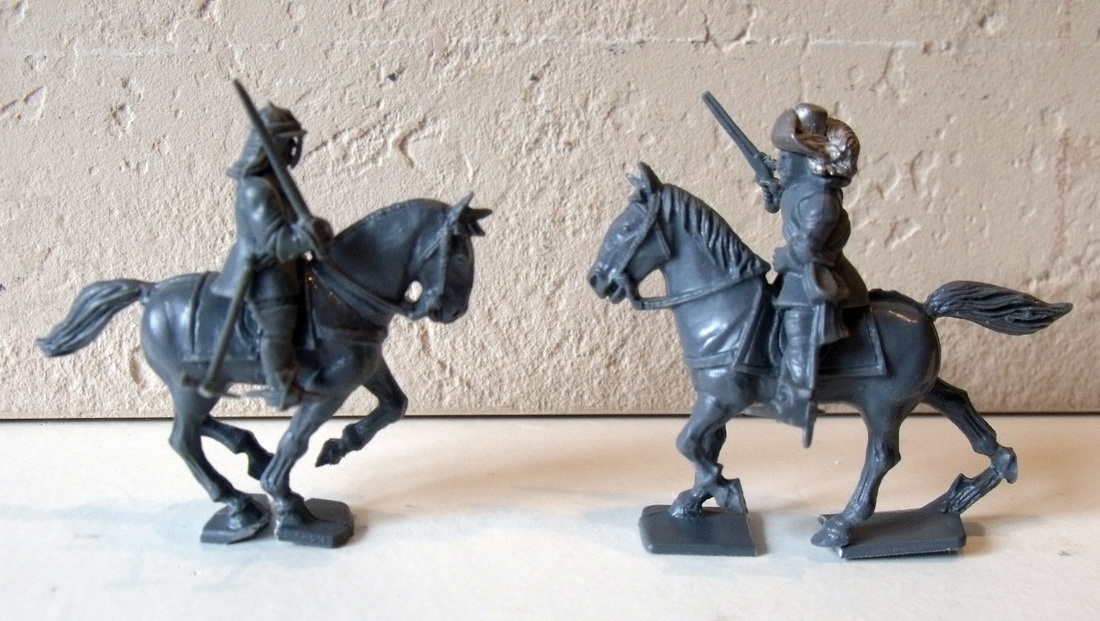
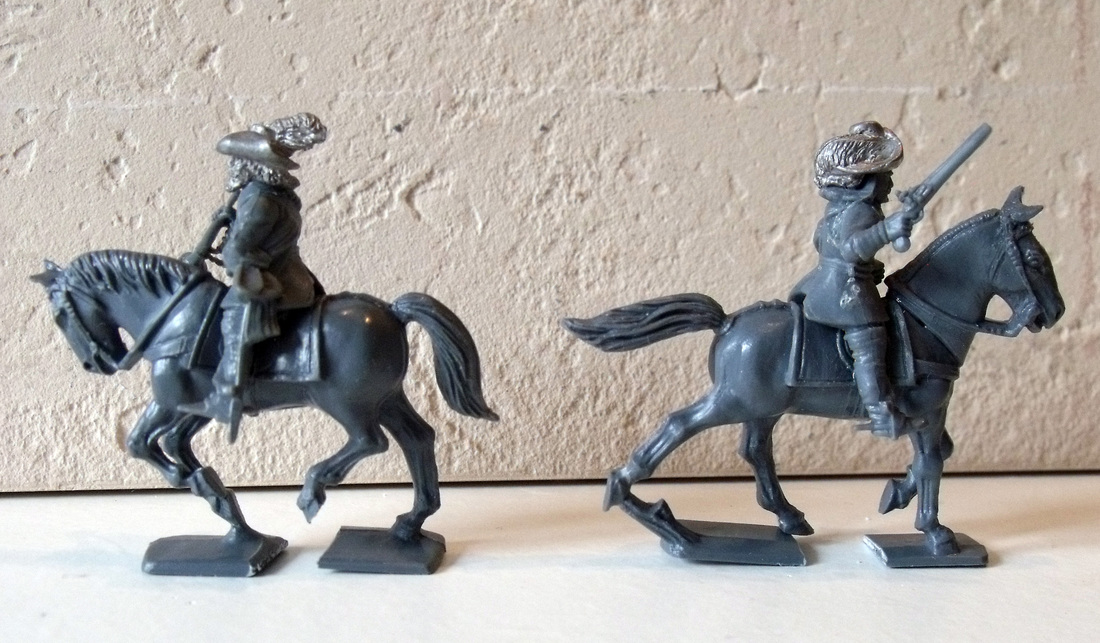
Warlord Games ECW horses are a really great set of plastic horsesand these horses are each made up of 2 separate parts giving a total of 9 variants from three horses (I know there are 4 horses on the sprue, but two are the same), and it looks like this.  If you take a very knife and cut each horse half in two just behind the saddle strap to make each horse four separate parts it makes a total of 81 variants from three horses, and it looks like this. 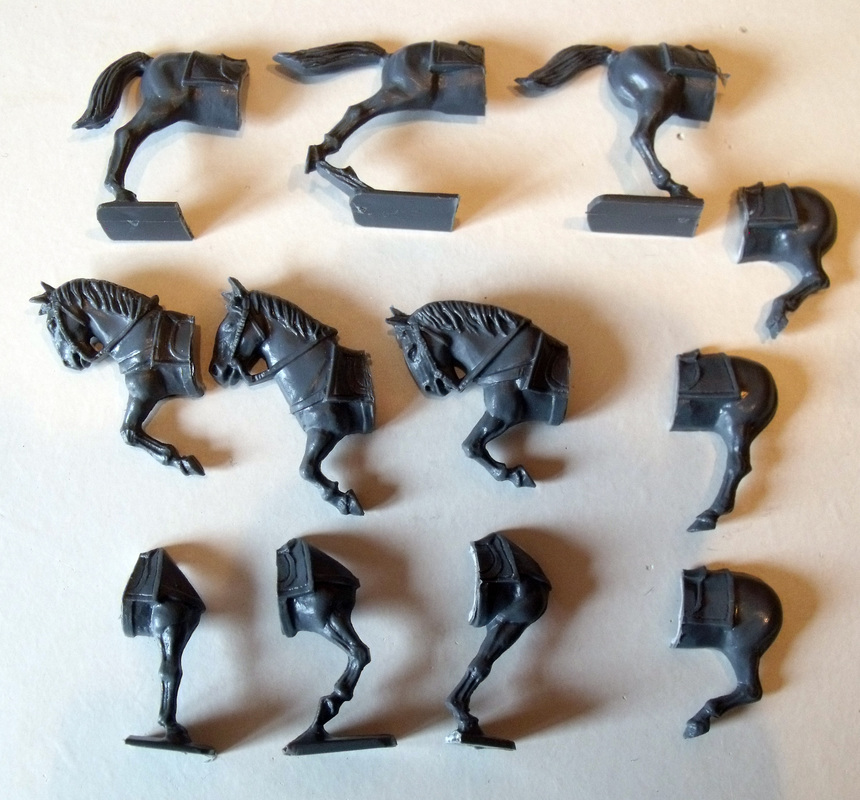 Once you start to glue them back together in a variety of new poses they look like this. 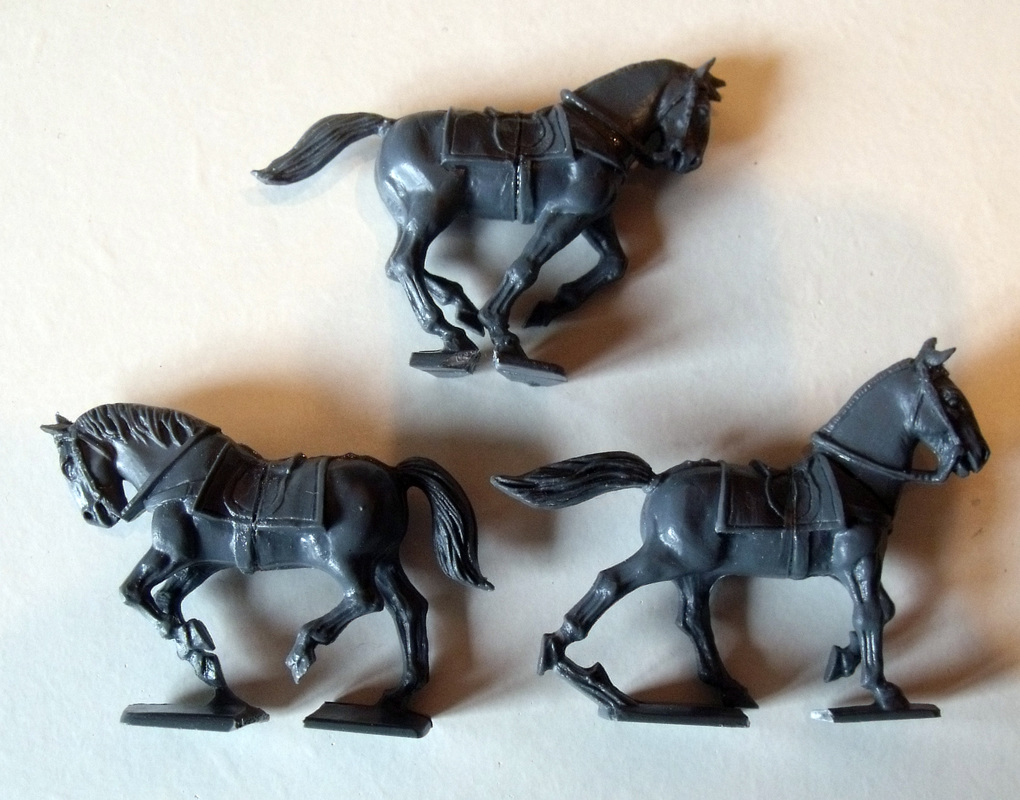 When the riders are added the cut lines are hidden and they look like this.
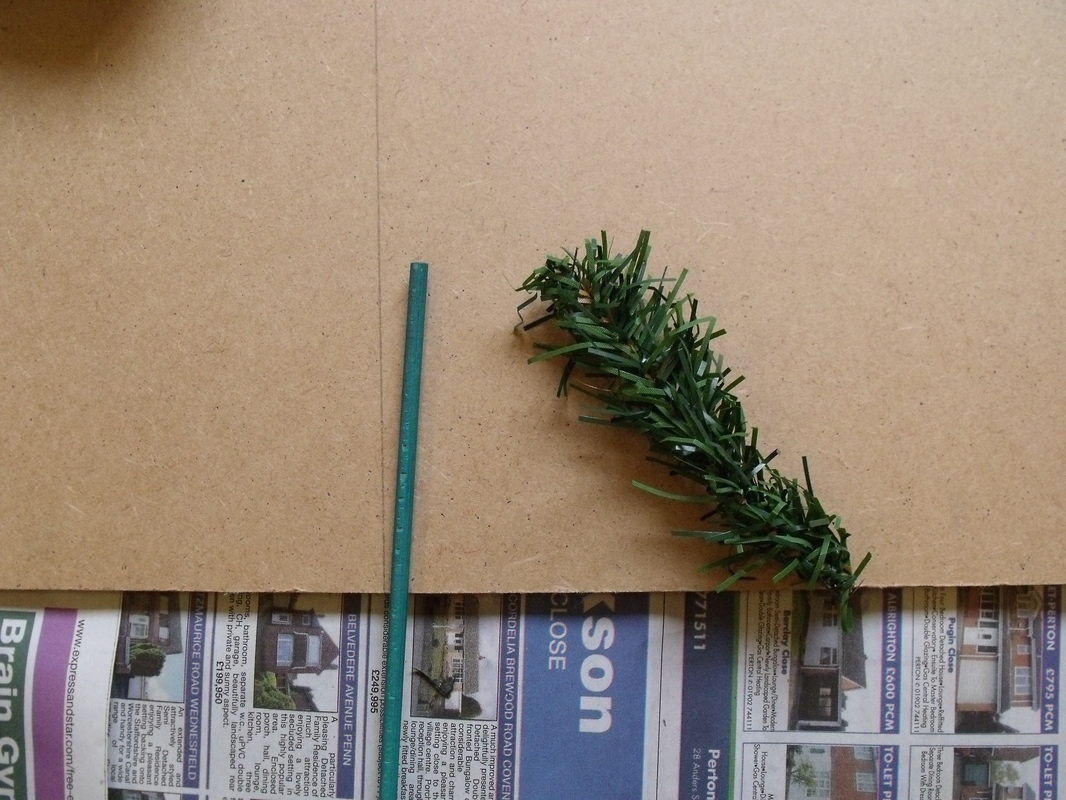
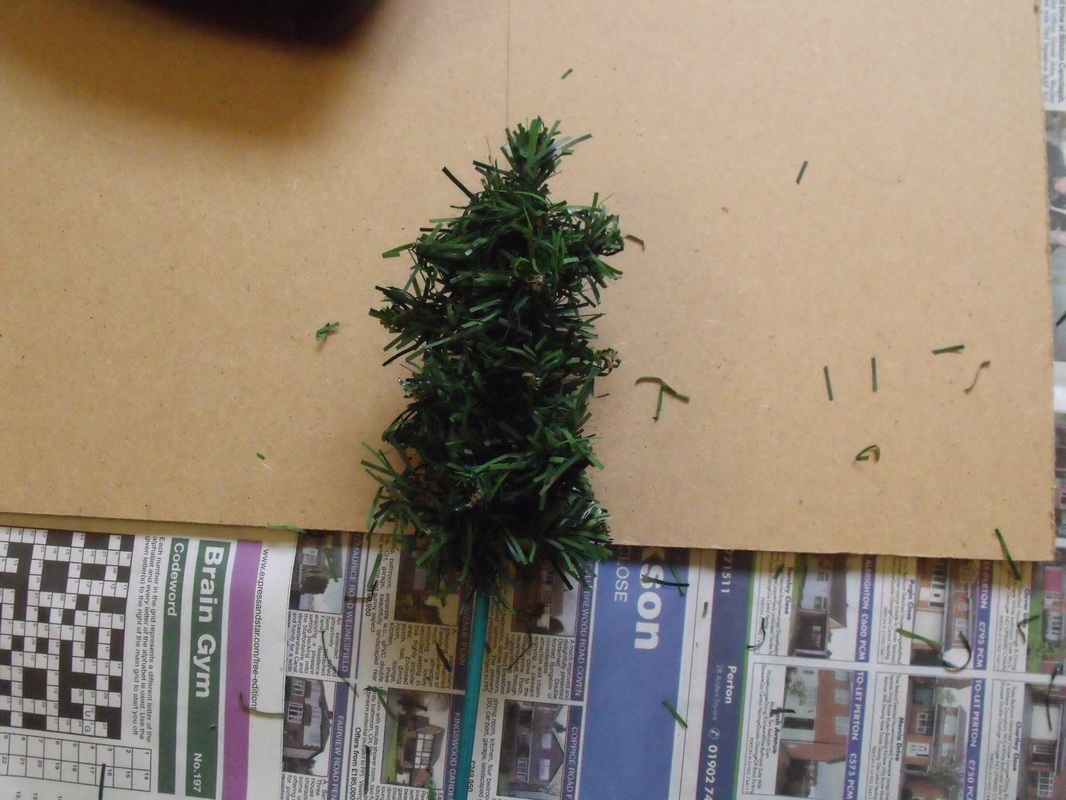
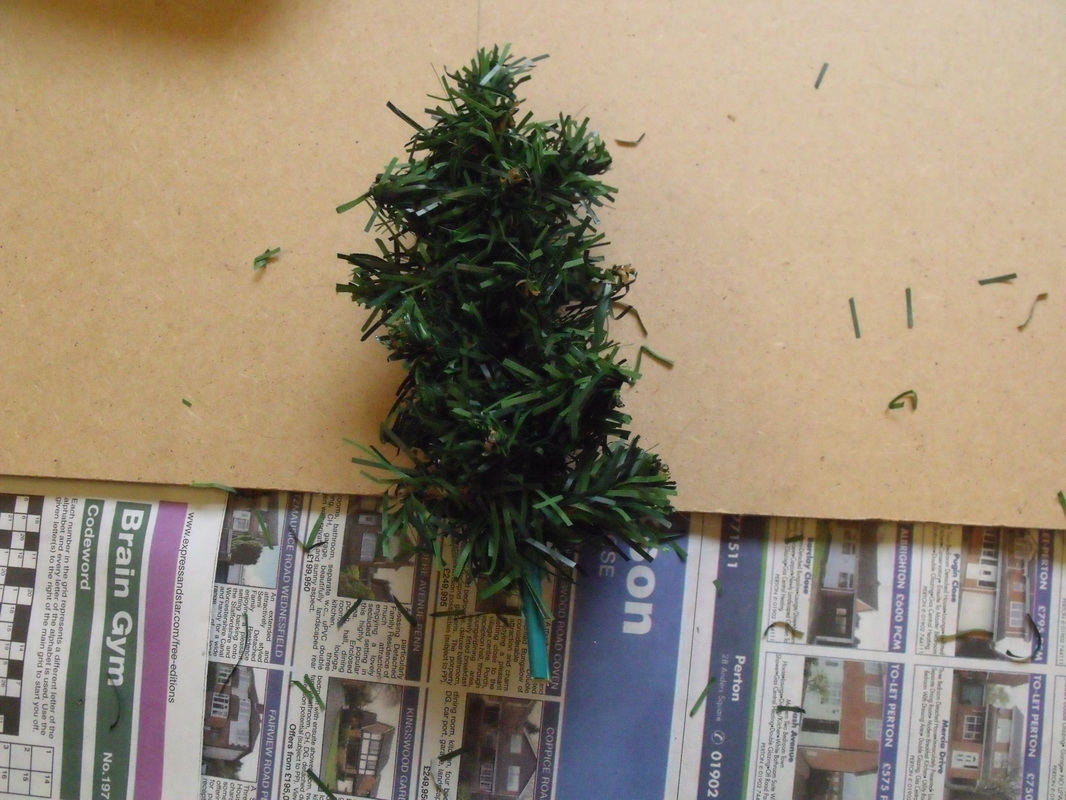
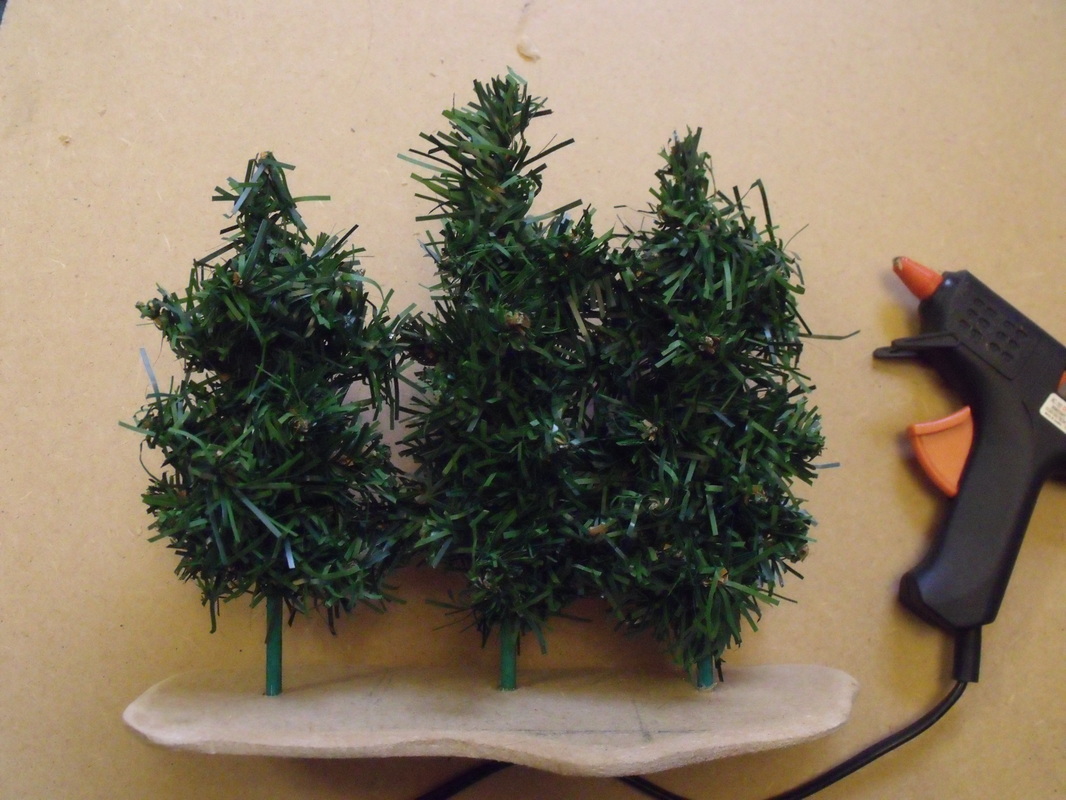
All in all a very simple and effective way of adding extra variety to the horses. A bit of a weird title especially at this time of the year, but nonetheless quite apt when you discover the details of this posting, and without beating around the bush it's all about trees and the use of old (or even new) Christmas trees. Basically, just over two and half years ago I was sorting through the Xmas decorations in readiness for them being put up when I discovered one of the trees had an issue with its legs, a missing one to be exact, and as it was old I decided to throw it out and buy a new one. As is the the usual way with wargamers all over the world I started looking at it wondering how to use it productively in my hobby and obviously came to the conclusion that trees could be made from this tree. Not much of a leap to be fair, but it was a leap in the right direction, so I duly set about cutting all the little branches up with my heavy duty clippers. What I ended up with was lengths of branch between 4 and 6 inches approximately and lots of them as it was a six foot high tree. The next thing was to assemble the tools and materials needed to transform these into useable model trees being: a jigsaw, drill, hot glue gun, metal ruler, paint brushes, pencil, heavy duty clippers, sharp knife, PVA glue, sandpaper, lengths of 4mm garden canes, 6mm MDF board, scatter flock and an old newspaper. 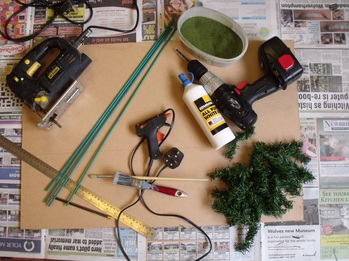 The Ingredients
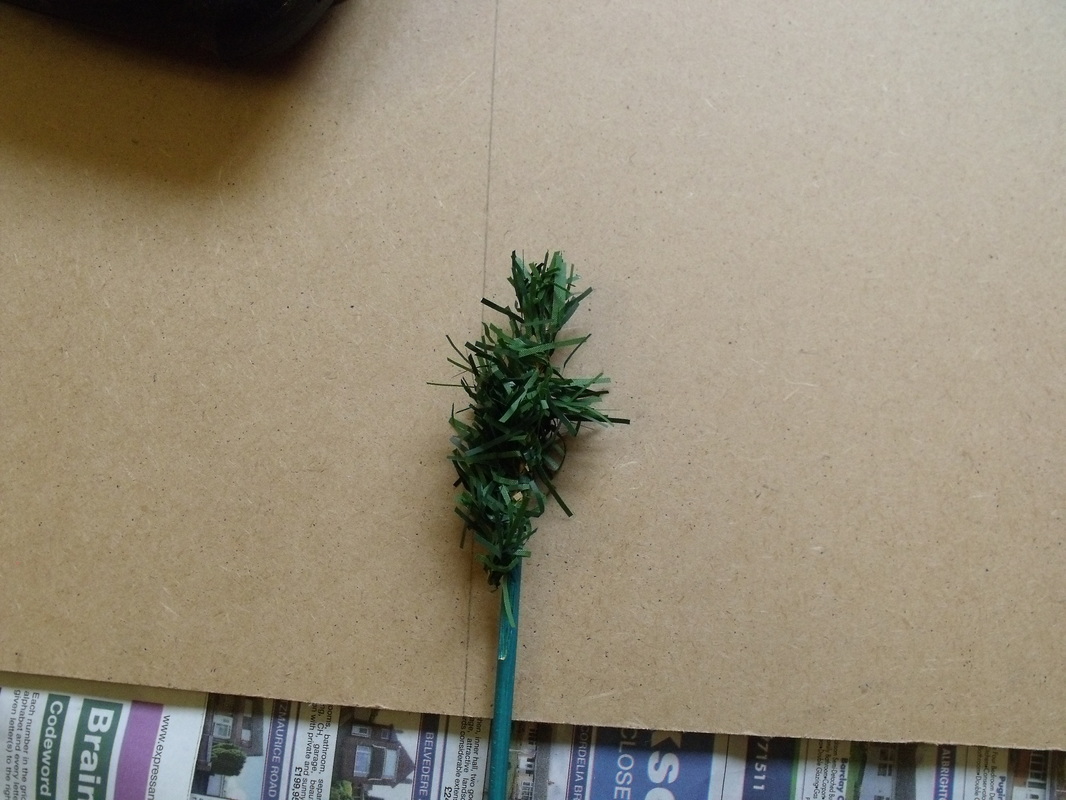
With all the tools and materials assembled I cut lengths of cane between 4 and 6 inches long, trying to vary the lengths but not have any waste from the 2 foot long lengths of cane. Once done I sorted out the lengths of branch so that I had a pile of short lengths and a pile of long lengths, this makes things much easier as you make the trees. Next I took a small length of branch and a length of cane and wrapped the branch around the cane about 1 inch from the top and then I bent one end up and one end down as per the photo's below.
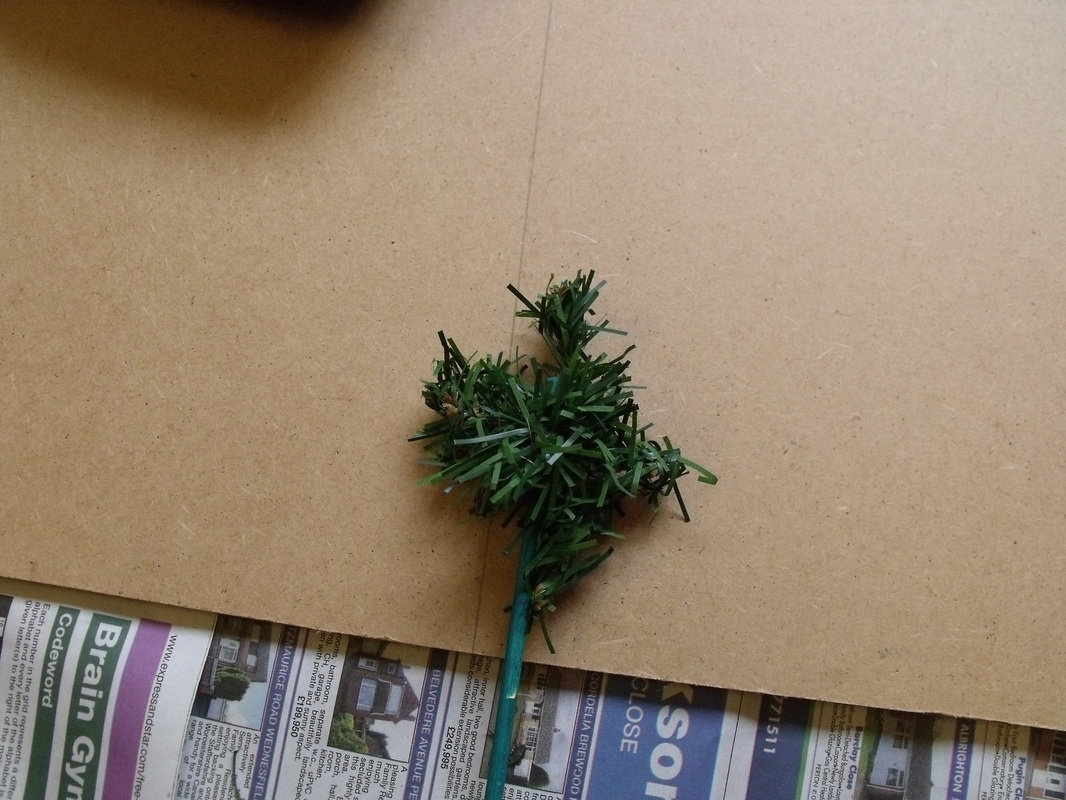
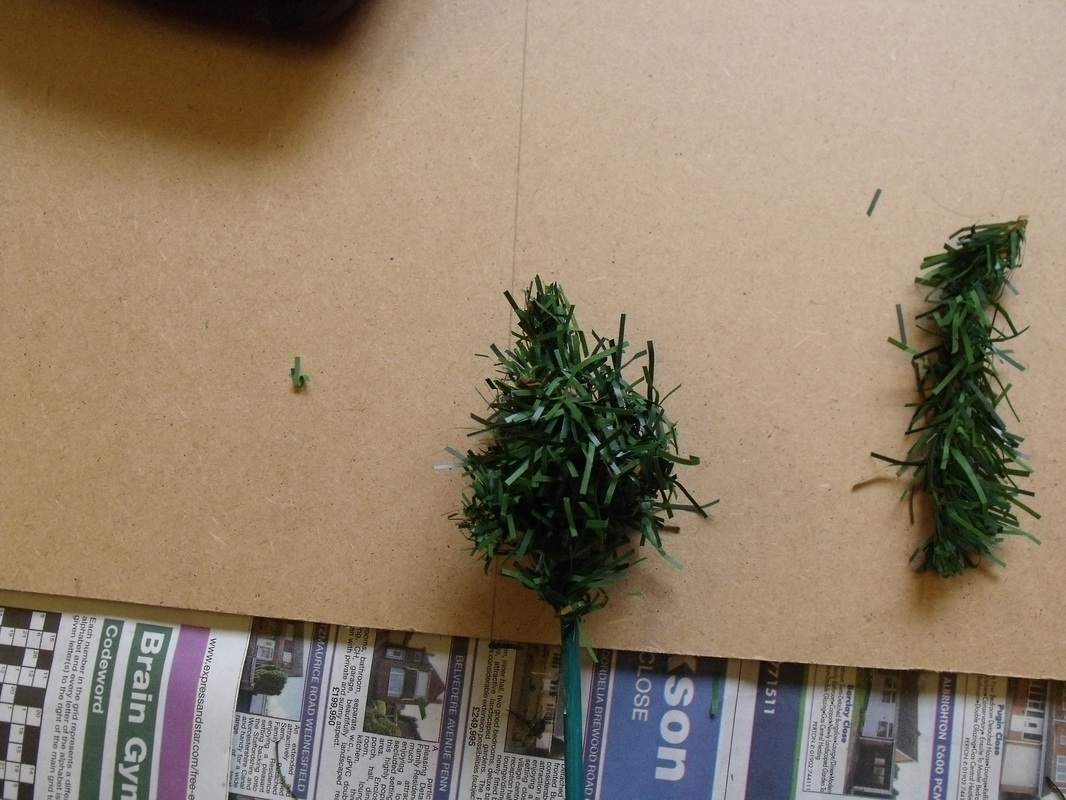
Then I took another short length and again wrapped it around the cane about half inch from the top and bent both ends of the branch slightly upwards. This was followed by another short length wrapped just below and this time its branch ends were left facing at right angles to the first ones and bent slightly up. At this stage I had the top of the tree done so I took another short length and placed it parallel to the trunk overlapping what was left of the first piece of branch going down the trunk. I took another piece of branch and wrapped it around the trunk securing the trunk piece again bending the branch ends slightly upwards. At this stage there was no glue involved as the branches held each other in place, again the photo's below help explain the procedure. So, I carried on down the trunk adding new branches at about three quarter inch intervals until I had enough left to look like a lower trunk. This I repeated until all of the branches were used up.
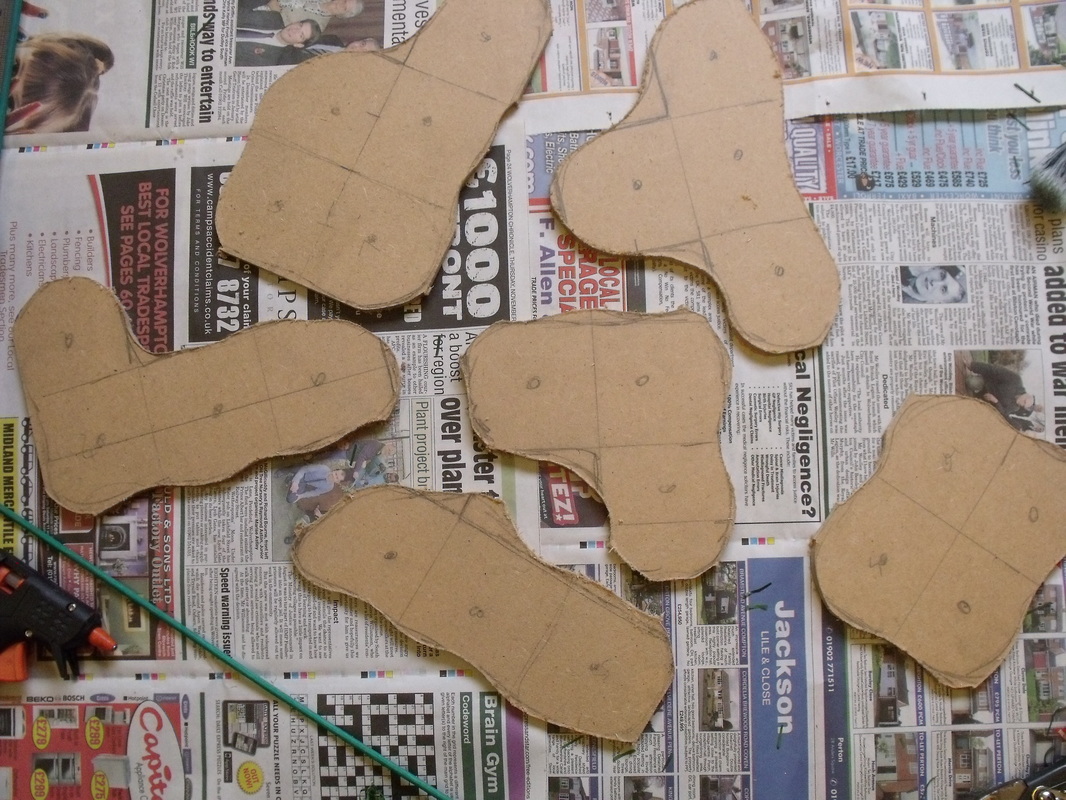
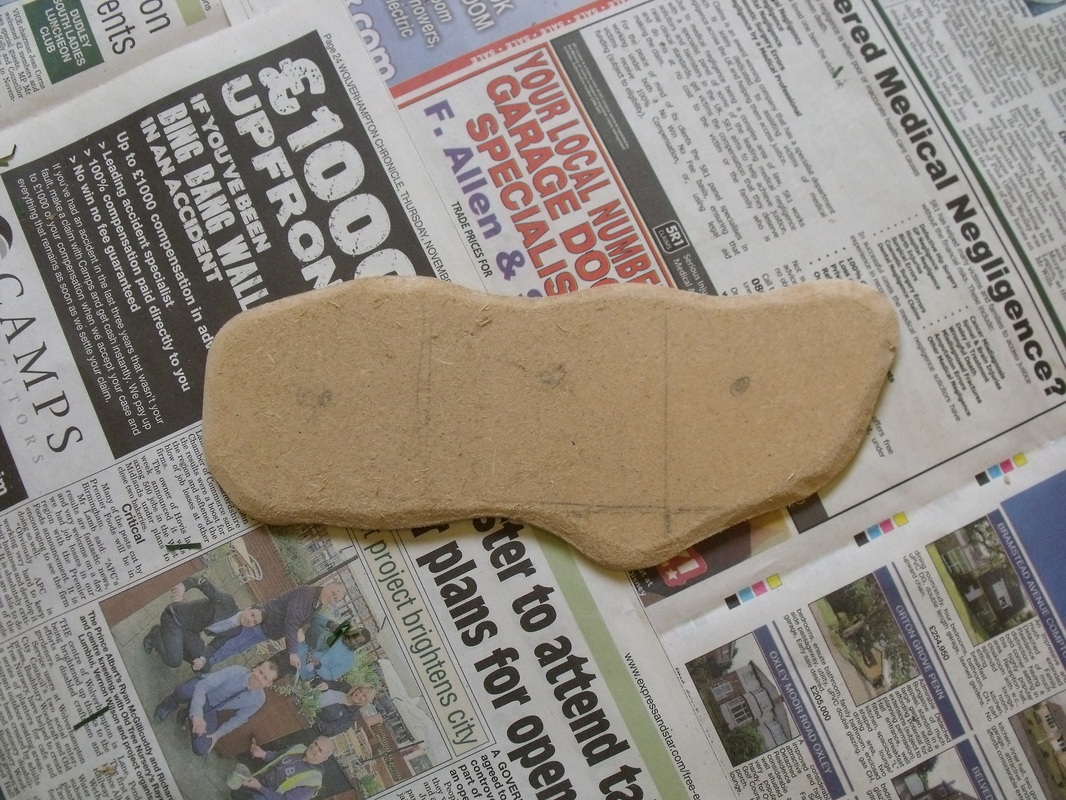
With the trees made I decided to make bases, now these could be single grouped, removable or done in any way I wanted but I decided to go for groups of between 3 and five trees. I simply took my MDF and marked a 3 inch grid in pencil, after which I marked a circle roughly at the centre of each grid square. Then I marked on the shape of each group of trees rounding off edges and making the group shapes look more organic. Once done and happy with the configuration I took the jigsaw and cut them out, trimming off any unwanted bits. With a sharp knife and sandpaper I bevelled the edges of the bases and and sanded them until they looked nice and neat.
I took each base and drilled out an hole as marked at the rough centre of each grid box and lightly sanded them to take off any burrs. with the bases totally ready I started gluing the trees in place with my hot glue gun, making sure the bottoms of the holes were well filled with glue and any extra trimmed off with my knife.
At this stage I had 53 trees each between 5 to 8 inches tall all ready to be flocked. Now this could be done with spray glue and flock, but I used PVA glue and a paint brush, which to be fair was quite quick and easy to do especially as the trees were on bases. The PVA also glues the trees to each other which helps to strengthen them. The last thing to do was to texture the bases and that was it, 53 very large trees for the price of an old Xmas tree and some pretty cheap materials.
As you can see in the photo's above the trees are pretty large and imposing and look far more natural than perfectly shaped bottle brush trees. As for getting trees, now isn't a great time of the year to shop for such things, but I do happen to know that on ebay you can get them for less than £15.00 including postage.
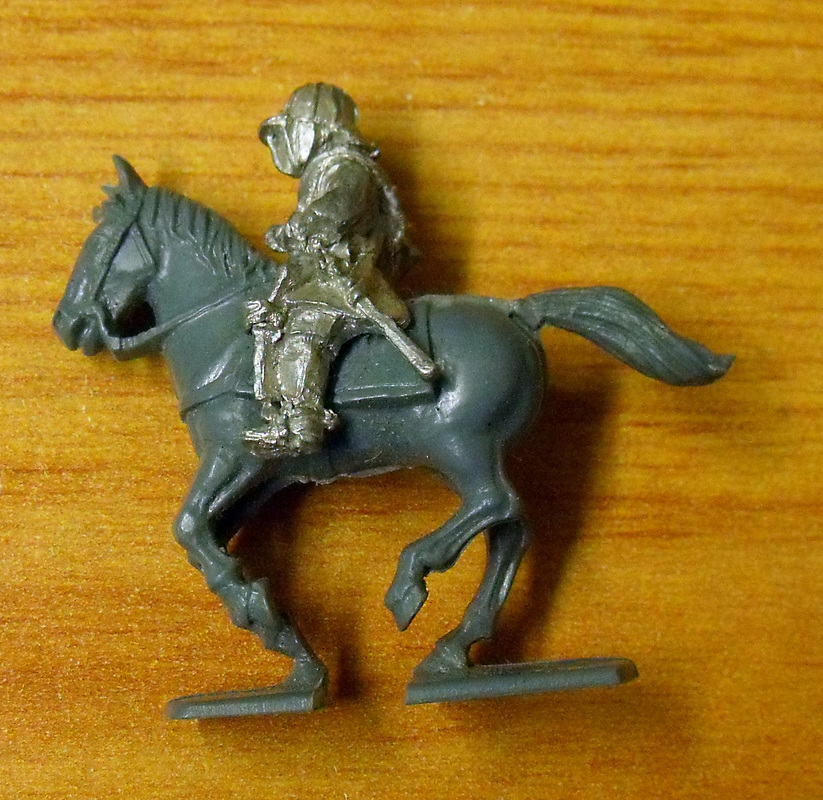
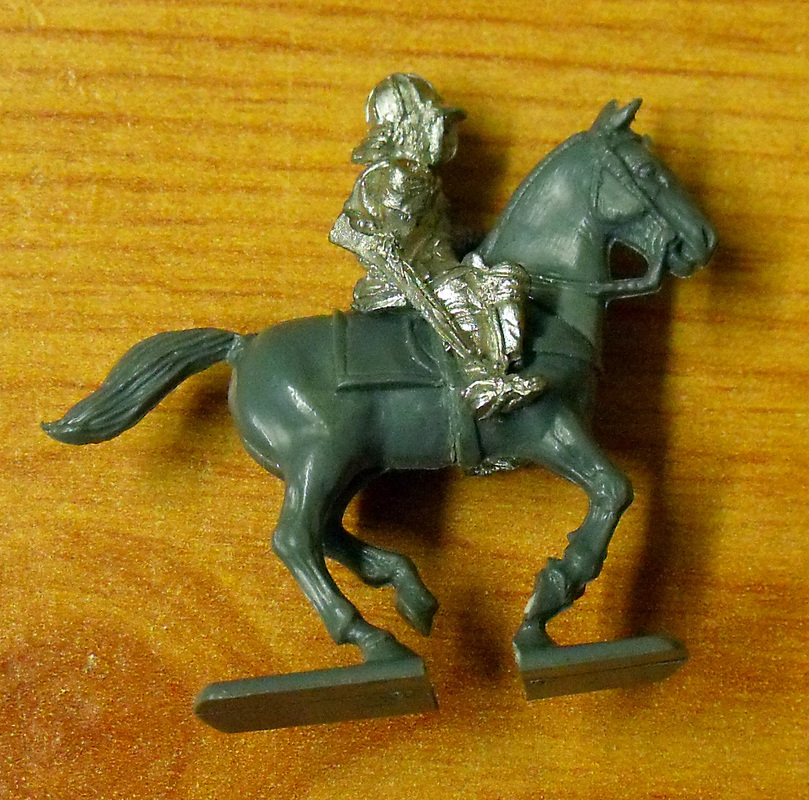
 For my ECW cavalry I unashamedly love the plastic horses from Warlord Games, they are big powerfully built and wonderfully sculpted horses that look perfect as mounts for well equipped heavy cavalry. So as I already had a hundred or more cavalry from Old Glory, Front Rank and Essex with cast on saddle cloths I really wanted the horses to be consistent in size and weight within my units as I like to mix & match the figures. Obviously the Old Glory horses were quite small in comparison and could not be mixed in the same units, Essex Horses were a mixed bag with some of them fitting in well and others not so well, and the early ECW Front Rank Horses again seemed a little underfed when compared to the Warlord Games Horses. I could have put them into separate units, but I actually wanted a really good mix of different poses within units and I actually liked all the figures I had. 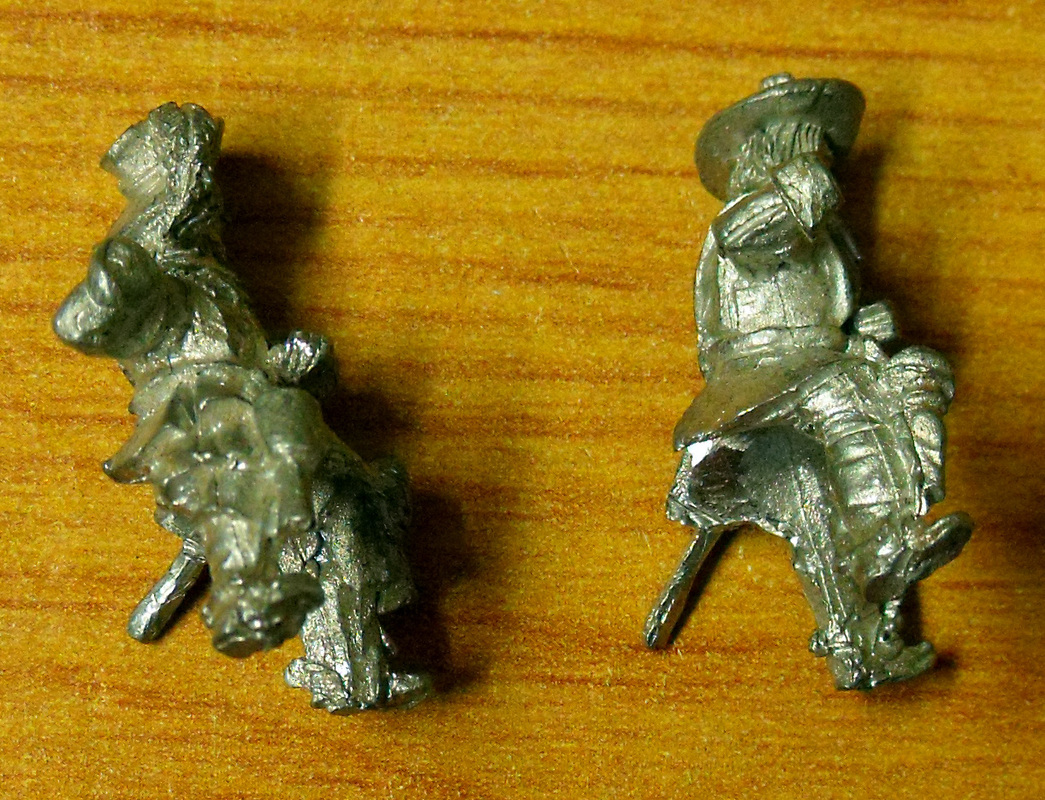 For most that was it, less than a minutes worth of work, but for others there was more to do on areas such as the saddle holsters and the rear of the buff coat. First the holsters, these can be really nice on some of the Old Glory cavalry and really awful on others, so I simply snipped off the awful ones and used the plastic ones provided on the horse sprues. Again all really simple and easy to do, but the rear of the buff coat on some of the figures had a really wide and unnatural looking opening so I decided to remodel these with green stuff, which although a little harder to do than the other work it was still relatively easy. The problem was obvious the saddle cloths had to be removed and done in such a way that it didn't stick out like a sore thumb that the riders had previously had the cast on saddle cloths. Actually this was easier than it looked so I took my trusty clippers and simply snipped off the areas of saddle cloth leaving the rider and his sword scabbard. The next thing to do was cut the back of the scabbard so that any extra thickness was removed and it looked normal, this done the clipper work was completes and normal clean between the riders legs was done with a knife or file.
That for the most part was all the converting that I needed to do, but there was the converting that I wanted to do, which was the weapon hands. Old Glory figures have separate weapon hands which you choose to mix & match, which is great and Warlord Games figures have separate weapon arms with lots of spares which is even better. Simply put it was a case of swapping hands or arms as I saw fit to make them look how I wanted, this part was really easy and really good fun. The Warlord Games sprues have extra trumpets and cornet lances which look great and are very easy to attach to most other makes of figure, so the lances especially I use on all of my mounted units. So there you have it, easy conversion techniques for making cavalry fit on horses they don't fit on. As for the spare horses, they were put aside to mount Scots cavalry and dragoons of all sides who both rode smaller horses, more of which I will cover in another post.
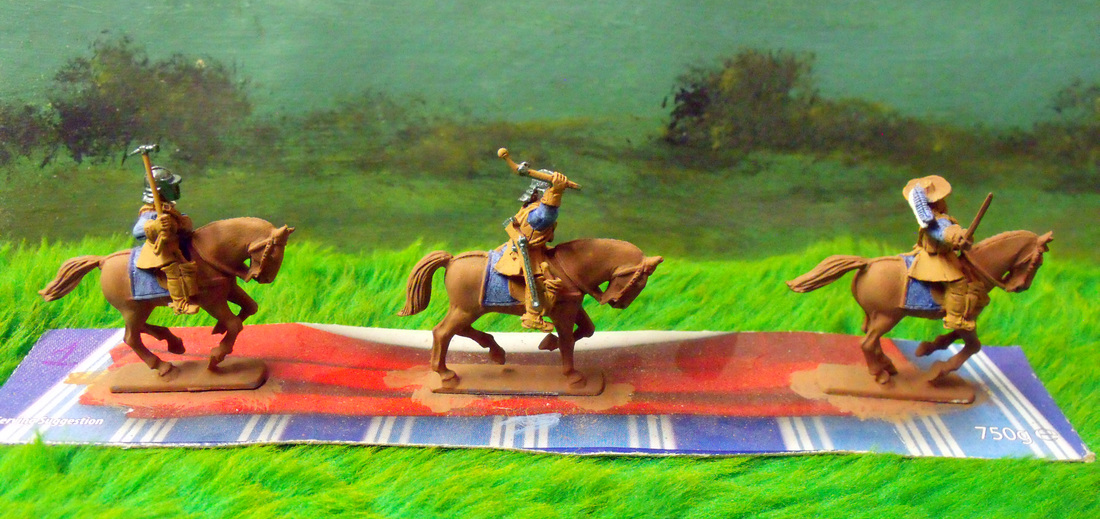
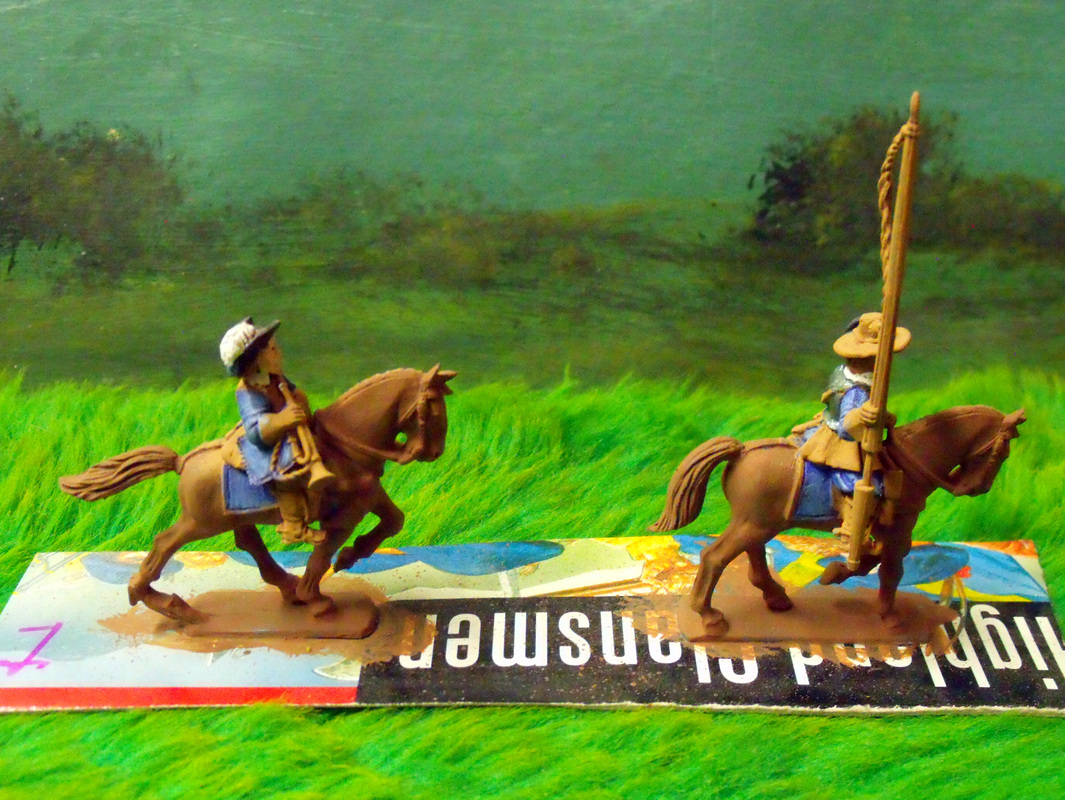
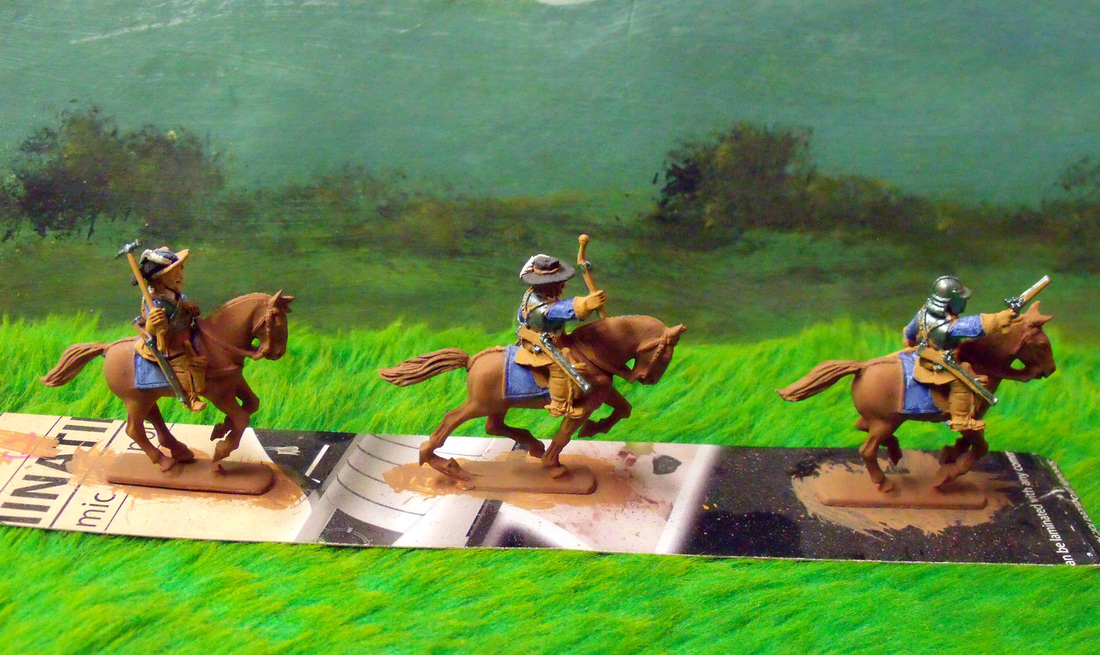
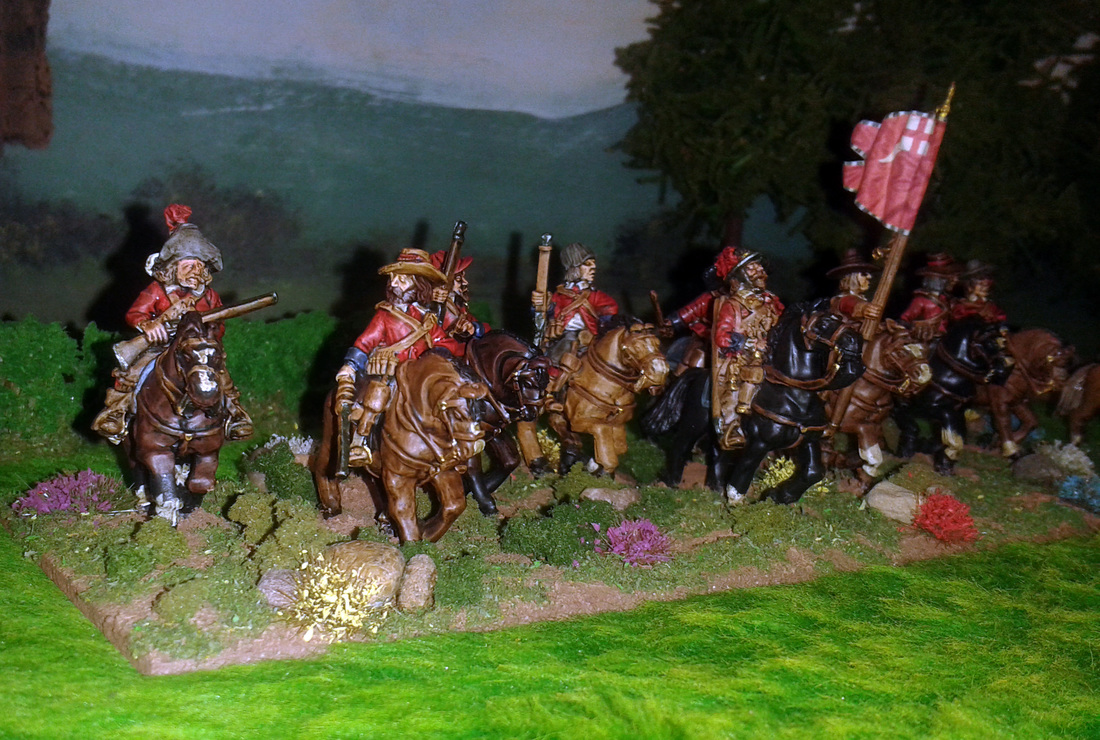
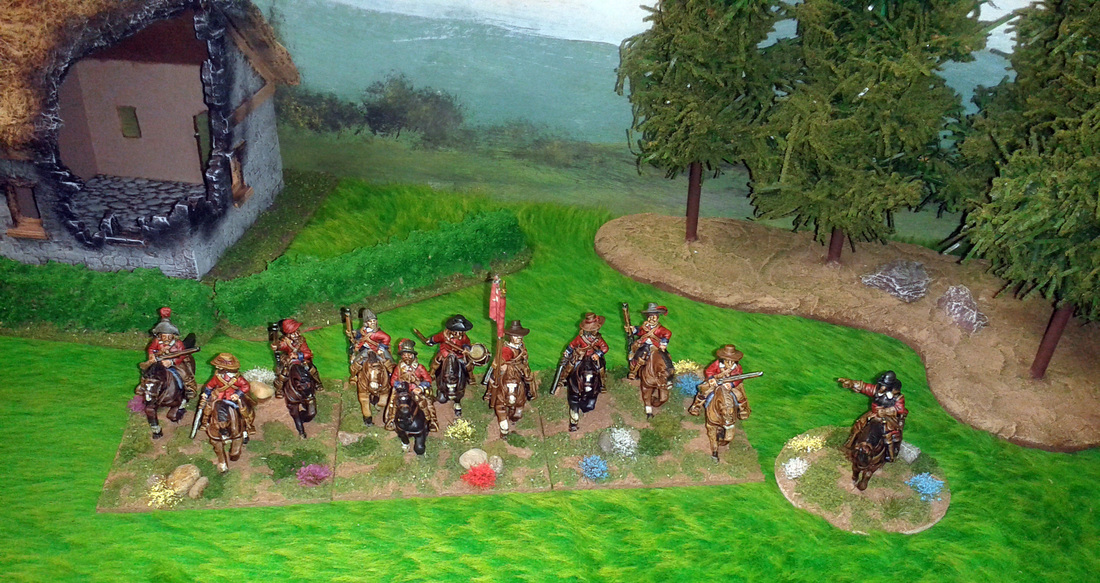
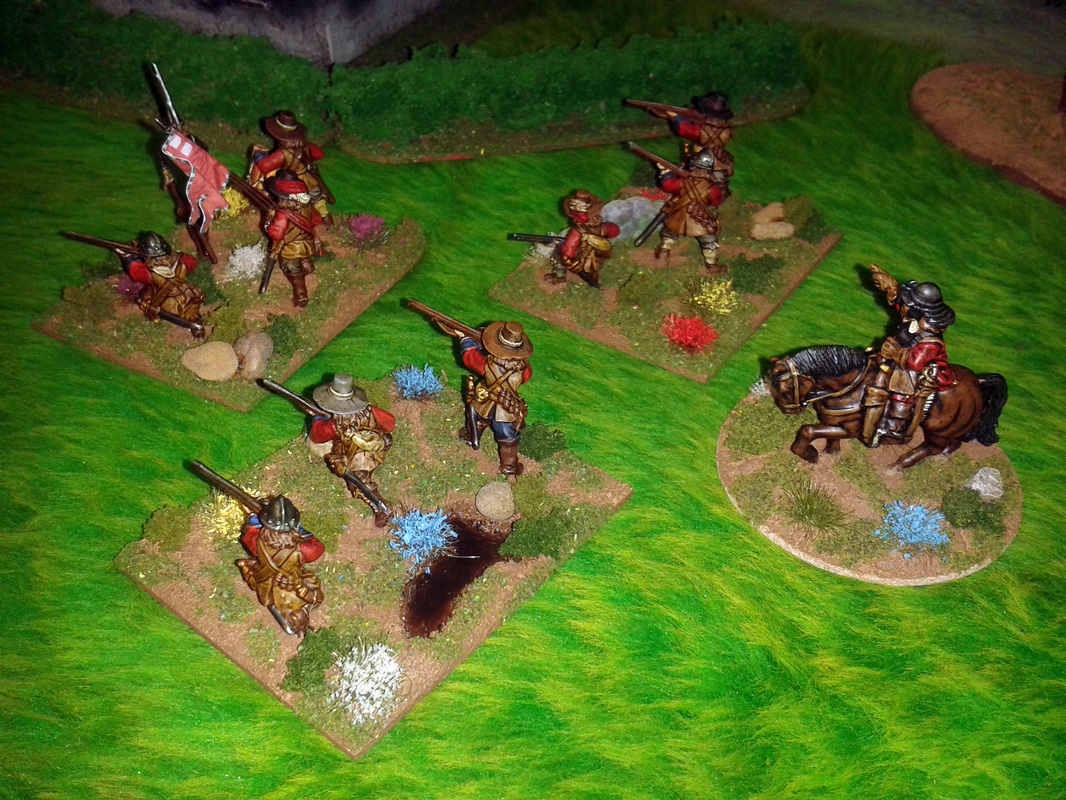
Sir Francis Dove is one of a select few 'Imagined' Generals in my ECW Royalist Army. His contribution to the Royalist cause is a Regiment of Foot, a Regiment of Dragoons, a Lifeguard of Horse and a Light Artillery Gun & Crew. For now here are some pics of Sir Francis and his Regiment of Dragoons. Sir Francis is a converted Trent Miniatures Lord Byron figure with a Redoubt Enterprises head swap and pistol holsters, a Green Stuff saddle cloth and an Essex Miniatures horse.
The mounted dragoons are mostly Old Glory with a couple of Foundry mixed in and an Essex Miniatures officer. The Foundry figures have Green Stuff saddle cloths and the flag pole is a plastic Warlords games cavalry flag pole, all of the horses are Old Glory.
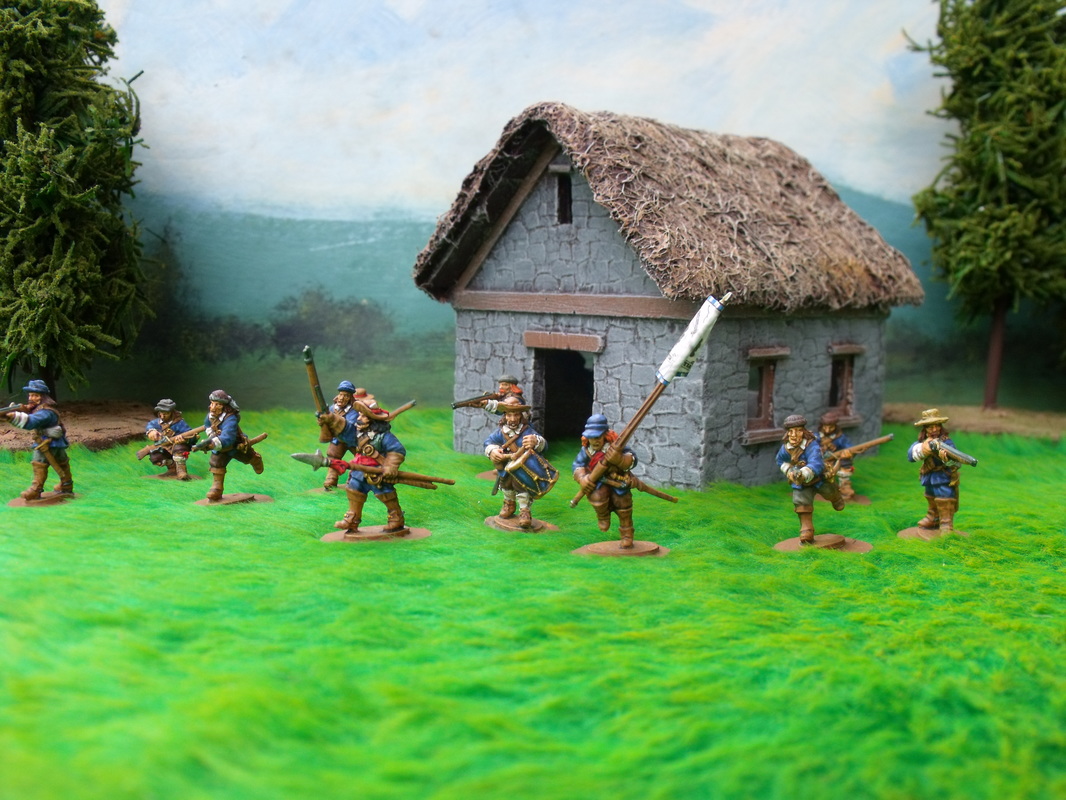
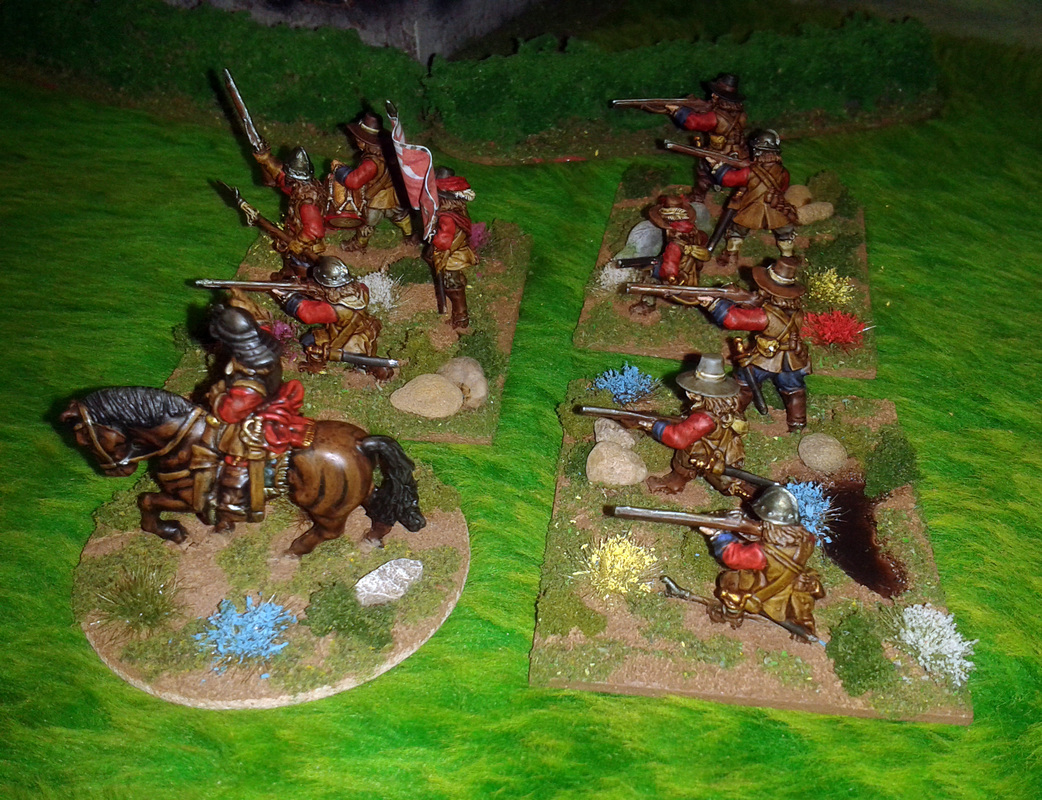
The dismounted dragoons are all Warlord Games figures and the stone wall is Green Stuff. The flowers I made myself from static grass clumps and my own homemade flower scatter mixes, and the trees, hedges and building are also homemade.
Well, that's it for Dove's Dragoons, I will be covering his other units in the near future.
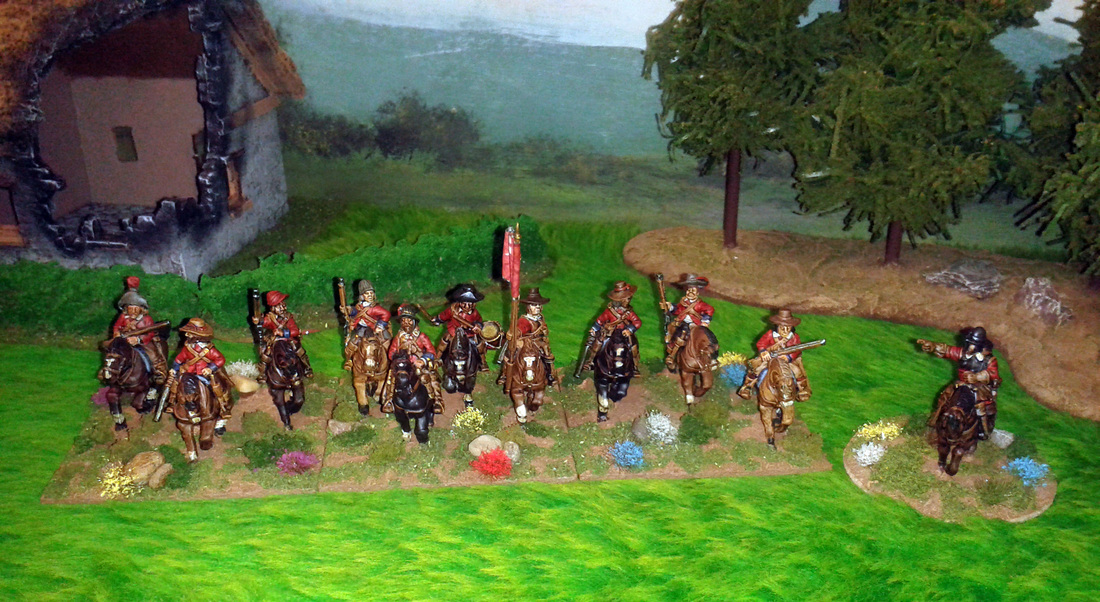
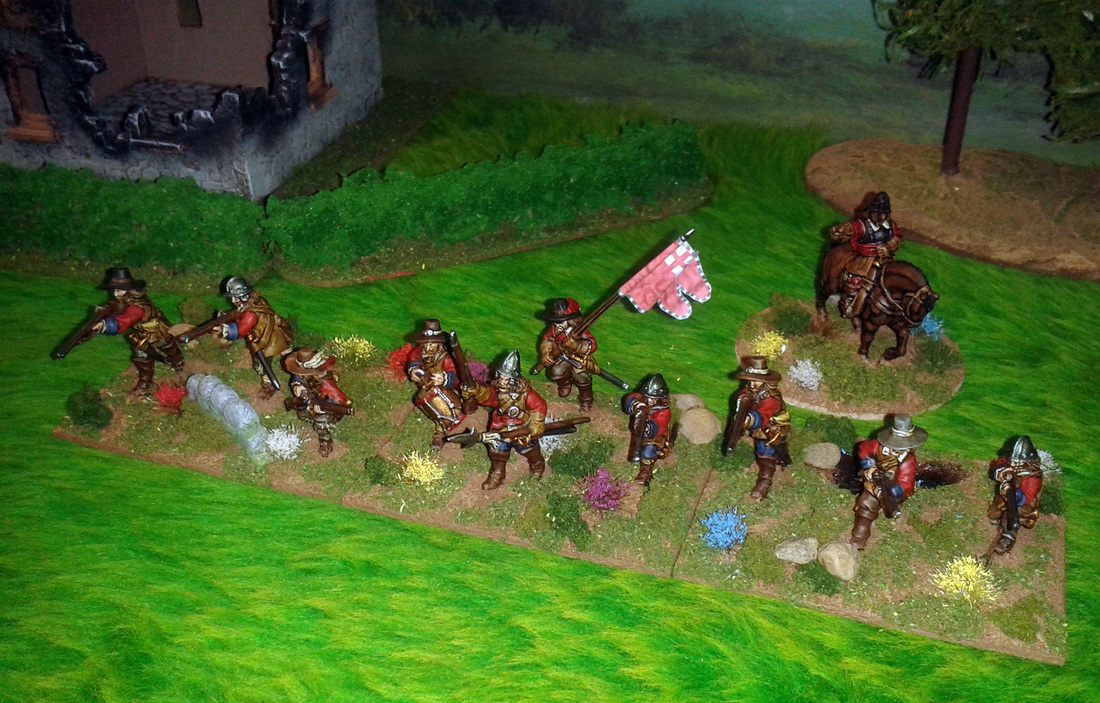
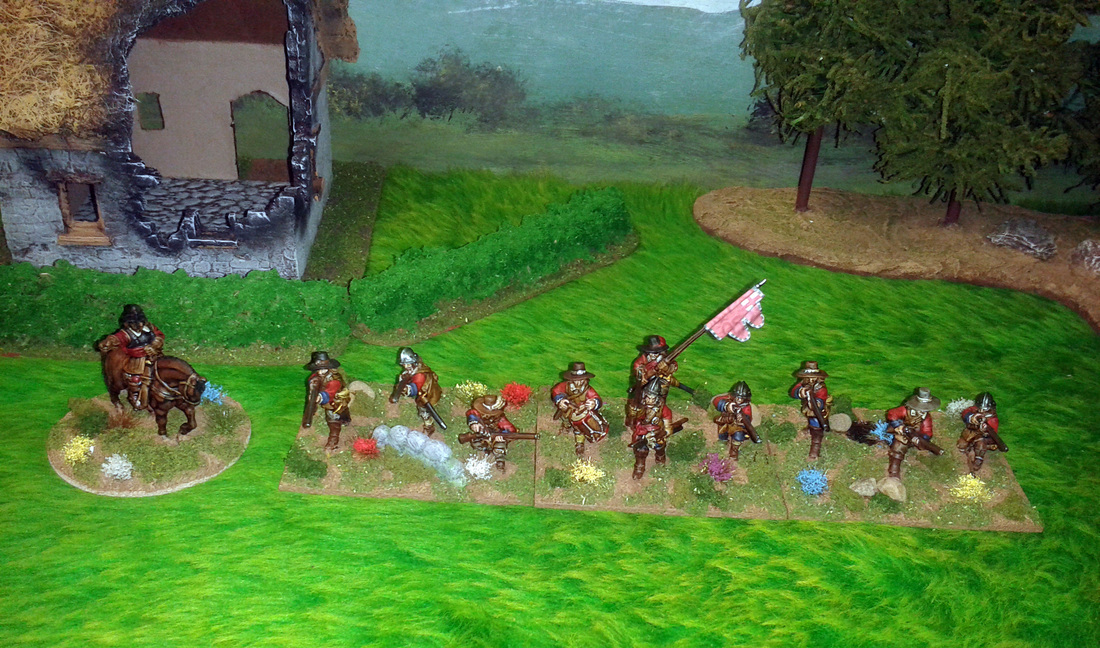
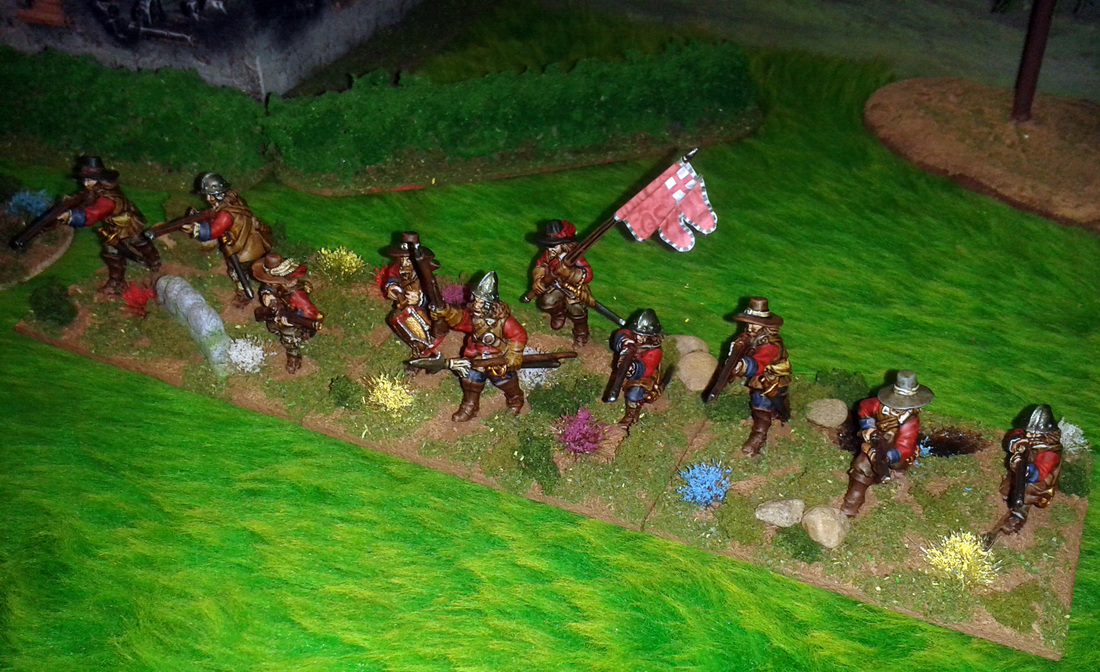
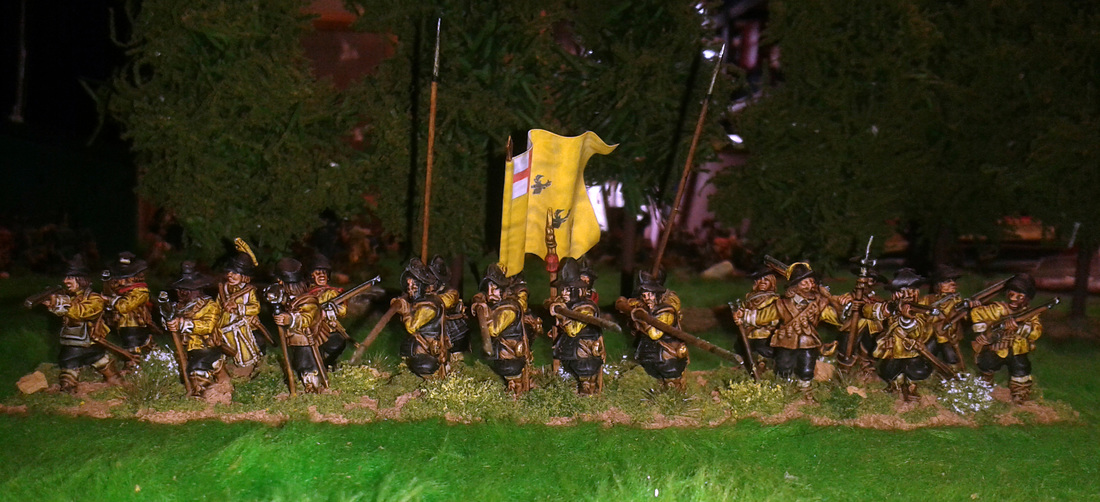
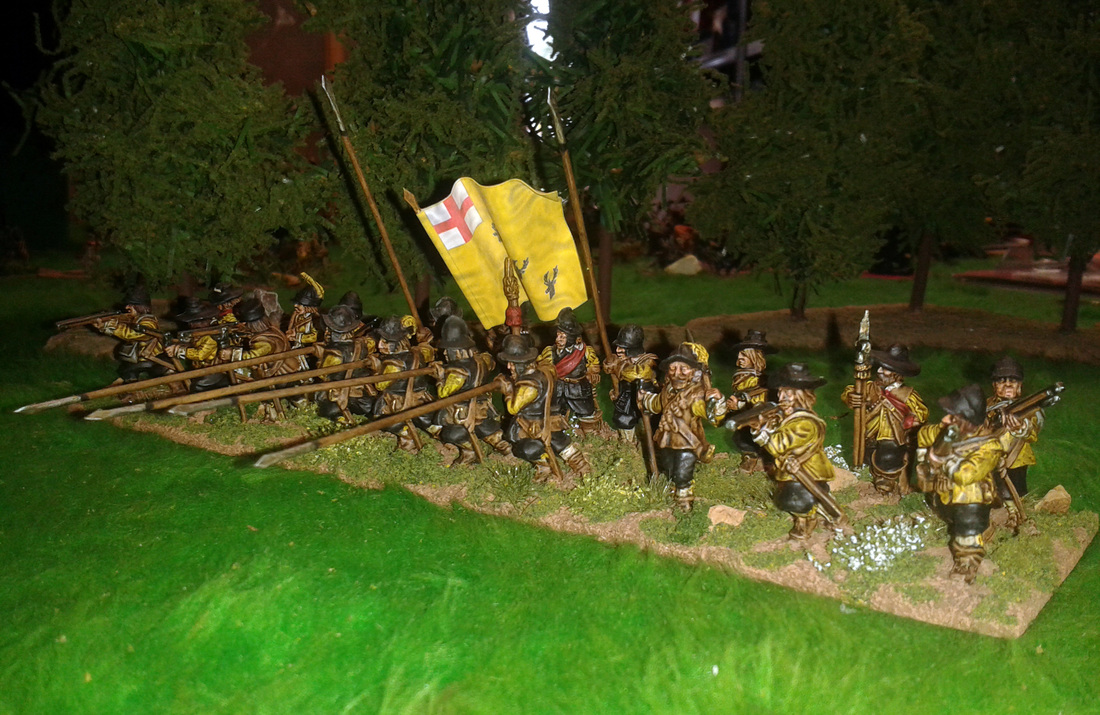
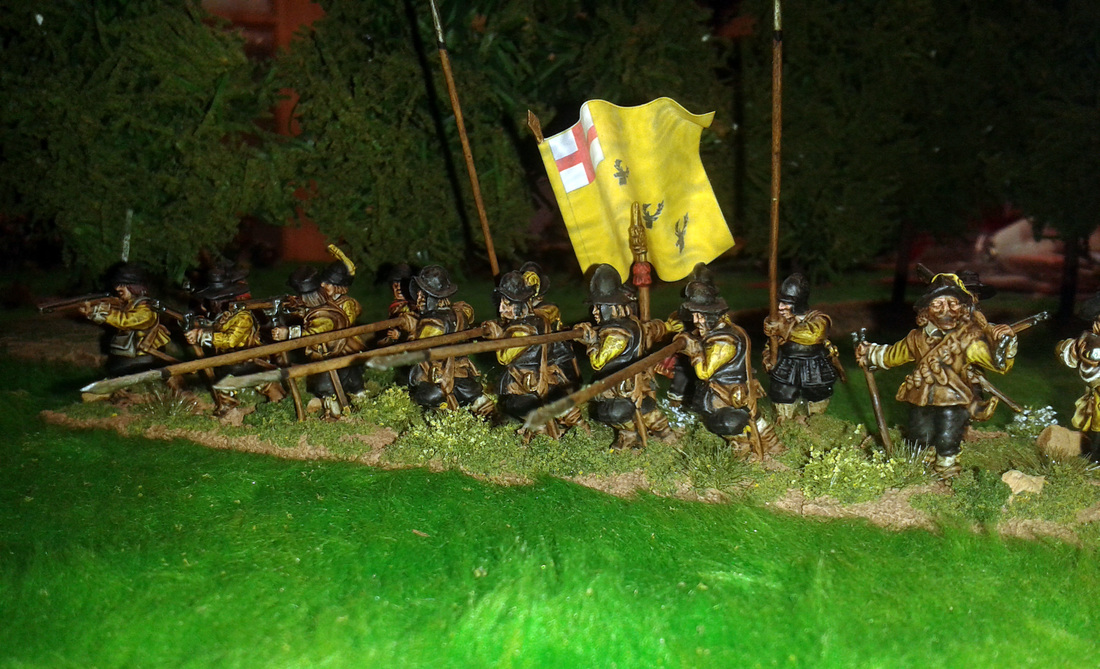
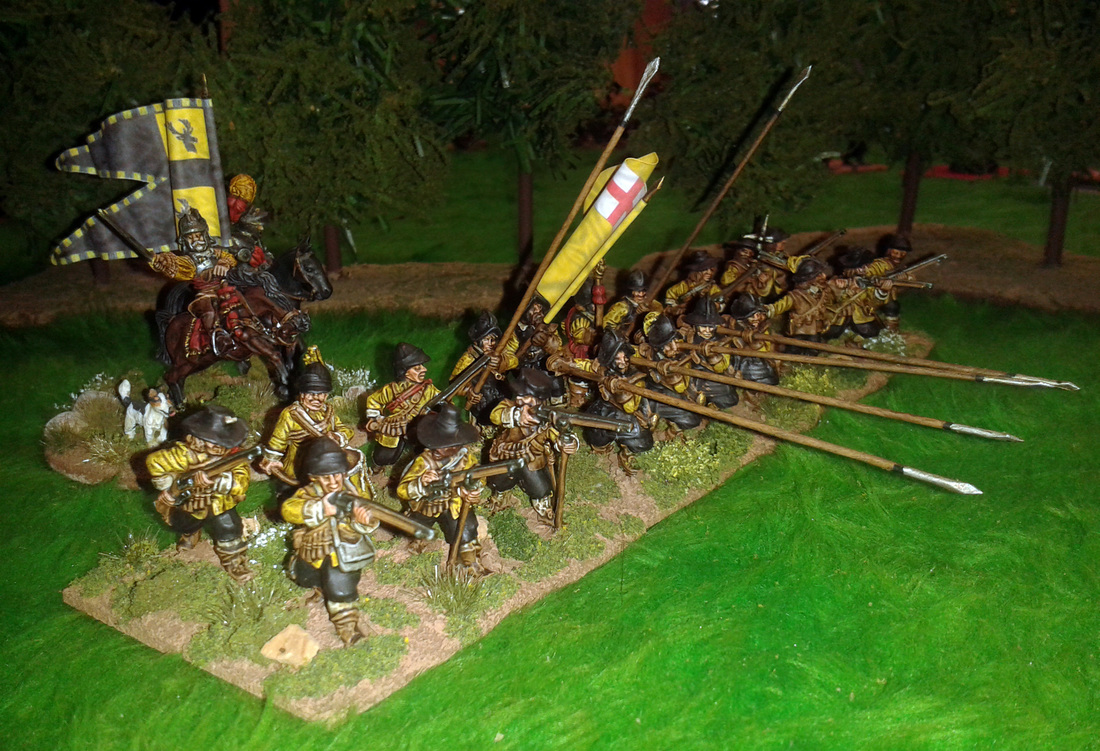
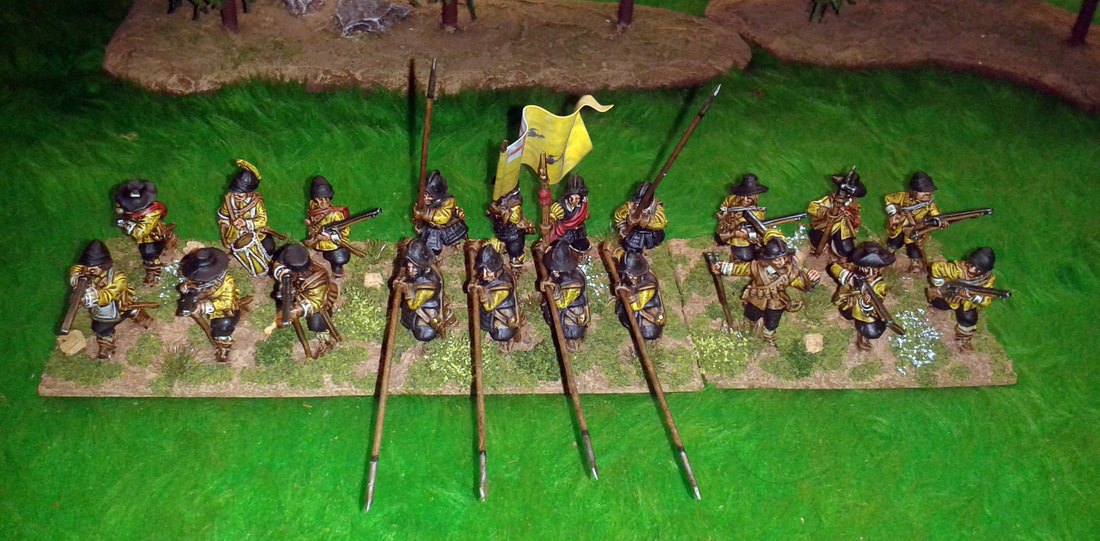
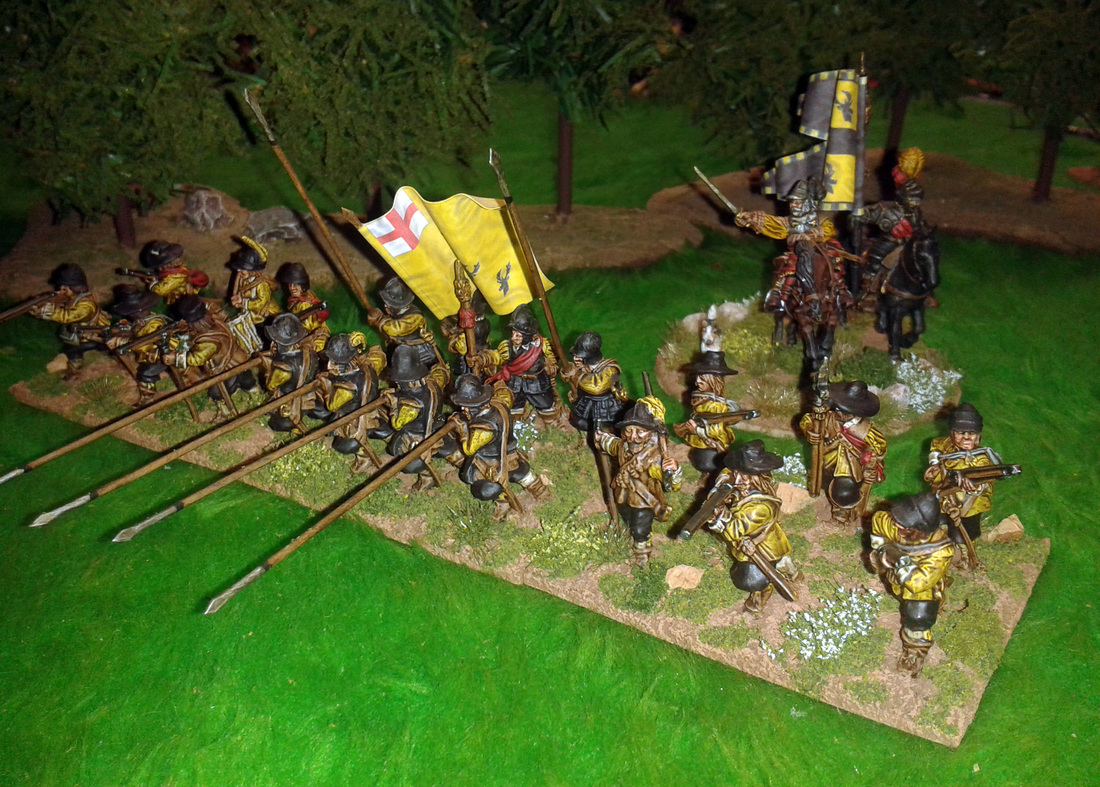
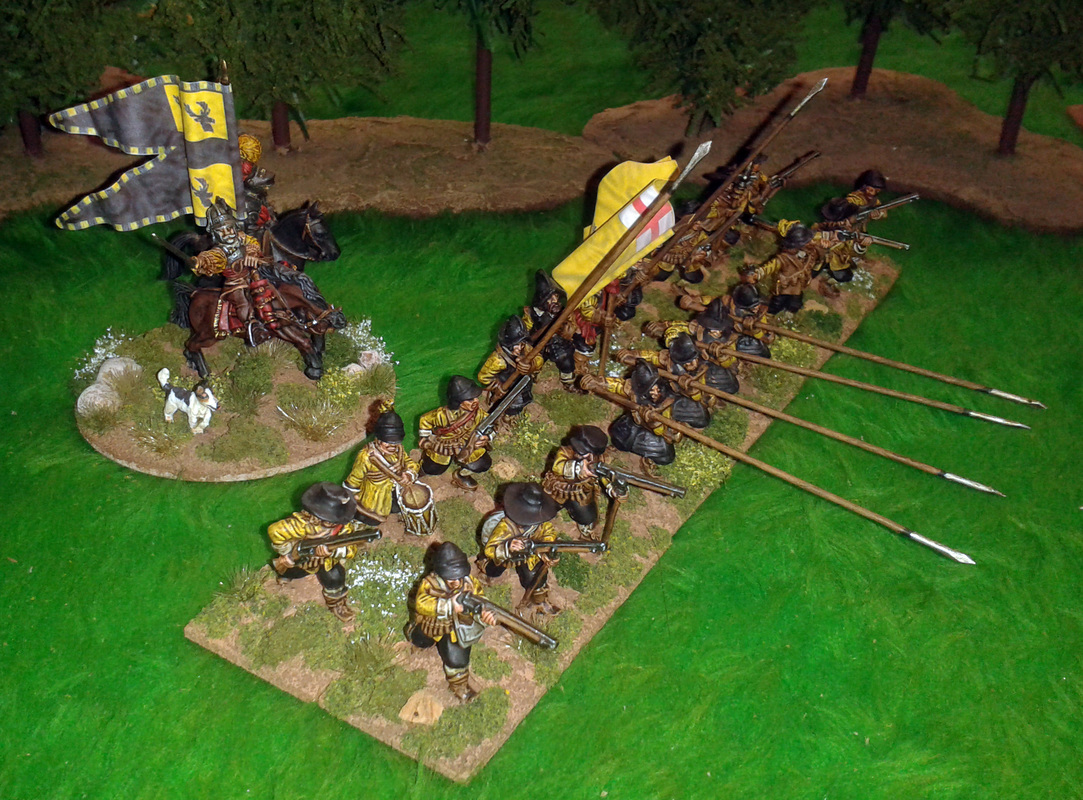
Step 1. Make sure you have a downloaded fully functional copy of Open Office which is free to download and use, and in my humble opinion just as good as any other Office software. Click on the button below if you want to download Open Office. And no, I don't get money from them to do this, it's just a good facility I use and it's free! Step 2. Open up Open Office but click on the 'Presentation' icon. Step 3.Leave it as an empty presentation and click the 'Create' button. This screen will open up for you.  Click to Enlarge Step 4. To the right hand side of the screen you will see two columns of slide layouts, with one of them highlighted, click on the 5th down on the first column it will give you this. 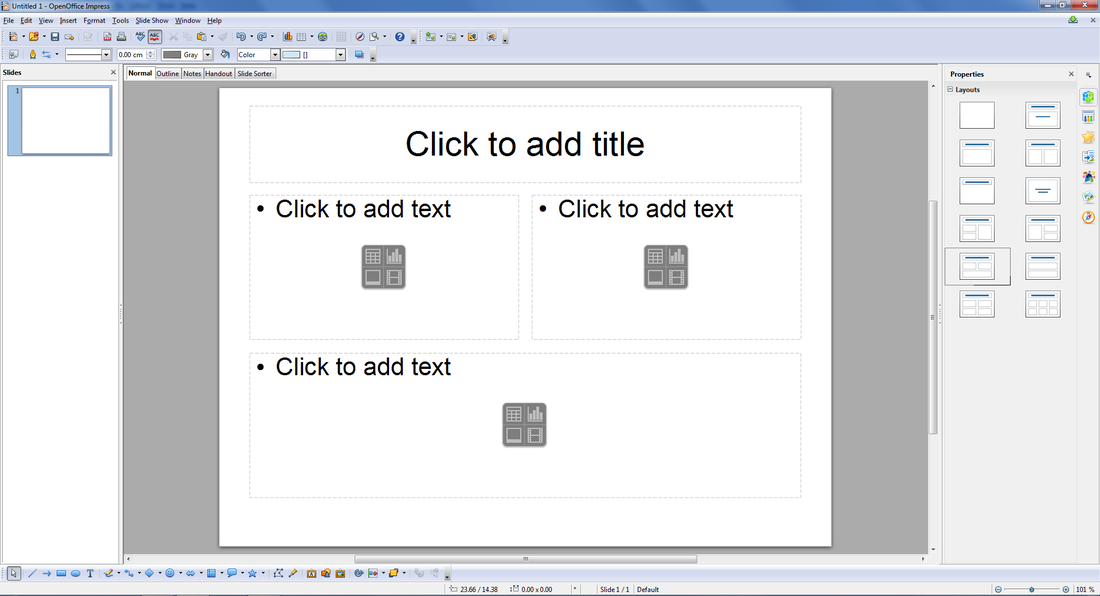 Click to Enlarge Step 5. You can Now add text and stats for the unit in any font or size that you wish like this.  Click to Enlarge Step 6. You now have a finished front for your card. If you want to add background images or colours or even an image of the unit itself, this is all very easy to do as follows: Step 7. Adding a background colour is easy enough, you simply right click anywhere on the card face, which opens up a menu box, simply put your cursor over the first option 'Slide' and this opens up a box to the side. Slide the cursor over to the option 'Page Setup' and left click on this. A new box opens up which has a blue highlighted menu bar with 'none' written in it. There is a downwards arrow next to this which if you click on it you get some options for the background. select either 'color' or 'gradient'as these will give you the best options to make your cards look pretty. Once selected you have either different gradient options or colour options, simply choose the one that suits you. Step 8. If you want a background image instead, such as a parchment effect or even a background photo you will need these to be ready made either from your own pictures or something nabbed from the web and saved in a handy file somewhere. Okay assuming you have an image simply right click anywhere on the card face, which opens up a menu box, simply put your cursor over the first option 'Slide' and this opens up a box to the side. Slide the cursor over to the option 'Set Background Picture for Slide' and left click on this. This opens up a box filled with your images and you find the image you want and open it. Now you have a background image. Obviously make sure that it isn't too busy as this may make your card hard to read. If you use a photo of a unit you can always alter the opacity of the image in Photoshop or similar type program, if not simply choose a simple parchment effect like this. 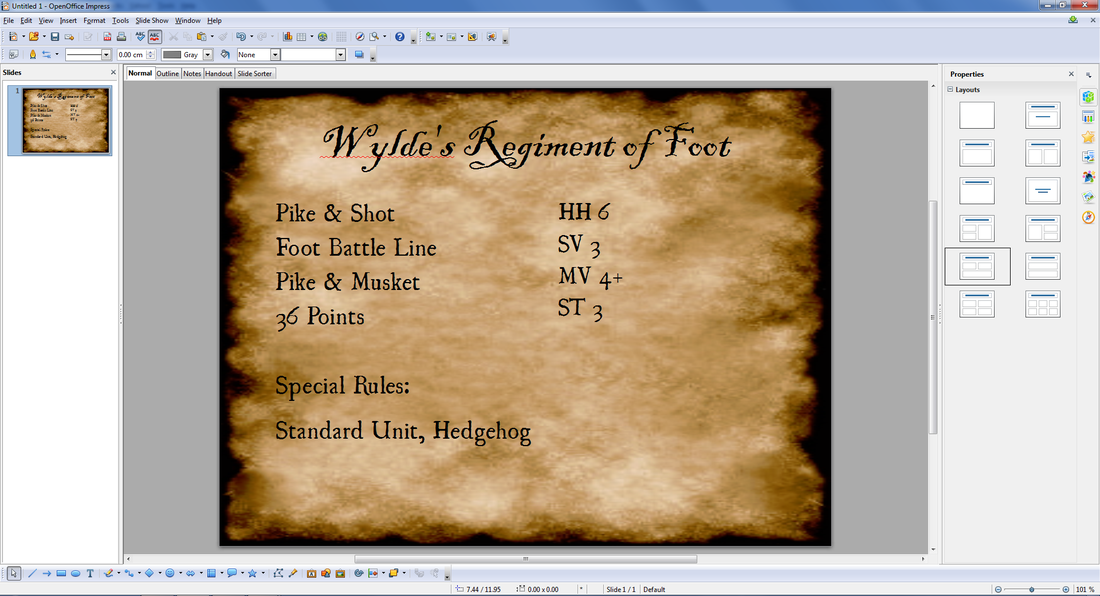 Click to Enlarge Step 9. Okay now you have your first card with either a pretty background image or colour you will want to make more cards with different units or stats or both. To do this right click on the thumbnail on the left hand side of the screen and select copy, now right click somewhere just beneath the thumbnail and select paste. you can keep doing this until you have the number of cards you want. This is very handy if you have say six units of the same type, all you need to do is change the name or stats that you need to and it makes the process of creating you cards really fast indeed. Obviously you should add an extra card for other troops such as cavalry and artillery and then copy versions of those too, changing them as needed. Once done remember to save the file and name it something like 'ECW Royalist Army Cards' as you can now use this to make a template for all the armies of the ECW that you and your mates have. Step 10. So now you will have a full set of cards for every unit in your army, including separate sets of cards for each of your Generals and Special Characters too. Make sure that these are separate sets as the backs of the cards are different for each set. And now the card backs. Step 11. Open a new presentation just as before, but this time click on the 3rd down on the second column. Add the name of the cards and choose a colour and font size that appeal to you and set a background image or colour as you desire. Again this can look as simple or as complex as you want it to look and once done make 5 copies so that you have a total of six cards. Save the file with the relevant name. Here is a card back set that I created to give an example of how they can look.  Click to Enlarge Step 12. You now want to print off sets of card fronts and backs too, again all very easy to do. You need some cardstock around 150gsm will do, but you can use thicker card if you want. To print them you must select select file in the top left hand corner and go down and select print from the drop down menu. This will open up a 'Print' box which has lots of information about what you will be printing. The important thing now is to find the blue highlighted box which contains the word 'Slide' and by using the downwards arrow next to it you will see an option for 'Handouts' which you must select. Once done the picture in the left of the box will change from one image to 6 smaller images, this is the setting you need and one you must select every time you want to print off cards. Now you will need to look for a grey highlighted button called 'Properties', select this box and another box opens to show your printer settings. Select the settings you require and click on the 'Okay' button and that box will disappear. You will now simply have to select the @Print@ button and all of your cards will print off. Step 13. Once you have the card fronts you need to follow the above instructions to print the card backs, this time only print one page of card backs at a time, so just load one page at a time into your printer. You must make sure that you put your previously printed card fronts into your printer the right way round to ensure that the cards fronts and backs are both facing the right way up when you look at them, this isn't critical but does add to the aesthetics. Once printed you will have a double sided print of your cards and you can either cut them out and use them or you can laminate them first, the choice is yours but laminating does make them look nicer and protects them from sweaty palms etc. Well, that's it for making army cards, mine were made for Pike & Shotte rules with amendments for using complete units of Pike & Shot instead of the separate units as used in the rules. Also each unit can have a several variants such as 'Pike Heavy', 'Shot Heavy' or 'Normal' and the first one you pick from the pack will mean that any the other versions are discarded. Sometime in the near future I will make a PDF for all of my Pike & Shotte amendments including all of the Special Characters and full sets of army cards for anyone interested.  Combined Pike & Shot Unit Card One of the big bugbears of wargaming for me and others that I know, is how to make a simple 'pick up' game more interesting without having to come up with fancy scenarios etc. You know the sort of thing, mate comes round with his army and sets it up same as always and you play a game with little or no context and it plays pretty much as always with fairly predictable results. Obviously a campaign throws a spanner in the works and so can scenarios, all for the better that is, but when you have neither and just want to get straight into it, games can get a little predictable, knowing that you have these units and he has those units every single time. A few months ago we started getting this problem and decided that something had to give, so we developed our own unit cards and moreover a way to use them other than just as a quick reference to what each units stats are. Basically we have a card made for each and every unit, commander and special character that we use in our games and before a game we decide what the points value of the force we will use or even the limit on how many cards we want to use for the game. With this done we shuffle each pack of cards (excluding commanders and special characters) and deal out a set number of cards that we know will fall within the safe limits of the points value for the game, for example 1,000pts. The points values are added together and let's say they add up to 800pts, which is 200pts lower than we need, we deal cards one at a time until the points value is reached or exceeded by a few points (just a few though). Now the commanders are in another pile and the special characters are put in a separate pile and we simply agree the amount of commanders or special characters each side has depending upon the size of force we have agreed upon. When it comes to deployment each player sorts out his army into command groups adding his commander and any special character to the group and deploys them face down on the table exactly where they will be deployed. All rules pertaining to where different troop types may be deployed and the mix of units within a command group are adhered to of course and then the cards are turned face up to reveal what unit is where. Obviously some special character cards my come into play now, such as 'The Scoutmaster General' and can be used to reveal some part of an opponents force before it is revealed allowing you to redeploy some of your own units etc. This can be a very nasty shock to find that your opponent has weighted a flank with all of his best cavalry or even with dragoons and commanded shot. Once the cards are revealed and the shock of each player is overcome, the cards are in turn replaced by the actual unit that is represents. The cards themselves are usually putt on the base line of the table as a quick reference to the unit and values or special rules. In terms of how all of this plays out, it is very much all done simultaneously and from start to finish takes only a few minutes requiring no umpire at all, and It is even suitable for solitaire play. Overall this is really quick to set up and is really rewarding, adding a lot of spice to what can usually be the same old bland pick up games. Making the unit cards is pretty easy really, you can of course do it the 'old fashioned' way with card and pens or if you are able to use a computer and printer you could very easily make them using any suitable software. My own are made using Open Office, which I like using and is totally free to download and very easy to use. I will do a tutorial for anyone that needs to know exactly how to do this and post it tomorrow.  Sample card for use with Pike & Shotte I have been collecting ECW figures for many years now, almost 35 really, I started with 15mm and then after many years I sold them all to be replaced with 28mm, which in turn were sold and replaced with yet more 15mm figures. These were eventually all sold again and I decided to reinvest in 28mm figures a few years ago. This time around I thought about what I really wanted from my ECW games and what I decided was that I wanted a more personal touch to my armies. Thus 'The Very famous English Civil War General Sir Stephen Wylde' was born in my imagination along with a complete narrative about him his Regiments and his exploits. Obviously a much needed and equally famous if not 'Infamous' opponent was born in the shape of my long suffering wargames nemesis and best buddy who has the ECW wargames alter ego of 'The Very Infamous English Civil War General Sir Nicholas Perks'. Obviously Wylde is the good guy being a dashing Royalist and Perks is the bad guy being a villainous Parliamentarian or vice versa depending upon your outlook or political leaning. With this in mind we both modeled our own generals in the best way we saw fit and then went on to produce a regiment of foot and some horse for our respective leaders. I of course researched the family coat of arms of both of us and designed the flags these being: yellow with black stags head devices for Wylde and Blue with yellow roundels for Perks regiments of foot. So, without further ado, here are some pics of Wylde's regiment of Foot.
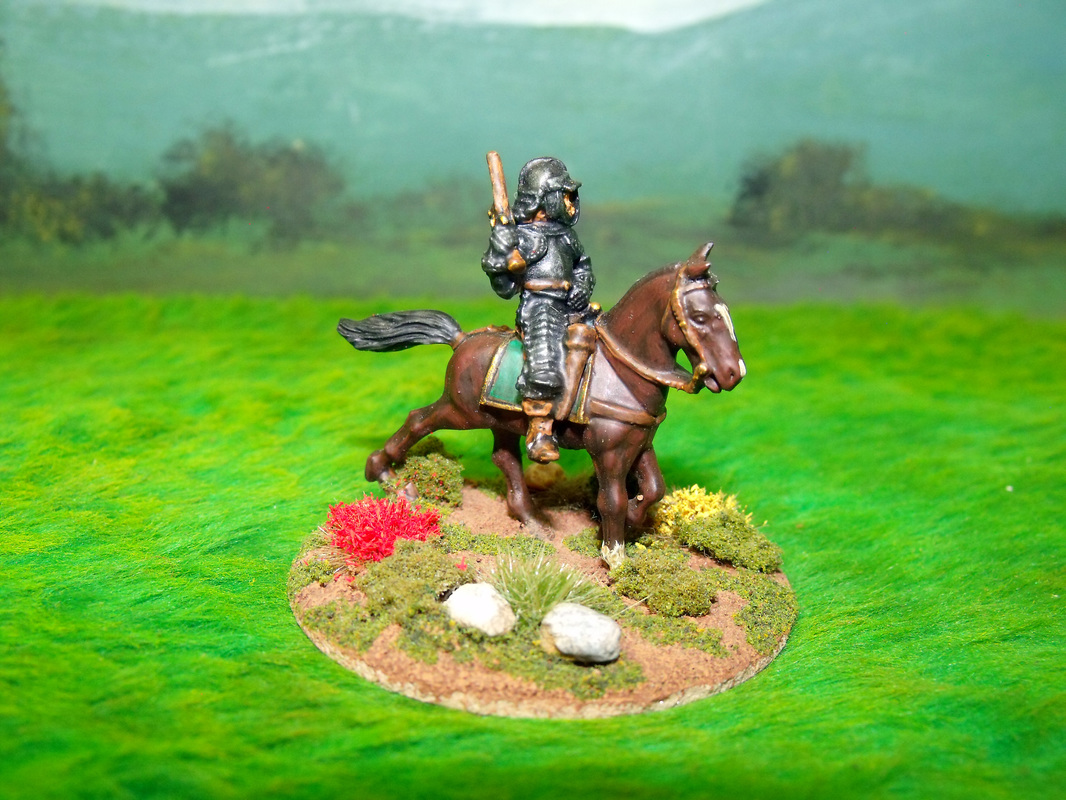
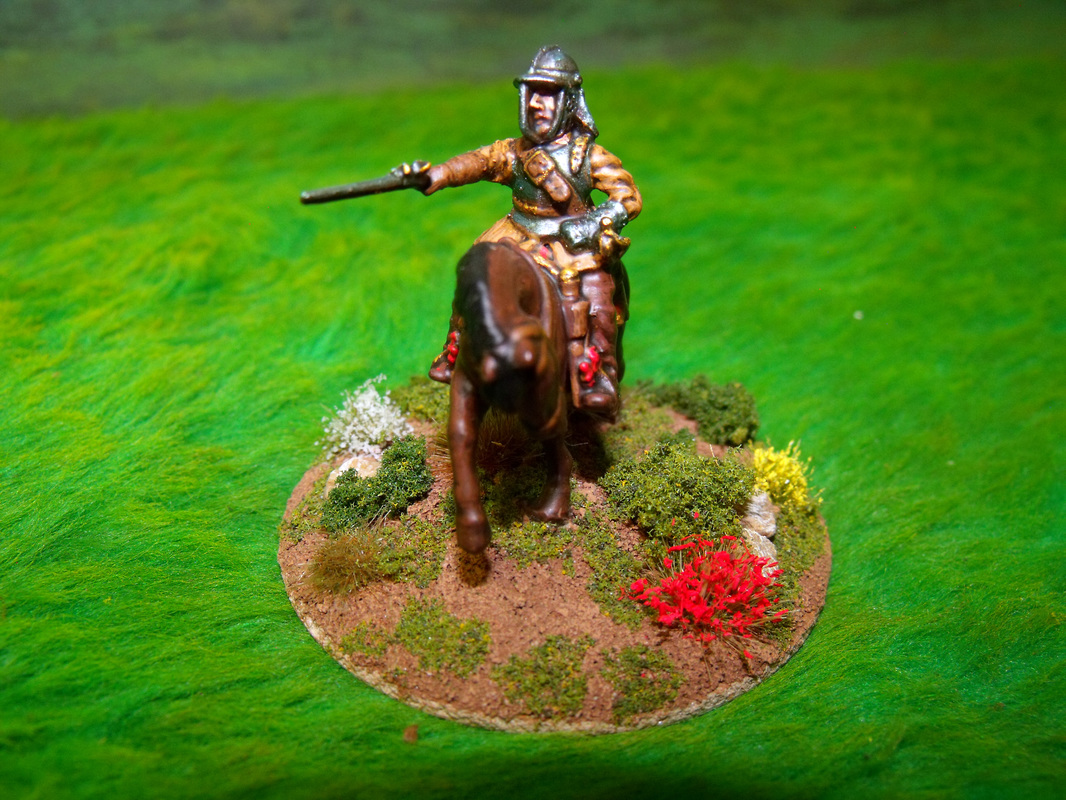
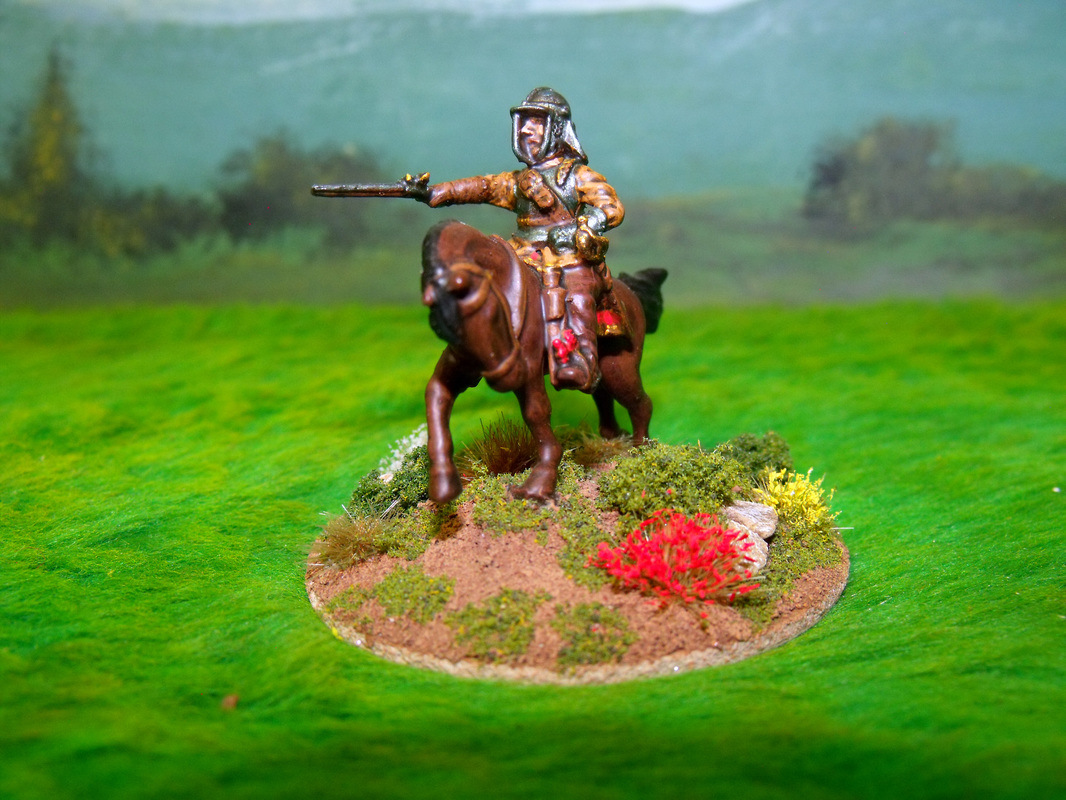
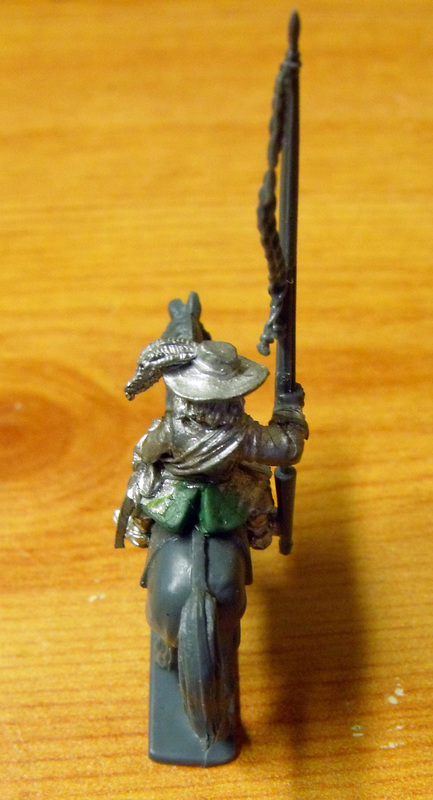
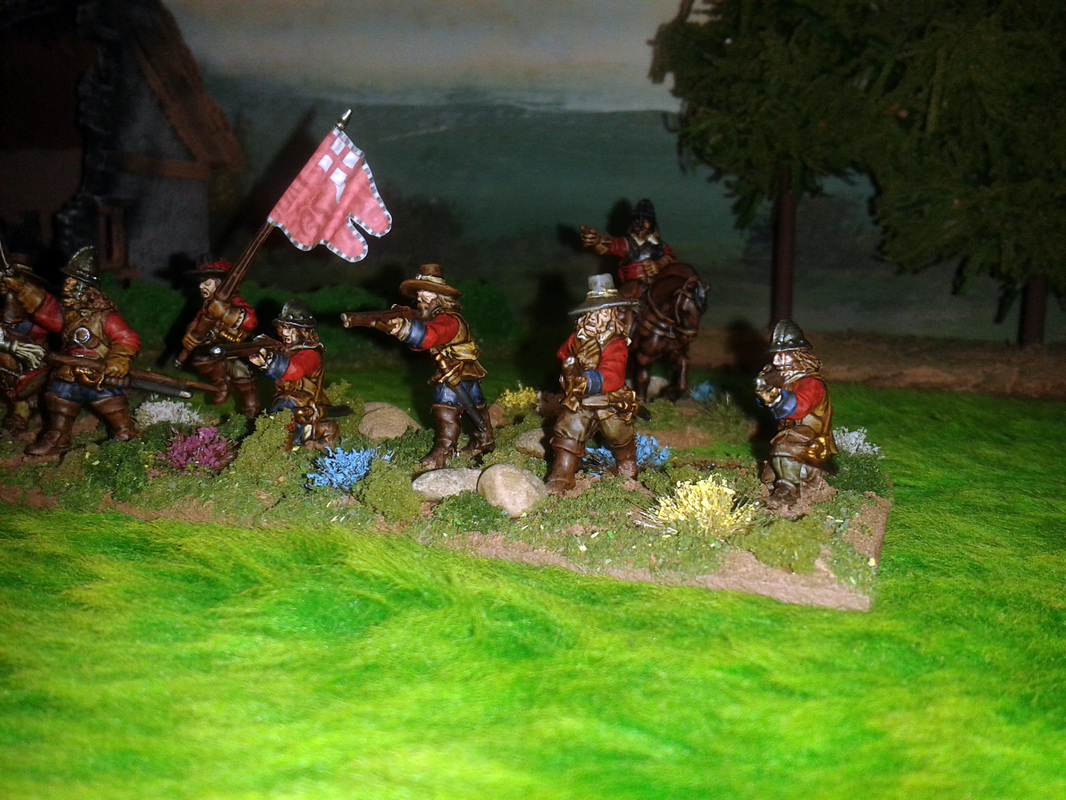
Welcome to my blog! Here I hope to show all things English Civil War and to get the ball rolling here are some pics of myself as personified in a Warlord Games conversion of their lovely Prince Rupert figure, with a new head from Redoubt Enterprises and a Warlord Games plastic cavalry hand with sword. The little dog is a faithful rendition of my own dog Daisy (cannot remember the make of figure) and the standard bearer Dante is a converted old Games Workshop figure (I think) riding on a Warlord Games horse. The standard I designed myself and is based upon my family coat of arms and is especially large as befits any 'Very Famous English Civil War General'.
|
AuthorStephen Wylde BA (hons) Archives
July 2022
Categories
All
ECW Blogs
ECW Sites
|


 RSS Feed